


Don’t be intimated by bows! In this post, you’ll learn how to make a bow for a wreath in no time at all. The instructions also include how to make a burlap bow with no sewing.
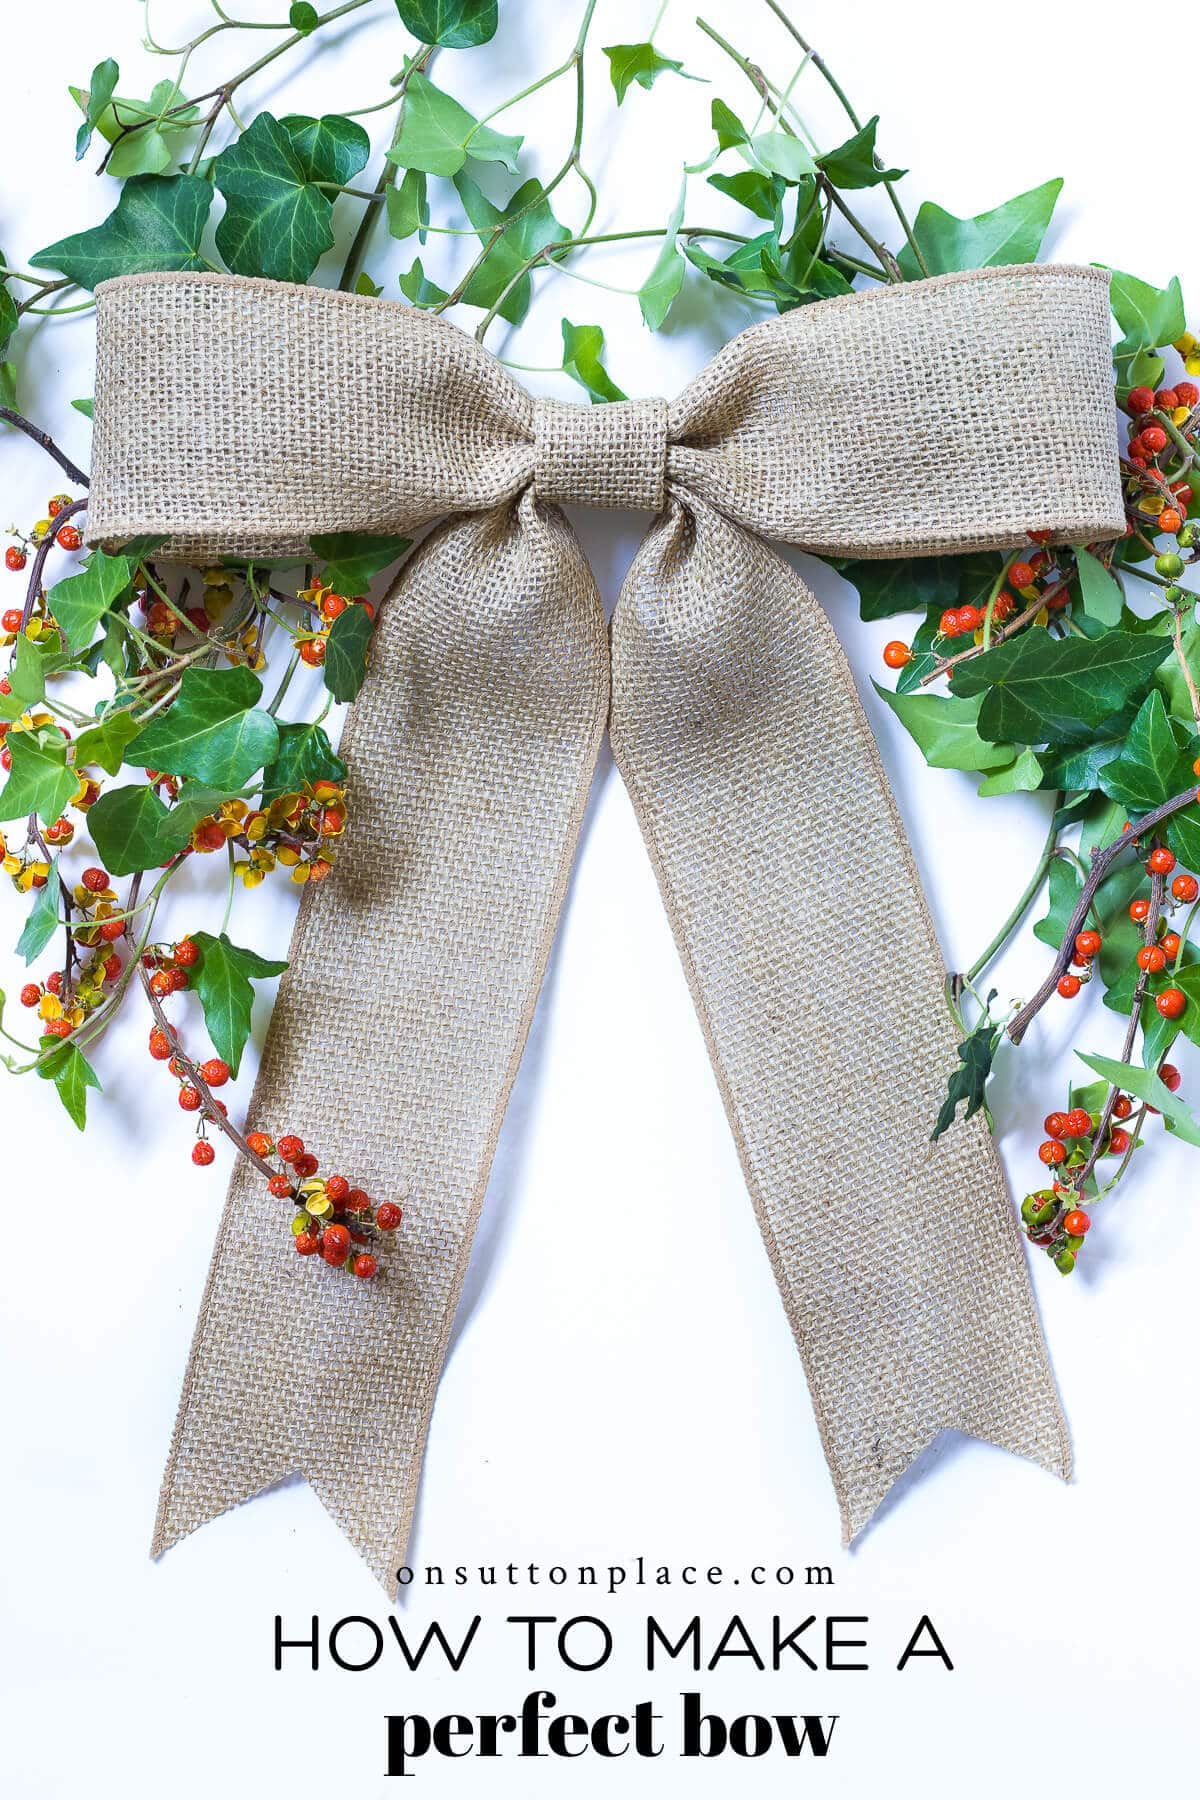
Sometimes the simplest things in life are the most rewarding. Who would have thought a person could get such total enjoyment from making a bow? I promise you will be absolutely delighted if you whip up one of these beauties. By following this easy tutorial, you will end up with a lovely and full bow that will definitely take your wreath to the next level. This method involves no sewing. It is perfect for beginners and experienced wreath-makers alike. I’ll share step-by-step pictures, and even answer questions people have. This tutorial will take you from novice to pro in just a few minutes!
This post may contain affiliate links. See my disclosure statement.
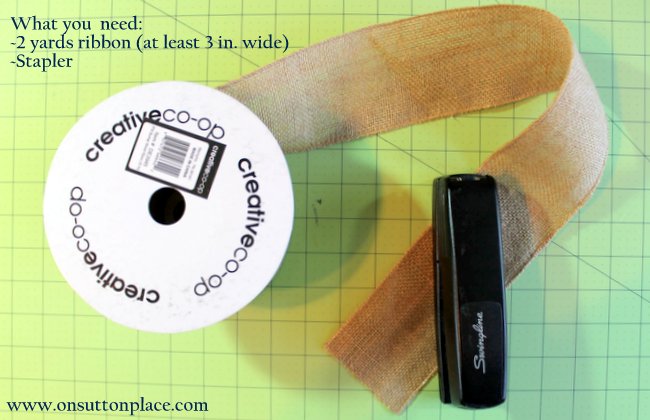
Supplies Needed
- 2 yards of ribbon that is at least 3 inches wide. Wider ribbon can also be used and will give you a softer bow.
- heavy duty stapler
- Scissors.

Step 1: Cut Your Ribbon
Cut the ribbon into 3 different pieces. Piece #1 = 36 inches. Piece #2 = 24 inches. Piece #3 = 6 inches.
Step 2: Mark The Center
Mark the center of the 24-inch piece of ribbon with a pin.
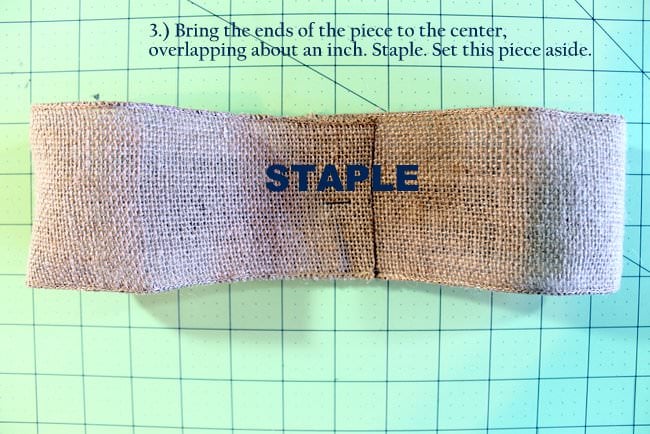
Step 3: Fold The Pieces To The Center
Then, bring the ends of the 24-inch piece to the center, overlapping them about an inch. Staple them to the middle of the ribbon and set this piece aside.

Step 4: Fold The Sides Of The 6-inch Ribbon
Now it’s time to prepare the 6-inch long ribbon. Fold the long sides over so they meet in the middle. They should not overlap, just touch.

Step 5: Secure With Staples
Secure the ends of the folded ribbon with one staple each. Then, put this piece aside.

Step 6: Accordion Pleat The Longest Ribbon
Now it’s time to prep the longest ribbon, the 36-inch long one. Make an accordion pleat in the middle of this ribbon.

Step 7: Staple It Together
Place a staple in the pleat to hold it together.

Step 8: Place The Pieces Together
Now we are ready to assemble the pieces together. To start, lay the 6-inch piece wrong side up on a flat surface. Place the 36-inch piece as pictured below.
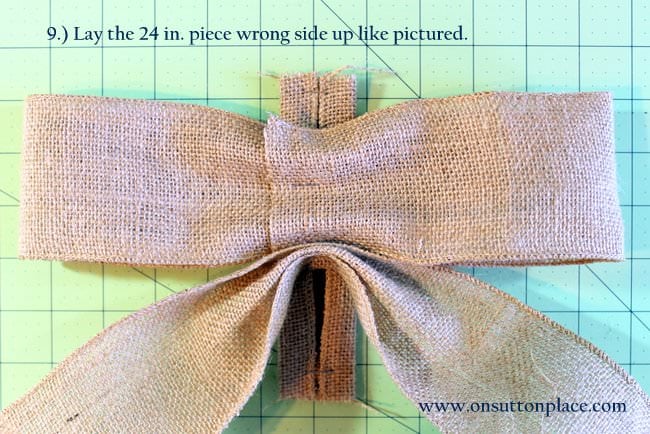
Step 9: Add the 24-inch Piece
Next, lay the 24-inch piece wrong side up so it is next to the 36-inch piece.

Step 10: Center All The Pieces
Now for the fun part! Pull the ends of the 6-inch piece together and straighten the other two pieces so everything is centered.
Step 11: Staple Everything Together
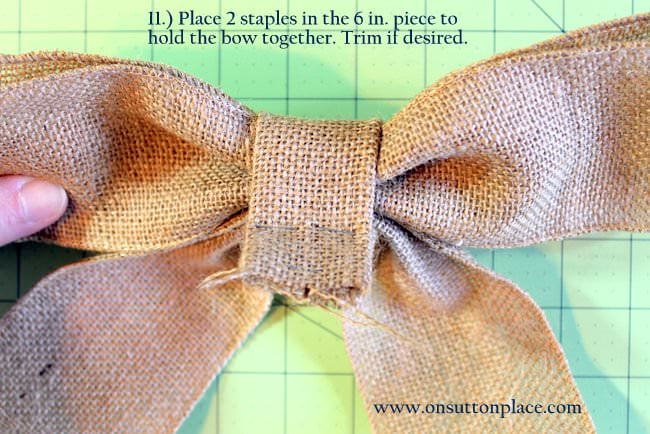
Finally, place two staples in the 6-inch piece to hold the entire bow together. Trim the excess if desired.
Step 12: Make A Notched End
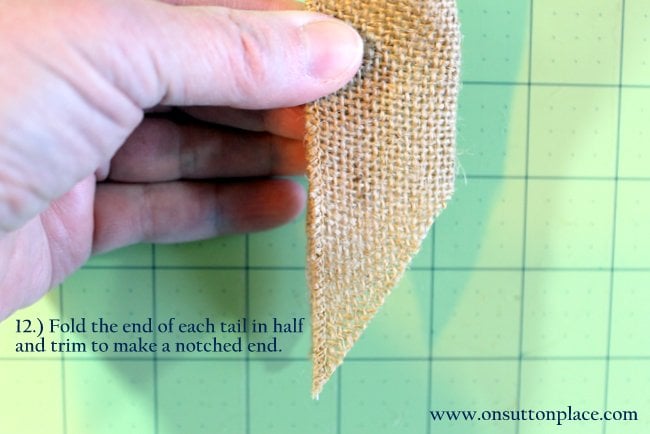
If you want, fold the end of each tail in half and trim to make a notched end. When I use heavier fabric, like grain sack, I am not able to use the stapler for the last step. The layers of fabric are too thick and they jam the stapler. A bit of hand stitching is required to hold the pieces together. Below are links to my tutorials for making ribbon from an antique grain sack, and also for making a grain sack bow.

JOIN THE OSP COMMUNITY
Sign up to get uncomplicated recipes, unlimited seasonal decor, and
understated ways to refresh your home sent straight to your email inbox!


amazon storefront
Discover simple and affordable
ways to refresh your home.
Follow my Amazon Storefront
for all my favorite finds!
Wow, I love this easy way to make a bow. They are the most frustrating thing to make aren’t they?? Thanks for the tips Ann.
Thank you for the awesome tutorial! I can never make bows and when I have seen tutorials, they never make sense. Yours is very easy to understand so I will be trying your method. Thanks and have a great weekend!
-Shelley
Thanks so much for this great tutorial! VERY useful, and VERY practical! Love it!
Even challenged Olive can do that. Thanks bunches Ann.
Perfect, I need to make a bow today and will try your method. Yours looks perfect so I expect mine will too:)
Stunning and simple … perfect.
Fondly,
Glenda
Well of course you would use thread to sew your bow together at the end! What else is a seamstress to do???? Love it! Thanks for sharing the tutorial. Maybe, just maybe I can replicate it. LOL!
Thank you for sharing this, Ann! I am so excited to give it a try…
Fantastic. I’m pretty sloppy with my bows… This should set me on the straight and narrow!!!
So that’s how it’s done! Thanks for the great tutorial!