
Easy step-by-step directions for making a grain sack ribbon bow from an antique grain sack or other fabric. No machine sewing required!
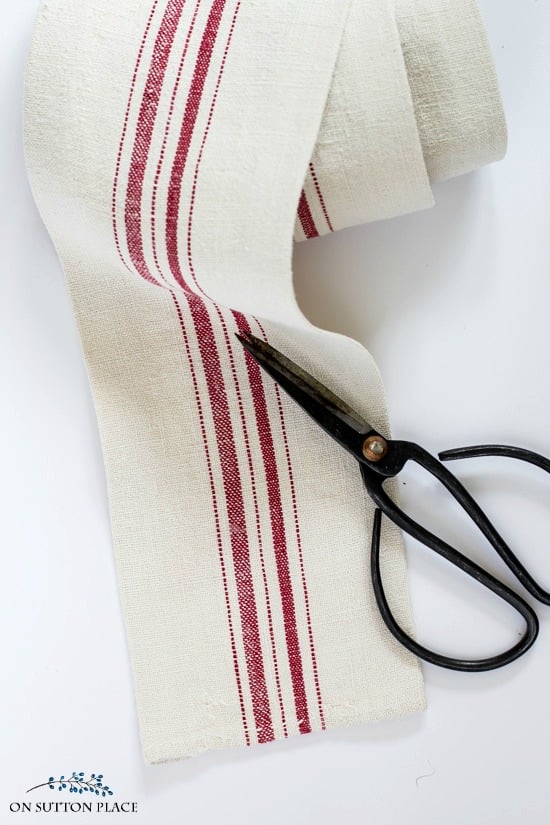
This is the second part of a two-part post that shows step-by-step directions for making a bow from grain sack ribbon. To see Part 1 (how to make the ribbon) click HERE.

This post may contain affiliate links. See my disclosure statement.
Steps for making a Grain Sack Ribbon Bow
1. Begin with three separate pieces of grain sack ribbon. For a bow that is 12 inches wide, here are the measurements you will need:
- 28 inches = the bow
- 8 inches = the center or “knot”
- 36 inches – the tails
That’s a total of 72 inches of ribbon needed. This is not an exact science. You can make the bow and/or tails any size you want depending on how much ribbon you have.

2. Making the bow: Using a yard stick or measuring board, lay out the 28 in. piece so the ends are over-lapping about two inches. Make sure it measures about 12 inches end-to-end.

3. Using both hands, accordion-pleat all the layers of fabric in the center. Using the embroidery floss and needle, make one big stitch to hold the pleat together. Set this piece aside. (You can get a better look at this step by clicking HERE.)

4. Making the knot: Press the long edges of the 8 inch piece under so the width measures about 1.5 inches. Try to center it so the stripes look even. Press well with a hot iron. Set this piece aside.
5. The tails: In the center of the 36 inch piece of ribbon, make an accordion pleat and secure it with a stitch.

6. Assemble the bow: With right sides down on a flat surface, lay out the three pieces of ribbon as pictured above.

Pull the ends of the 8 inch piece together and straighten the other two pieces so everything is centered. Put two big stitches on both sides of the “knot” piece to hold it all together. Trim the excess fabric making sure to stay away from the stitches.

Finish the tails: The easiest way to finish the ends of the tails is to cut a sharp notch. Another option is to hand sew a narrow hem in each tail.

Each grain sack bow I have made has been one-of-a kind. Each one looks unique and depending on the width of the grain sack stripe, some have more color than others. I am completely in love with all of them!


JOIN THE OSP COMMUNITY
Sign up to get uncomplicated recipes, unlimited seasonal decor, and
understated ways to refresh your home sent straight to your email inbox!
More Grain Sack Inspiration
No posts
Hi Ann, I am a subscriber, but I have misplaced the password for your OSP sight. Can you help me?
Ann, thanks for the grain sack ribbon tutorial. Your instructions are great! You always make everything look so easy! Thanks, again for your post. Blessings!m
Thank you for this tutorial and thank you for the Christmas printables. I having been using both the Christmas season. Merry Christmas!
Hi there!
Are there directions somewhere for how to get the printable into the fabric? Newbie here…I’d love to use them on flour sack dish towels.
Thank you,
Jen
Thank you for a very clear tutorial for this darling project. Do you make plain bows from the leftover grain sack? Love this bow on your wreath!
Hi Susan! I never have but you certainly could. Excellent idea! You can also use it to back pillows (if you sew) or for some other craft.
Hi Ann,
I haven’t written in a while~ I just wanted to say that your instructions for the bows were impeccable. I also wanted to say thank you for your generosity with your Christmas printouts. I will be using them for this Christmas. I hope that you and yours have the most joyous of Christmases & and Happy New Year!
Nina
Thank you Nina…Merry Christmas to you too!
Hi Ann,
I haven’t written in a while~ I just wanted to say that your instructions for the bows were impeccable. I also wanted to say thank you for your generosity with your Christmas printouts. I will be using them for this Christmas. I hope that you and yours have the most joyous of Christmases & and Happy New Year!
Nina