This post may contain affiliate links. See my disclosure statement.
Easy tutorial to make a reversible
burlap banner that requires no sewing!
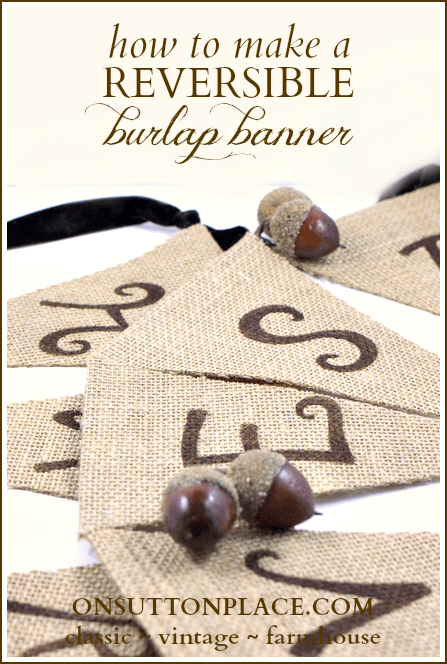 This reversible burlap banner is a project I have wanted to do for a while…really since I discovered the wonderful world of burlap. I know I was late to the party but now that I have figured a few things out, I really like working with it. Burlap is smelly and sheds…but it has so many other good qualities that those 2 little flaws don’t really matter. It’s inexpensive, very easy to find and neutral in color. I usually prepare my burlap by washing it but this time I left it alone. I wanted it stiff so the pennants would hang nicely. In keeping with my plan to re-purpose my Fall decor for Christmas, one side of the banner says HARVEST and the opposite side says BELIEVE. Here’s how to make your own!
*Some links on this page lead to shops and websites (like Amazon) where I am an affiliate. Click HERE for my complete Disclosure Statement.
Supplies needed:
- 1 yard burlap
- 1 yard Wonder Under
- Iron
- Banner Template
- Sharpie pen
- Scissors
- Hot glue gun/glue
- Alphabet Stencils
- Stencil brush
- Paint
- Twine
- Acorn Garland
Cut two pieces of burlap and one piece of Wonder Under 12 in. by 36 in. Iron the Wonder Under to one piece of burlap. Peel off the paper backing and iron the second piece of burlap to the first. Here is a pennant template. Cut out the template and trace 7 pennants on the burlap. Make sure to trace the pennants with the points alternating up and down.
 Cut out the pennants. They will be very stiff and the Wonder Under will help stop the burlap from fraying.
 Fold over the short end of each pennant about 1/2 inch and press firmly.
 Trim both sides of the folded over piece.
 Cut a piece of twine about 3 yards long. Tuck the twine under the fold of each pennant and seal the fold with a dot of hot glue on the corners.
 Now it’s time to stencil the letters. Since my crafting supplies are pitiful, I had to buy the stencil, brush and paint. Hopefully you will already have these ready to go. If not, this is the paint I found at Hobby Lobby. I highly recommend it…especially for craft-challenged people like me.
 Lay your banner out and carefully stencil your letters. If you use this paint you can immediately flip the banner over and stencil your other word. If you use traditional craft paint, let it dry before flipping the banner.
Get creative and add embellishments of your choice. I opted for brown velvet ribbons on the ends and acorn bunches between each letter.
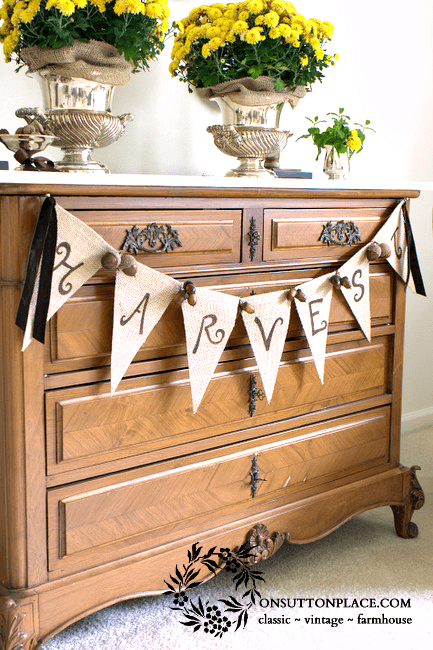 Here is the BELIEVE side of my banner. When it gets closer to Christmas I will show you how to cover the raw edge of the fold and add Christmas embellishments. The hard part is over though!
Reversible Burlap Banner UPDATE:
Click HERE for all the details on adding the finishing touches to this banner.

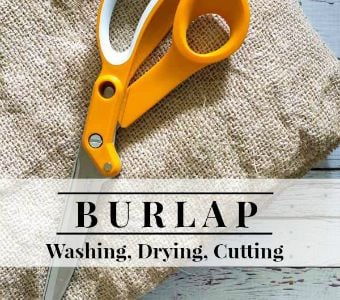
For other crafts or decor items you may want to wash your burlap. Here’s an easy tutorial for that:
Are you a member of the OSP Family? We’d love to have you join us!

Quick question, if I’m only doing a one sided banner, do I need the wonder under? Also, what prevents the burlap from fraying? I haven’t worked with burlap yet. However, I want to make a bunch for my vow renewal reception.
Hi Sara…even if you making a one sided banner, use the wonder under. It’s what makes the burlap stiff and it’s also what keeps it from fraying. Good luck!
Found you through Pinterest. I was just looking for something just like this! I have an upcoming craft fair and wanted to make my own banner, but was worried about the burlap fraying (& I don’t sew either! Lol) Thanks so much for this…dual sided is wonderful for us outdoor vendors in case things twist or flip (or if the banner can be seen from both sides.) Can’t wait to do this!
Oh I’m so glad…I think it should hold up very well for a long time. Good luck with your craft fair!
I love this banner! Love burlap anything so it’s perfect. I want to do this for a craft night this month…would you mind providing the directions to add the believe side? I am craft-challenged so can’t see how I will add the believe to the back while hiding the seams.
What I was planning to do was cover the raw edge of the fold-over with either ribbon or some sort of lace. It all could be applied with hot glue or fabric glue. You could embellish it with buttons or anything Christmas-related.
Love the banner and I bought burlap for it today. But when I print the template it is very small—could you tell me what size the triangle piece should measure?
The triangle should fit the page. I’m not sure what print program you are using but there should be a place to change your settings and “fit to page.” Let me know if you still have trouble!
You made this just for me, didn’t you? I mean, c’mon . . . “no-sew” AND “reversible”???
It’s just darling, Ann. I’ll be borrowing it shortly, if you don’t mind. I mean the idea, not the actual banner. That is, unless you’re coming to California soon. :D
This is darling Ann! I love that you can reverse it!! I just may able to do this!! Thanks!!~~Angela
Love your great quick how-to’s! You always seem to come up with more things for me to try.
Great job!
Great idea! especially like the “no sew” part!
Wendy CozyCleanandSimple.com
Love your banner! I haven’t worked much with burlap either. Does it lose its burlapy smell if you wash it?
Brilliant idea! I think I might have the patience to do something like this! Thanks for the idea and instructions.
I think this is a dumb question but I’ m missing something. . . So, the fold will only be on one side, right? The Believe side? But it will be glued down all the way across? Or just at the two dots?
Best Banner I’ve seen! I’m pinning this!
So pretty, Ann. You’ve managed to keep it elegant!
Ann, just wanted to congratulate you and your buddies from the “No-Sew Decorating Showcase,” and ask for it to be an annual fall event. I don’t sew beyond replacing a button or mending a hem, so I am pleased to discover another means to create.
You may be late getting on the banner bandwagon but you sure have it down!!! I was very lukewarm about banners, until I saw yours! I LOVE it!!!! I am going to make one for my mantel at Christmas time! You have the best style, Ann!
I love it Ann!
Look at you..burlap, stenciling, hot glue. What has happened to you Ann? LOL…Oh How I love this banner! It is beautiful.
Great idea and double duty as well, Love that,
Kathysue
Oh, and there’s that gorgeous piece of furniture so love too! Love the burlap, but it doesn’t like me. I must be allergic.
Brenda
Ann I just LOVE that banner!
Ann – this is fabulous and simply brilliant that it is reversible. How clever are you! I can’t wait to try this project. I was a little late to the burlap party, too, but trying to catch up. :) Thanks for being part of our little No-Sew Showcase group. xxoo
I love it, Ann…especially the fact that you will use it again at Christmas! I’ve had fun working with the “No-Sew” gals!…hugs…Debbie
That is just darling, Ann. Really a cute idea! xo Diana
Well, I think that is something I just might be able to do! Thank you Ann.