This post may contain affiliate links. See my disclosure statement.


Make this spring wreath with ferns & flowers to refresh your front door for the changing season. Welcome spring with ferns & flowers, and add curb appeal at the same time!

When the seasons change, so does the wreath on our front door. This is a tradition I started with the purchase of our first home, and it continues to this day. Like many of you, I look forward to it, and it never fails to make me smile. When spring arrived last month, I began to look online for inspiration for a new spring wreath. It didn’t take me long to decide on ferns, and once that decision was made, the rest of the wreath fell into place.
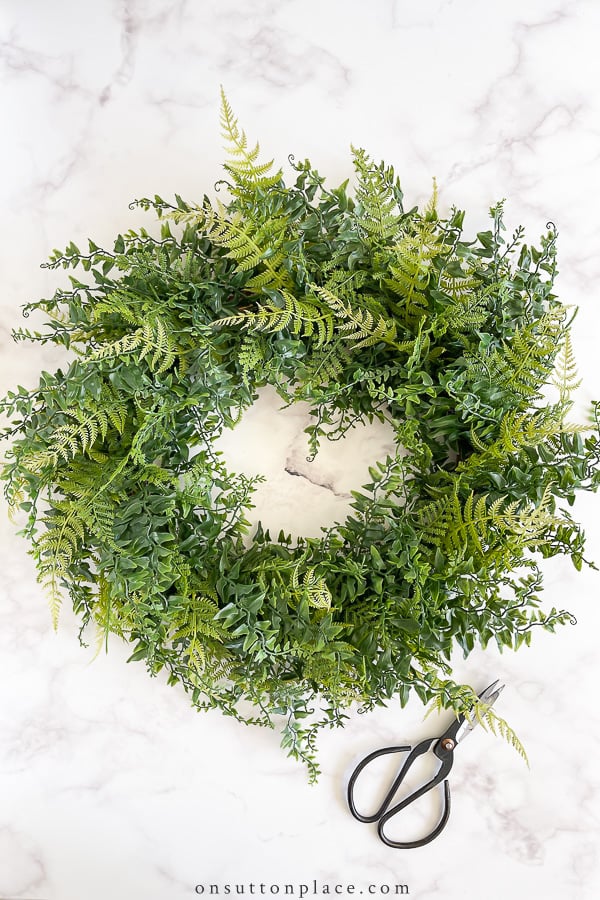
To begin, I want to talk about the wreath base. I originally planned to use a grapevine wreath, and add separate faux fern stems myself. I wanted a very full wreath, filled with ferns, so I knew I would need quite a few. After looking online at numerous sites, I discovered that it would be about the same price, and much easier, to simply buy a ready-made fern wreath. (I waited until I was able to use a 30% off coupon!) If you don’t want to go this route, I’ve linked to a basic grapevine wreath, along with fern stems, in the supply list below.

Spring Wreath Supplies Needed
- grapevine wreath
- faux fern fronds
- ready-made fern wreath
- faux hydrangea flowers
- faux berries
- small 11 inch stems on perimeter not available online
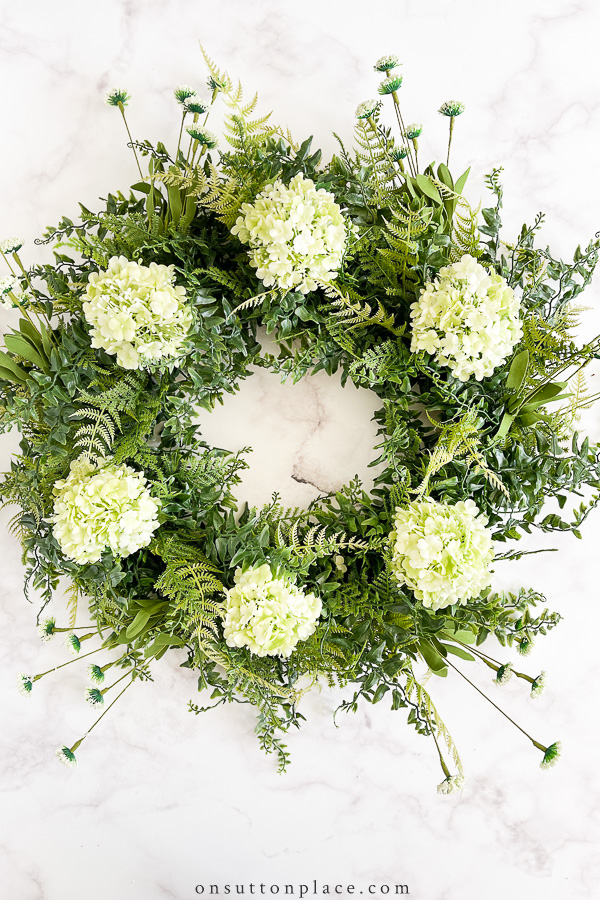
The first thing to do with a ready-made wreath is fluff it, and separate the stems. Take your time, and gently pull the stems out and away from the base. After the ferns on my wreath were fluffed, the next step was adding the biggest blossoms, which in this case, were the hydrangeas. Determine the top of the wreath, and place a blossom there. Continue around the wreath with as many blossoms as will fit, with some space in between.
Spring Wreath Tip
No wire is needed to attach the elements when a grapevine wreath is used as the base. Using wire cutters, separate each blossom by cutting the stem about 8 inches long. This will give you a sturdy stem on each blossom to stick into the grapevine. Sometimes it’s a tight fit, and takes patience, but the better embedded a stem is, the better it will stay put.

When your biggest blossoms have been placed, add the second element. I added the berries after the blossoms, but definitely assemble your wreath whatever way you want. The last thing I added were the smaller stems around the perimeter of the wreath.
A good rule of thumb when it comes to making wreaths is to use three different elements for interest and texture. Vary the elements so they aren’t the same size. Use a mixture of blossoms, berries, branches, or pods. When it comes to color, simply use what you love best.

How to Keep Birds out of Door Wreaths
When I shared a spring wreath in our Facebook group, a member asked how to keep birds out of nesting in her door wreaths. I know this is a problem for many of you…and I finally have a solution! One of the members said to stick large, unfurled paper clips into the wreath where the birds would normally build a nest. They stick out just enough to deter the birds, but not harm them. If you give it a try, let us know the results!
After the year we’ve had, the much anticipated arrival of spring has been wonderful. The days are getting longer, and some have been warm and sunny. The daffodils and forsythia are in bloom, and my hosta plants are poking their heads through the soil. The clematis growing on our light pole is turning from brown to green. On the next warm day, I’m going to drag out the hose and clean our porch. I’ll be bringing you new ideas for spring porch decor very soon…so stay tuned!
Wishing everyone who celebrates Easter a lovely and peaceful day!
Until next time…

This wreath is just beautiful! I also love a very full wreath.
We are remodeling a house to sell in the spring. I am going with Naval front door color thanks to Ann’s inspiration! Any suggestions for a ready-made wreath with similar colors and fullness to this one?
Your wreath is beautiful. Due to health reasons, I am unable to shop in stores at this time. Would you share where you purchased your wreath? Also I am in love with the color of your front door, would you share the paint brand and color. I always enjoy reading your blog, you share so many good ideas and beautiful pictures.
Thanks.
Donna
Hi Donna…I’m sorry for the delay in answering. Here is the link to the fern wreath: https://rstyle.me/+9CAcwiLwX3ow-qpQ1lhFRA It’s a bit pricey, but very beautiful. The paint color on the front door is Naval from Sherwin Williams. It’s exterior paint in a satin finish. Thank you!
I love this wreath! I agree it’s one of your prettiest!
I have another tip for deterring birds from nesting in your wreaths. I wrap mine in bird netting. It is invisible from the street and barely noticeable up close. I use a strip and wrap it around and around (none in the middle). So far, no birds.
This is lovely and I have everything already on hand to make it. I love the mixture of elements and especially the extension of the small blooms and berries.
I love the wreath and how full it is.The white looks so pretty against the blue door.
You have made another beautiful wreath Ann. I’m sure it will bring you much pleasure as you enjoy your new front porch. I always look forward to your blog with great decorating ideas and recipes (of which I have tried several – definitely keepers). Here in NH spring is a little slow in making an appearance but touches of green are beginning to show.
I wish you lived nearby; I’m sure we would be meeting for tea and muffins!
Happy Easter to you and your family!
Hi Ann! Would you share where you purchased the 11 inch stems that are not linkable? Perhaps I can find them locally; or at least something similar. Thanks for the inspiration.
Hi Karen…I’m sorry for the delay in answering. I got the stems at my local Hobby Lobby. Thanks for your patience!
I absolutely love this wreath!!! Can you tell me how many berry sprays you used on yours please? I an going to attempt to make one and the color palette is perfect!!!
Hi Darlene! I used 3 berry sprays. Have fun!
Love the fern wreath but the flowers take it to the next level. Stunning!
I live in a woodland setting and the ferns sure attracted me. The wreath is beautiful.
Ann, you always make the most beautiful wreaths for any season. I love this one and I believe I am going to try to make one of these for our front door!
Your wreath is so pretty. I have yet to hang my twig and forsythia wreath because I know the birds will make a mess of it. I will give the paper clips a try. Thanks for the tip!Sharon
Love your blog, been a faithful reader since your start! ♥️♥️♥️ Olivia💐💐💐 Happy Everything!
Beautiful wreath Ann! Like you, I always make my own wreaths as I don’t think you can generally find a store bought wreath that looks as nice as one you can make. I think using a pre-made greenery wreath is a great idea to save time!
Another time saver I have found is to use greenery garland. You can attach to a grapevine wreath or in my case and with a glass door at work, I attach to the front and back of a wire wreath form so the wreath looks good “coming and going”. I have enjoyed your wreath inspiration and your blog! Thank you! Debra
This is definitely your prettiest summer front porch ever. Love the fern wreath and your color scheme. You cannot go wrong with green and blue. . Thanks for the tip about nest building. I hung a hanging basket of begonias and within 24hrs the Carolina wrens had set up housekeeping🙂