


Make a dried orange slice wreath with this simple tutorial. Beautiful, natural Christmas decor that adds warmth to any space.
Because I love a fun craft project that doesn’t take much time, these dried orange slice wreaths were the perfect way to spend a few minutes making something beautiful. It’s such a simple craft, but the finished wreath looks surprisingly impressive. If drying orange slices isn’t something you want to do, they can easily be purchased online and you can skip that step. I usually dry a batch every year before the holiday rush begins, and use them for garlands, stovetop potpourri, Christmas tree ornaments, and gift tie-ons. For me, it just wouldn’t be Christmas without them. Here’s how to make a dried orange slice wreath of your own, using just a few simple supplies.

When I started this craft, I wasn’t sure how the wreaths would look in the end. I gathered a mix of embellishments from my Christmas bins and went from there. The image below showing the supplies is exactly where I began. I knew I wouldn’t use everything, but it was nice to have a few options.

Materials Needed
*As an Amazon Associate, I earn from qualifying purchases.
- Wreath forms (Grapevine or other natural base. Mine are 8 inches.)
- Dried orange slices: make your own or buy them
- Hot glue gun and glue sticks
- Twine or string for a hanger
- Optional embellishments:
- Cinnamon sticks
- Tiny star ornaments
- Star anise
- Faux greenery (use what you have)
- Small wool balls
This post may contain affiliate links. See my disclosure statement.
Instructions for Making a Dried Orange Slice Wreath
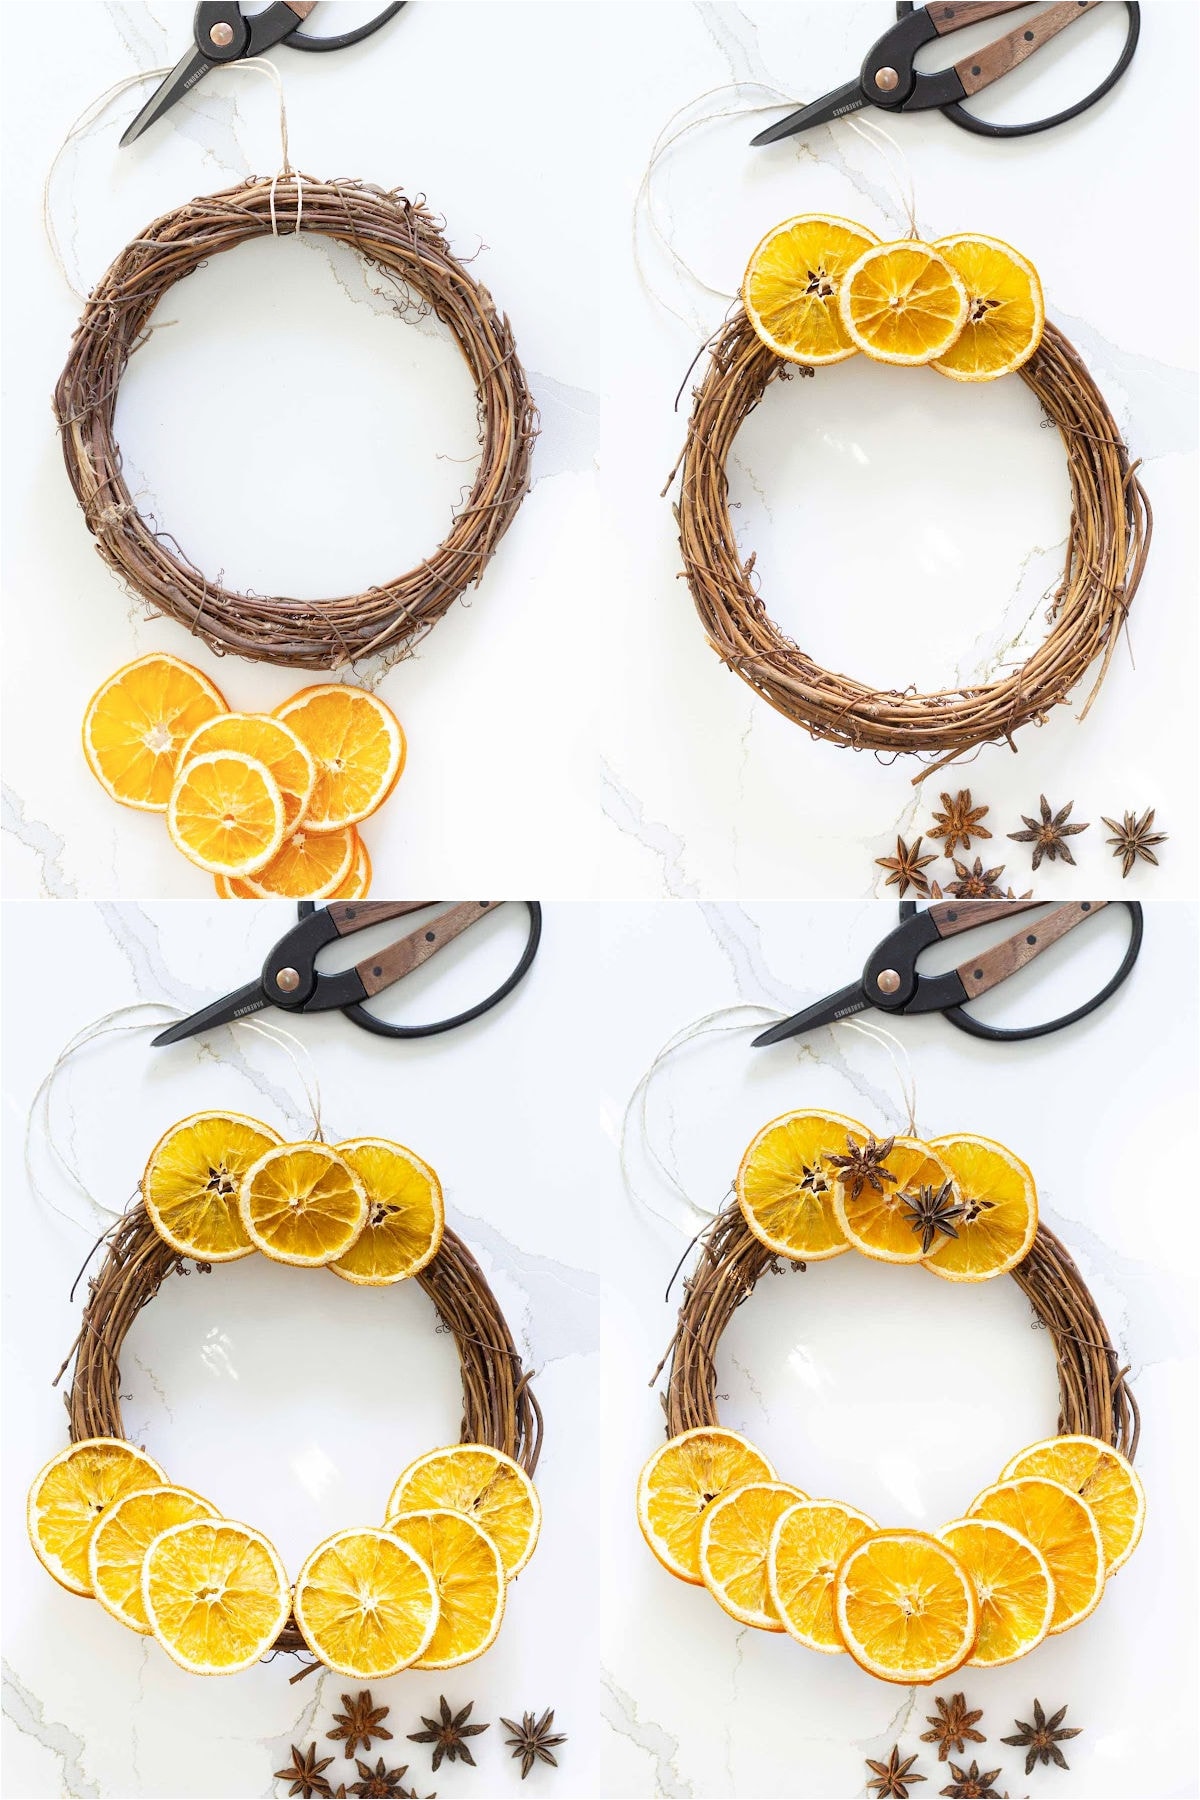
- Plug in your hot glue gun so it’s ready when you need it.
- Carefully look at your wreath and decide where the top will be.
- To make the hanger: Cut a length of twine and fold it in half. Place the folded end behind the top of the wreath, then pull the two loose ends through the loop created by the fold. Gently tighten to form a secure lark’s head knot. Tie the loose ends together to make a hanger.
- Before gluing, arrange the dried orange slices on the wreath form. Try different placements until you’re happy with the overall look.
- Working one slice at a time, glue the oranges in place. Be sure your glue is very hot so it holds firmly. As you layer, apply glue between slices to attach them to each other as well as to the wreath.
- When all the orange slices are secured, add your embellishments. Keep it simple if your wreath is small, or layer in a few accents for texture and variety. Check the materials list above for suggestions.
Tip: the glue adheres well to the orange flesh, but for a more secure hold, add a small bead of glue along the rind before pressing the slices into place.

These little wreaths turned out even better than I expected. They’re simple, natural, and add a handmade touch that feels just right for Christmas. I love how the dried oranges glow when the light hits them, and how something so easy can look so special.

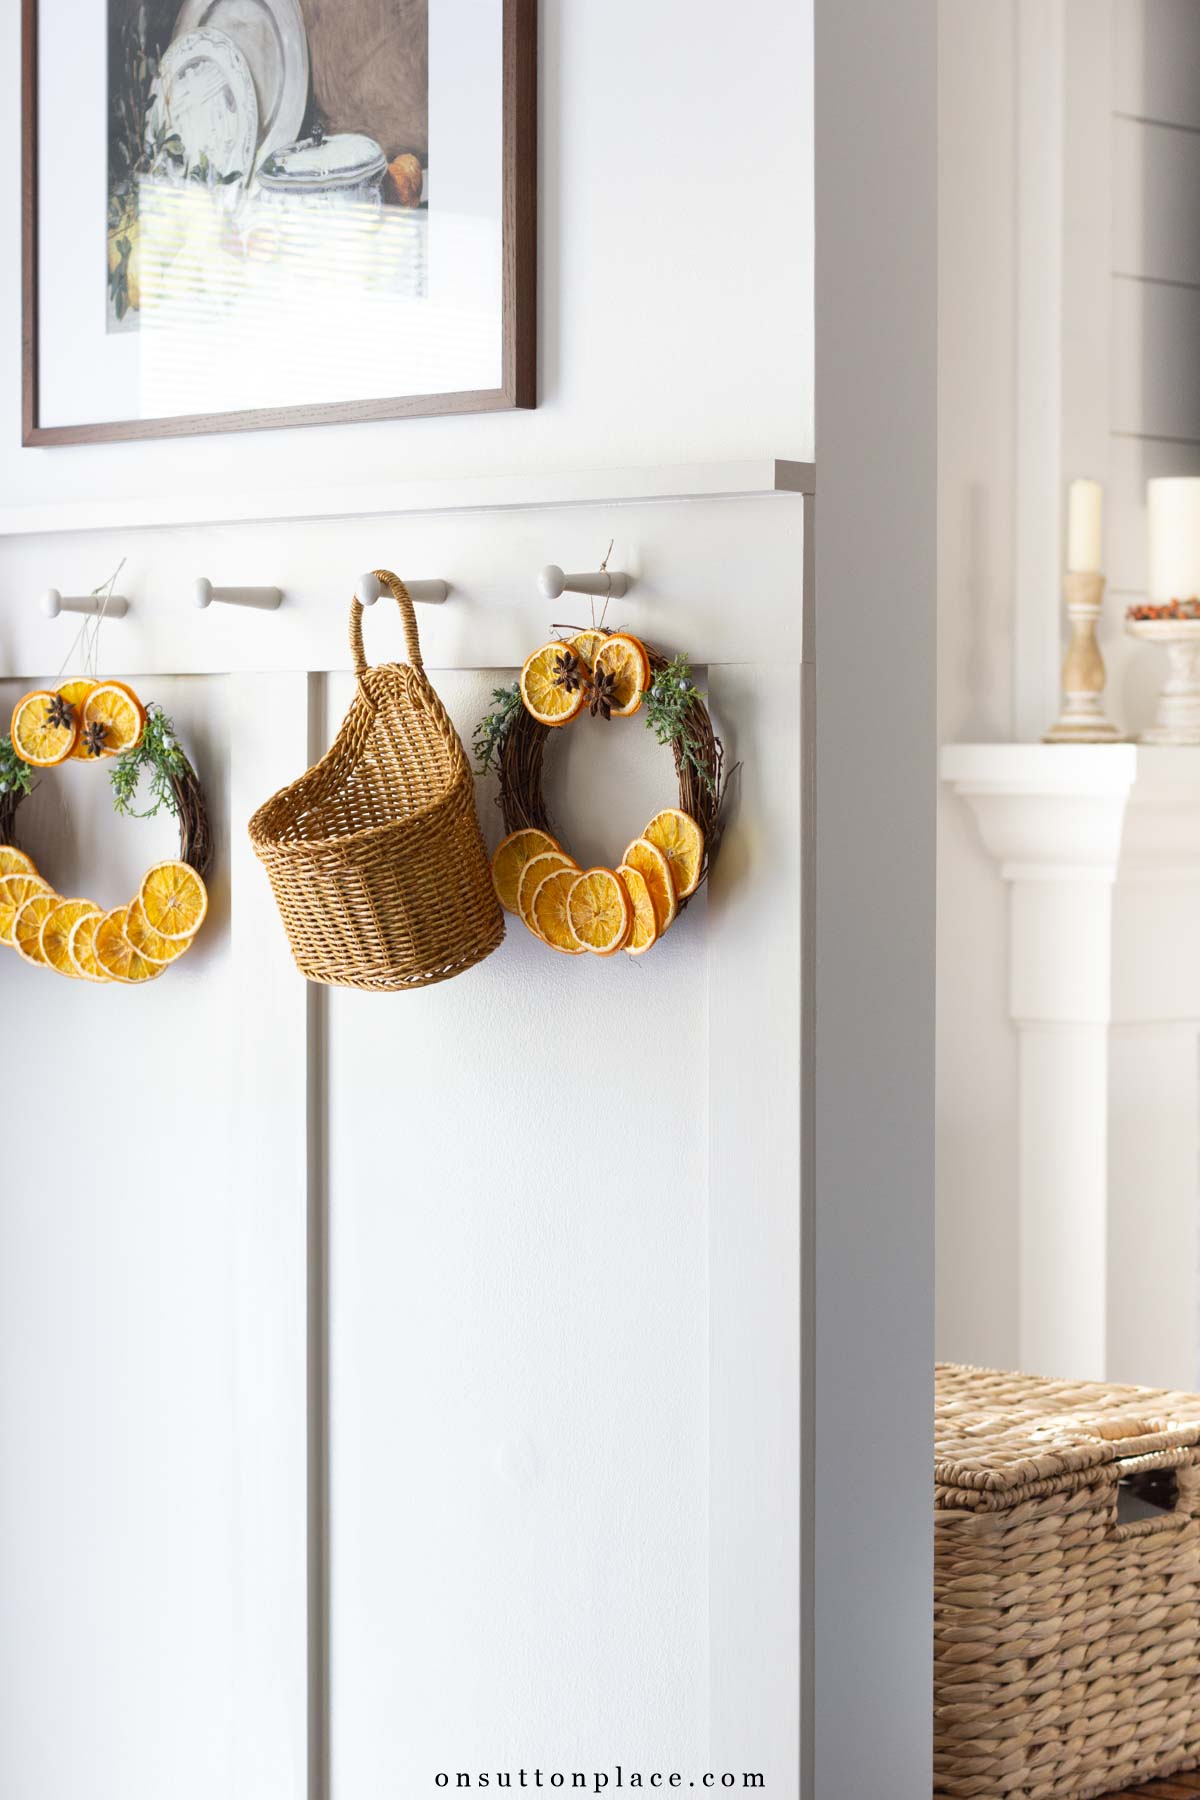
There are so many ways to use them. Hang one in the kitchen, or on a cupboard door. They’re lovely tied to a window sash, where the sunlight can shine through the slices. A larger version would be beautiful on the front door…a touch of Williamsburg that never goes out of style.

JOIN THE OSP COMMUNITY
Sign up to get uncomplicated recipes, unlimited seasonal decor, and
understated ways to refresh your home sent straight to your email inbox!


amazon storefront
Discover simple and affordable
ways to refresh your home.
Follow my Amazon Storefront
for all my favorite finds!

Hi Anne…these Orange slice wreaths are lovely. I love drying Orange slices… I do mine in the oven because I dont have a Dehyrator. The smell from them drying is exquisite….mmm!!!! I tuck them in swags, arrangements, on my tree, anywhere I can find a place. I learnt how to save them from year to year, I put Orange essential oil on the saved ones. The ones that arent pretty anymore I put in a potpourri. Yes Anne, I learnt this from you and Yvonne many years ago. Thank you😍