


Use this method for kitchen tile grout repair. There is no need to remove existing old grout, and it can be done in just a few hours!

Author’s Note: this post was originally published in 2012. I used this tile grout repair method right up until the last month we lived in the Sutton Place house, which was November, 2021. The day before our first showing to sell, I followed the same process that’s detailed below.
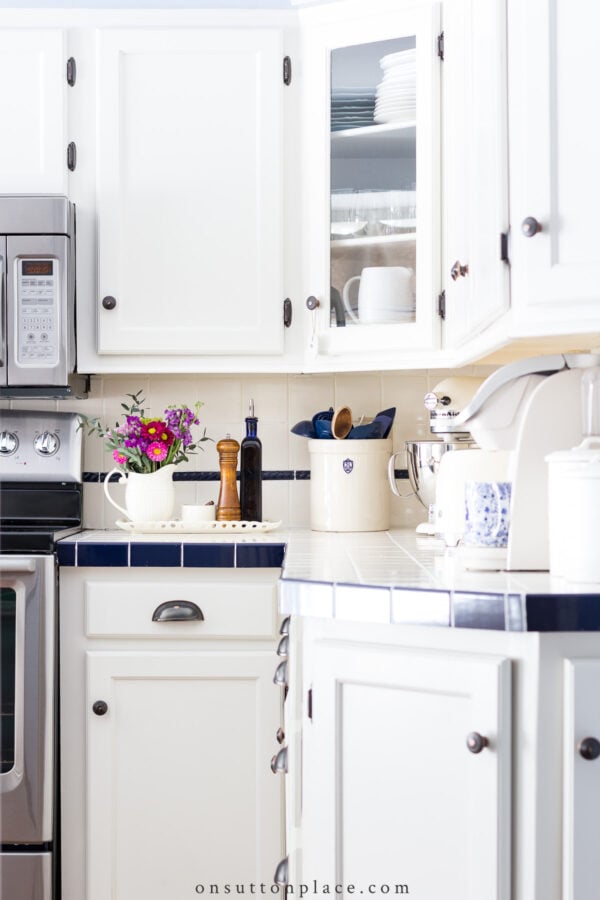
I really hate grout. Actually, hate isn’t a strong enough word. I detest grout. Even the word itself is hard to say. But at our house on Sutton Place, I had tile countertops that were installed as a “Band-aid” over Formica…and even though I had the best of intentions, the Band-aid never got pulled off. The biggest issue was keeping the grout lines clean and white. It was nearly impossible. Just when I was ready to give up hope of ever having white grout again, I found this little bottle of Tile Guard at a local home improvement store. Since the price was right, I picked it up. It sat in the cupboard under my sink for months. If I had known how easy it was to apply, I would have tackled the job a lot sooner. The image below shows you where I started, the first time I used Tile Guard.

My tile was old, and the grout grabbed on to every crumb, all the moisture, and every speck of dust. I wiped and wiped, but the grout sucked the dirt right in, and stains were inevitable.

This post may contain affiliate links. See my disclosure statement.
The Method
When I was ready to try the Tile Guard, I first cleaned the countertops with Clorox Clean-Up, and then I began dabbing the Tile Guard on the grout. Very quickly I could see that this method was not going to work. The liquid wasn’t coming out fast enough. So I cut the dabber top off, and just poured the liquid on the grout lines. I used cotton balls to spread it out. The image below shows what the countertops looked like when I was finished applying the Tile Guard.

The manufacturer’s instructions said for best results to let the application dry overnight. This was key in allowing the liquid to set up, and stick to the existing grout. The next morning, I wiped the counters with a damp sponge. The tiles came out very shiny, there was no haze, and the grout was bright white. All in all, the process was completely painless. There was very little mess, and it was fast.
Tips for Easy Application
- I did not seal my grout when I was finished. However, I would highly recommend it. Apply the Homax Sealer, especially if you are restoring a large space or floor.
- Use rubber gloves to apply the liquid. It saves your hands from becoming a giant mess.
- I never worried about cracks or damaged grout. I just applied a heavy coat of Tile Guard and hoped for the best!
- To make this job as easy as possible, I recommend clearing your counters in the evening. Clean your tile, and apply the Tile Guard. First thing in the morning, wipe everything down, and restore order to your kitchen.
- This method will work for porcelain tile, marble tile, as well as natural stone tile. To my knowledge, it will work on any type of grout, as long as it is white.

Update
I am definitely not a grout expert. When I originally shared this tile grout repair method way back in 2012, some people judged just a little, and said I was covering up the dirt. Honestly, I probably was, but I always cleaned the grout very well before I applied the Tile Guard. I had old counters, and the bottom line was that I just wanted them to look better…and the renewed grout always did. It resisted mold and mildew, and grout cleaning was easier. This is real life DIY. I found a solution that I could DO MYSELF, that wouldn’t require professionals, and that was affordable. I’m not saying this restoration method will work for everyone in every situation. I am saying it worked for me, and I highly recommend it.

Frequently Asked Questions

JOIN THE OSP COMMUNITY
Sign up to get uncomplicated recipes, unlimited seasonal decor, and
understated ways to refresh your home sent straight to your email inbox!


amazon storefront
Discover simple and affordable
ways to refresh your home.
Follow my Amazon Storefront
for all my favorite finds!

Thanks for the great information, I intend to buy and use this product.
I just finished a grout project in my kitchen…down on my hands and knees, a scrub brush, peroxide and Dawn Powerwash (that stuff is amazing, I’m replacing a lot of my cleaning products with it). My grout is tan. It took me a month to clean and seal (I did 2 rows at a time and my knees still hurt)! But, it looks so much better! It hadn’t been done in nearly 10 years and the last time we did it, we didn’t seal it. The grout was BLACK!
Good for you…what an accomplishment!
What a great home improvement! And such a pretty kitchen.
I don’t currently have any surfaces with grout, but I hated dealing with it when I did! What a great solution you found! Bleach can only do so much and the product you used did the job.
You might be reading my mind. My issue is a new, 18 month old, floor. When it was installed by a highly regarded professional who was employed by my area’s premier decorating company, (I say this because I spent lots of $$$ to have the best and low maintenance install) I was told by this genius that they no longer apply a sealer to the grout lines because the grout itself has been “reformulated” not to absorb dirt etc. and it will not stain or soil. LIES. My grout is a light tan on the stone floor so this product will not work, I am in the process of dealing with that. If I find a solution I will let you know. In the meantime, I have a little battery powered brush on a stick that is getting a workout, grout, yuk!
Thank you, Ann, for this tip. Our home came with a tiled shower, and the grout can definitely use refreshing. I am not ready to replace the tile, so I am going to try this.
Thank you for sharing I’m going to try this on my own title and hope for the best lol!
We will be selling our home in a few years. I have tile in my kitchen. I like it, but my daughter if trying to convince me to replace it with granite. I don’t want to pay for it, but she says I might lose buyers because of the tile. What do you all think?
Hi Cathy, I’m a potential home buyer and it’s sooo frustrating seeing kitchen after kitchen that looks exactly the same after being remodeled or having countertops replaced in a style I don’t like and knowing I’m paying extra for something I’d just want to replace as soon as I’d have the funds to do so. I’d keep the tile, just clean it up as much as you can, which based on this post shouldn’t be more than 10 bucks and a night of take-out.
Holy cow – that looks fabulous! Wonderfully clean looking and I can’t wait to do mine, too. :D.
You made an interesting point when you explained that the key to getting good grout results is by letting it sit overnight. A couple of the tiles in my kitchen are starting to come loose, and I am worried that these will lead to moisture getting in and causing mold growth. I’m not a very handy person, so I think I will hire a professional for this grouting project.
I have a similar countertop, and absolutely hate when my grout is stained! I keep a spray bottle nearby, with a diluted bleach in it. Spray it on the tiles, wait a while, a little scrub with a brush, and you have clean grout!
But is this basically a grout “paint”? I’d rather remove stains than cover them. I scrub the floor with bleach, and then seal. I have two homes and my bleach method works better in one of the kitchens than the other, for some reason.
Yes this is a product that paints the grout. I cleaned my grout the best I could before I applied it. It accomplished what I wanted and that was to give my grout a refresh.
Wow! That stuff works great! Thanks for the tip.
That’s good to know about this product!
I have an aunt who’s bathroom always had this perfectly white looking grout looked so white and fresh and my Mom finally asked her what her secret was and she said she uses the white liquid baby shoe polish (people used to use that for kids shoes a lot) – Same procedure….put it on and let it dry then wipe the excess off. It will be interesting to know how long your Tile Guard holds up!
Ann, I think you have made a wonderful discovery. Your “after” looks amazing.
Looks like new. My grout is all either dark brown or grey, but love how clean your tile looks with the freshened up grout!