
In this post: Easy, DIY Outdoor Christmas Lantern Planter Idea for your Porch. Festive and fun way to welcome your friends and family! Uses a LED candle and fresh greenery.
Whenever a new season rolls around, the first thing I do is refresh the decor on our front porch. It’s my favorite place to start and it always sets the tone for the rest of the house. As promised when I shared the first look, I’m here to show you exactly how I put the outdoor Christmas lantern planters together. After that, there are a few pics of the door wreath and sitting area.

*Some links lead to websites where I am an affiliate. Click HERE for my complete disclosure statement.
This post may contain affiliate links. See my disclosure statement.
DIY Outdoor Christmas Lantern Planter Directions:
- What you need: planter or pot, tall lantern (mine is about 22 in. tall,) potting soil, fresh greenery.
- The planter can be round or square but needs to be big enough so the lantern fits in the middle with at least 2-4 inches of dirt surrounding it. Fill the planter with dirt almost to the rim.
- Important: water the dirt well.
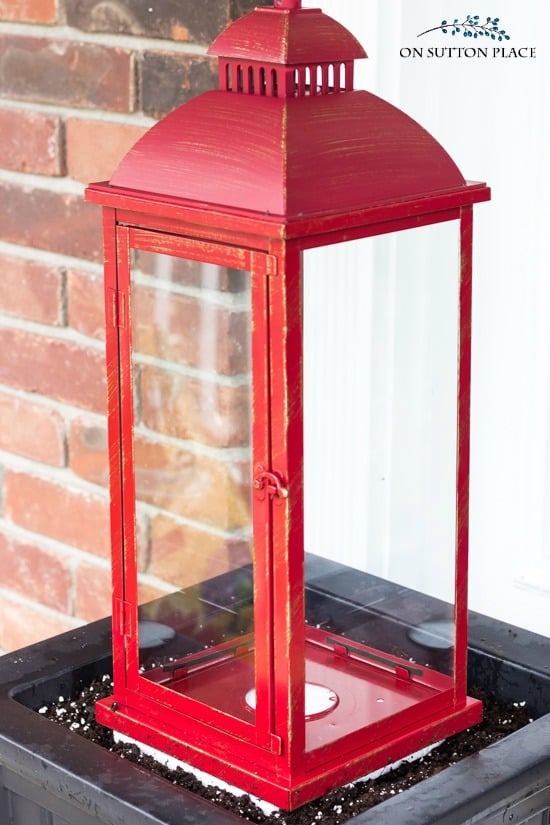
- The packing material in the lantern boxes included a few pieces of square styrofoam that I used as a base for the lanterns on top of the dirt. This is an extra step and not really needed. When I set the lanterns directly on top of the dirt, they worked fine. I used the styrofoam to raise the lanterns up just a little more.
- Now let’s talk about the candles. After the greenery is inserted in the dirt, the lantern door won’t open…which means you can’t get the candle out to turn it on. The solution to this problem is a LED candle with a remote. My favorites are from Pier 1 but you can find them at any craft or discount store.

- Place fresh batteries in your LED candle and place it in the lantern.
- Now it’s time to add the greenery…my favorite step!
- I used three different kinds of greenery: Cedar, pine with short needles, and pine with long needles. I had to buy my greenery because I don’t have bushes or trees I could cut. If you do, this step would be free. I purchased three bundles of greens for about $10 each.
- Give the end of each pine piece a fresh snip and push it into the dirt.
- Use the tallest and most sturdy pieces for behind the lantern. Place the cedar along the front of the pot so it drapes down. Fill in with the long-needled pine and any leftover pieces.

- Stand back occasionally so you can see if the greenery is balanced. It certainly shouldn’t be perfect, but make sure you have the same amount of greenery all around the lantern.
- If you are making two lantern planters, put them together at the same time. That way they will look balanced as a set.
- Add pine cones, red berries or even a bow.
- The final step is watering in the greenery. Make sure it’s watered in well. To keep the greenery fresh, water once a week. (If your temps fall below freezing, the watered dirt will freeze as well. No need to add more water if this is the case.)
The lanterns I used in this project are no longer available. Here are some other options.
Red Lantern #1
Red Lantern #2
Red Lantern #3
Get the black square planters {HERE.}
Get the doormat {HERE.}

Sometimes I can see projects like this in my mind, but when I try to make them happen, things don’t go as planned! This time I got lucky and these outdoor Christmas lantern planters turned out just like I imagined. I have to admit, I love it when that happens.

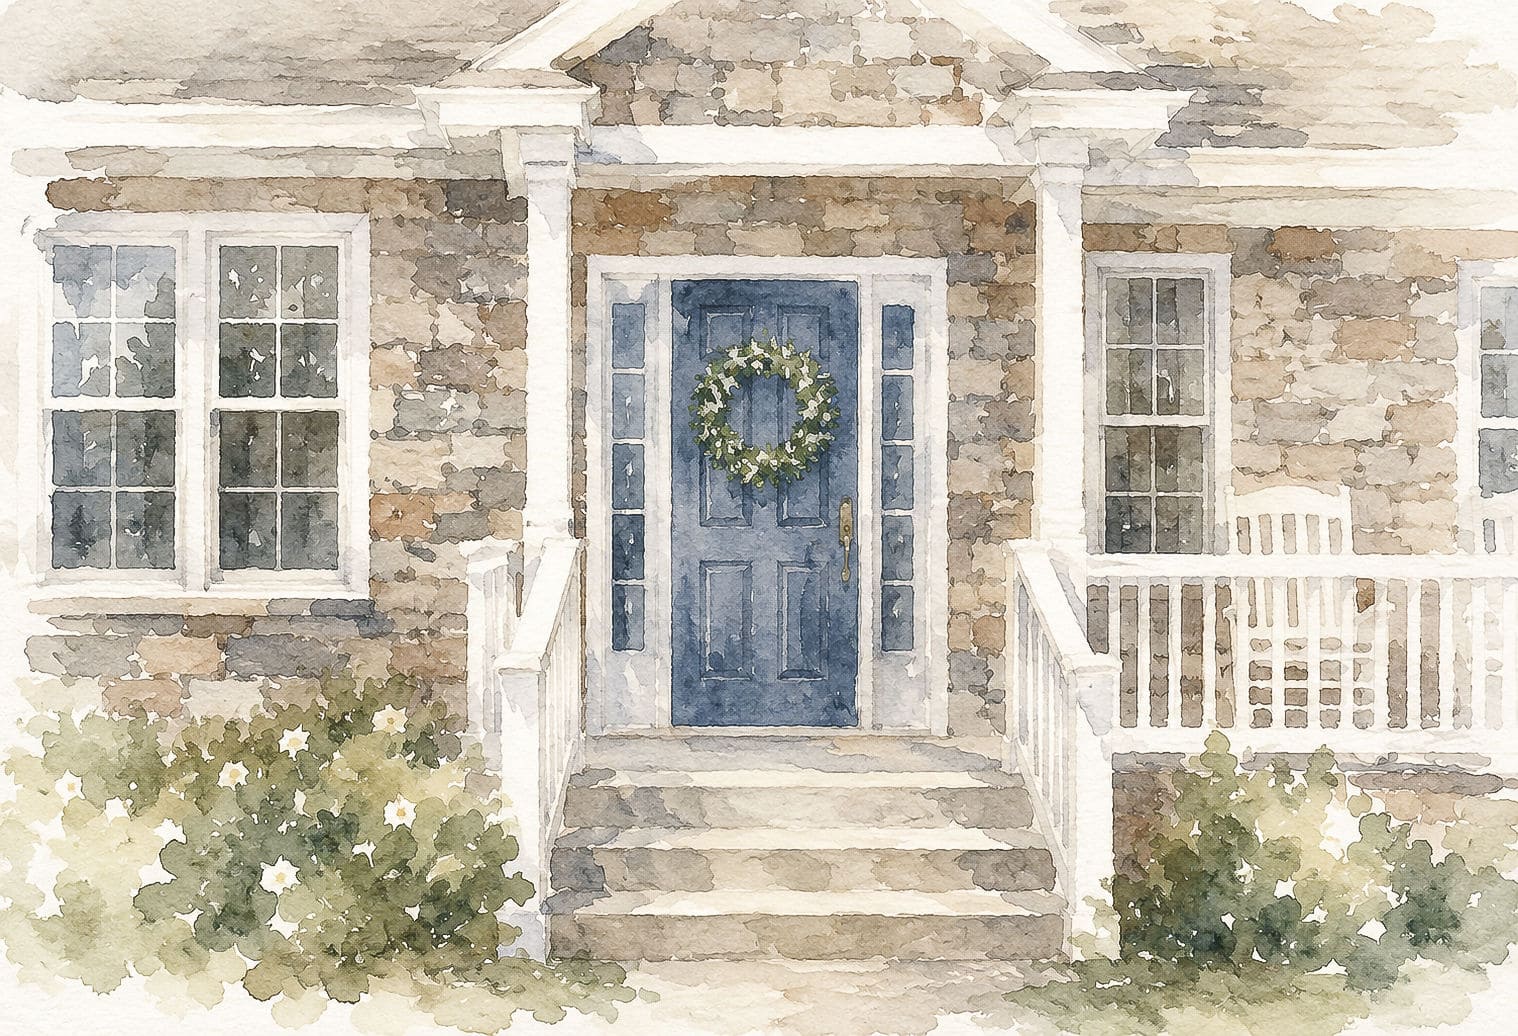
Now let’s talk about the rest of the porch. The wreath is old…I’ve lost track of actually how old. I bought it at a time in my life when I didn’t have any extra money for decor and I remember putting it (and the matching garland) on my credit card because I didn’t have enough cash in my checking account. I worried about the cost and felt guilty about spending money I didn’t have. It was worth it though because I love both pieces as much today as the day I bought them. (And I did finally pay off my credit card!)

I used this same wreath last year so to switch things up a little, I added a garland of faux cranberries. Along with the juniper, the cranberries add a pop of color and a festive touch.

The sitting area got some Christmas cheer with plaid throws and pillows I used in our guest room last year. I found them at TJMaxx so I don’t have an exact source. I have found a few similar throws and included them in the shopping widget at the end of the post. I looked, but couldn’t find anything even close to these pillows. I stopped at my TJMaxx a few days ago and again this year, their selection of Christmas pillows is amazing. Definitely worth the trip if you have a store close-by.


I used some leftover pine pieces in the galvanized metal watering can and my grain sack Christmas trees to dress up the wicker table. This end of the porch went together in just a few minutes. Of course, Kelly was right there the whole time.

I love the way the porch turned out this year and I came in under budget which is always a good thing! The only new additions were the lanterns, doormat (which I love) and greenery.
Front Door Color: click {here.}

Love this look . New to your site. So I’m catching up. Working planters now for 2020 Christmas.
I have been following your blog for years and I look forward to your posts.
This year I decided to make the Outdoor Lantern Planter that I have loved since you posted it years ago. It turned out beautiful. Thank you for providing projects that those of us who are artistically challenged can accomplish. Best Wishes for the New Year.
Beautiful front porch! What are the dimensions of the black planters? I’m starting from scratch with my porch and would love to know what size to get. Thanks!
Love the plane to idea. How long did the greenery last?
Best porch decor ever! Love the red lanterns with the fresh greens. Merry Christmas to you and your family.
Ann! First I just noticed your update logo? I love it! And, I knew I recognized that blue front door when I clicked on your link from Kim’s party! LOVE IT! Love the red lanterns. I may just have to attempt a copy cat! Love it all! laura
Love your front porch! So beautiful! Can you tell me what color your shutters are?
Hi Lauren! I don’t have the exact color of the shutters…but I color-matched it at Sherwin Williams. They came up with an exact match to Gibraltar. Thanks!
Love the green and red against your blue door. It’s all lovely … including your adorable dog!
I have always admired and loved your porch. The way you decorate it is so welcoming and festive. My mouth dropped open when I saw your planters. I purchased lanterns (in black) about a month ago to do the exact same thing! I can hardly wait to get back home to put it together. Hope they turn out as fabulous as yours. Merry Christmas!
A great idea and look, I have shared this with friends!
Ann,
You are MOST GENEROUS with all of your beautiful ideas. I wish you were my friend/neighbor so we could enjoy a cup of chai tea together. Thank you so much for your generosity of spirit.
In gratitude,
Marialyce
I just love your blog… so inspiring and beautiful! Could you tell me where you got the garland of faux cranberries that you put around your wreath. Thank you! Looking forward to more Christmas decor.
Hi Yvonne! I got the cranberry garland at Hobby Lobby a few years ago…but I saw it there just recently so they may still have it. Happy Holidays!
I just found your website today when I saw your Thanksgiving napkin idea on Pinterest. I’m really excited to find you. I’m dying over your front porch because I have a read brick house and a newly painted navy blue door and two rocking chairs on the porch. It has good bones, but not style at all. I love what you have done here and totally want to use your porch as inspiration! I love the links you provide and really appreciate your ideas.
What a most beautiful idea! Your Christmas porch is always so pretty with wonderful creative touches.
Beautiful as always. Thank you Ann, I’ll be giving the lantern planters a try this year.
Love this, it is so pretty! I’m not sure I can do the lanterns, I’m afraid my German shepherd will knock them over, but I would like to copy your wreath idea. Thanks!
Those look really nice! If I had a porch, I’d borrow that idea!
I just subscribed this evening and love your site! These pictures are sooooooooo me! The porch is homey and welcoming. I use a bushel basket filled with mixed greens and faux red berries. I will add a lantern this year! Thank you! (Incidentally, my exterior doors are all painted SW-Naval…love it!
Pretty!!!
You know how it is said we look like our pets? I have seen pictures of your husband in your blog and think he and Kelly resemble one another! A compliment for Kelly to have that human aspect and a compliment for your husband to that have that unwavering respect for its owner, not that your husband is owned! It is just that respect and loyalty bond thing that goes on between pet and human. We lost our beloved dog a few years ago and I so terribly miss that bond we shared which is one of the reasons I love seeing pictures of Kelly. Thanks for all the inspiration and leaving us with a positive note at the end of your blogs.
I love the lanterns. Such a great idea. The red against the greenery is so pretty. I’m sure they are beautiful and welcoming at night when lit.
Hi Ann, love the planters with red lanterns. I have black planters in front of a deck which is in between the house and garage (gray cape with white trim, black shutters, red door). I always fill the planters with holly and evergreens for the winter, which looks fine, except that they really need a pop of red. So they are getting red lanterns this year. And probably forever more… Thanks for a great idea!
I just love your style! Everything on your porch is beautiful! Thank you for sharing!
This may be my favorite winter porch ever! Love the picture of sweet Kelly.
This looks so casually elegant to me. Really a great look overall! I especially love the fact that Kelly was your little helper. ;-) My Mini Schnauzer, Harry Potter, is always right there checking things out around our house, too–as long as it doesn’t involve Power Tools! He hates the sound of my husband’s nail gun. When Denis gets out the power tools, Harry and I go to the other end of the house and turn the music on!! :-)
I absolutely love this project. I’ve been looking for a unique idea and this is it. My only concern is that the lanterns will blow over on a windy day. I’m going to look for a solution to solve that dilemma.
Hi Patrice! The lanterns are very stable after they are surrounded by the greenery. It would take an extremely strong wind to blow them over!
The planters are just beautiful. To me they are the epitome of Christmas decor. Love the rest of the porch, too. Makes me wish I had a porch to decorate. Seeing your porch decor for each season is one of my favorite things on your blog.
Love, love this idea. But Inmay tweak it a bit since I live in Michigan and temps very often fall below freezing. Wondering if I Could use live wreaths as my base for the greenery?
Hi Betsy! Live wreaths are a good idea…especially if your planters are round. I’m in Ohio so we have freezing temps too. I have used fresh greenery for years and there was never any problem. Hope it works out for you!
The porch is very lovely and festive looking. Love the black,red and green together. The star of the show is that gorgeous little Kelly!
Ann,your porch is lovely, wish I could come and sit a bit with you.
Beautifully done!
I am so inspired by your post. I was able to get the lanterm at a Kirkland’s store. They are sold out online, but are available in some stores. I also saw some at Hobby Lobby and one could use their 40 percent discount on one item. Thank you for such lovely ideas.
As always, beautiful displays with well written directions! Thanks so much! Feels like I’m getting advice from a friend!
Beautiful
Lovely porch Ann- looks so inviting. Thanks for adding a picture of your pup. Always happy to see her!
Ann, it’s beautiful as it always is. It is so cheerful and inviting. I’m disappointed Kirkland doesn’t have the lantern now. Shoot! Oh, and Kelly looks so cute. 😊
Your porch looks lovely and very welcoming. Ann just one question I love seeing the blankets on the chairs but do they get wet and maybe blown off the chairs.I live where we do get snow..not alot but still snow on my porch. My porch is not as protected as yours. Have a lovely Thanksgiving with yr family.
Hi Lorri!
My porch is a bit protected, but it gets wind and rain or snow sometimes. In all the years I have been decorating the chairs I have never had a throw blow off. Once in a while they will slip down off the back, but that’s it. The honest truth is that I don’t worry about them getting wet. I realize when I put items on my porch that they might fade, get wet, etc. I try to find washable items but if I use something that is not washable, like the black pillows, I just hope for the best!
Oh I love what you did with the lantern and the printer…I don’t have that kind of planter but I have a beautiful old crock and and large rust/iron lantern! I will have to scrounge for the greenery (we live in hot SC and greens don’t last long), but I will find something! thank you!
Genie, that’s a great idea. I don’t have planters either but I do have two 6 gallon crocks. I just might have to try this idea using what I have on hand.
Love, Love, Love!! I’m shopping now for a lantern to do this at my daughters house! Perfect!
First Kelly is adorable!!! Thank you so much for sharing how you have done the planters … I love them and you are such an inspiration to me God bless and Happy Thanksgiving to you and your family may you have a blessed day
I love your planters and lanterns. Absolutely gorgeous. Love your furbaby the most. Thank you for this great idea.
I try to decorate the side entrance to my church. . Ann you’ve given me great ideas for that. I can even get the greenery of pine and cedar at my little country home.
Thanks as always.and have a blesses thanksgiving
This is such a warm and inviting Christmas entrance, and the tutorial is so helpful.
Thank you so much for solving my problem of the out of stock lantern. I just ordered 2 of them and really appreciate the directions on how to create it. Can’t wait to try it out.
I was SOOOO disappointed when I saw that the lanterns were sold out…but I think the alternate ones I found will work just as well. I’m glad it all worked out in the end and thank you so much for your patience. Enjoy your project!