Making a wreath for your front door is much easier than it looks. Learn how to make a wreath with a simple grapevine base and a few basic supplies. Create something that feels personal and looks beautiful from the street.

This is a method I’ve used for years, and once you understand the steps, you can change the look for any season or style. Whether you prefer something simple or like to add a few collected pieces, this approach works every time. This wreath is a project I’ve made many times over the years. The steps are the same, but I’ve updated the photos to better show the process.
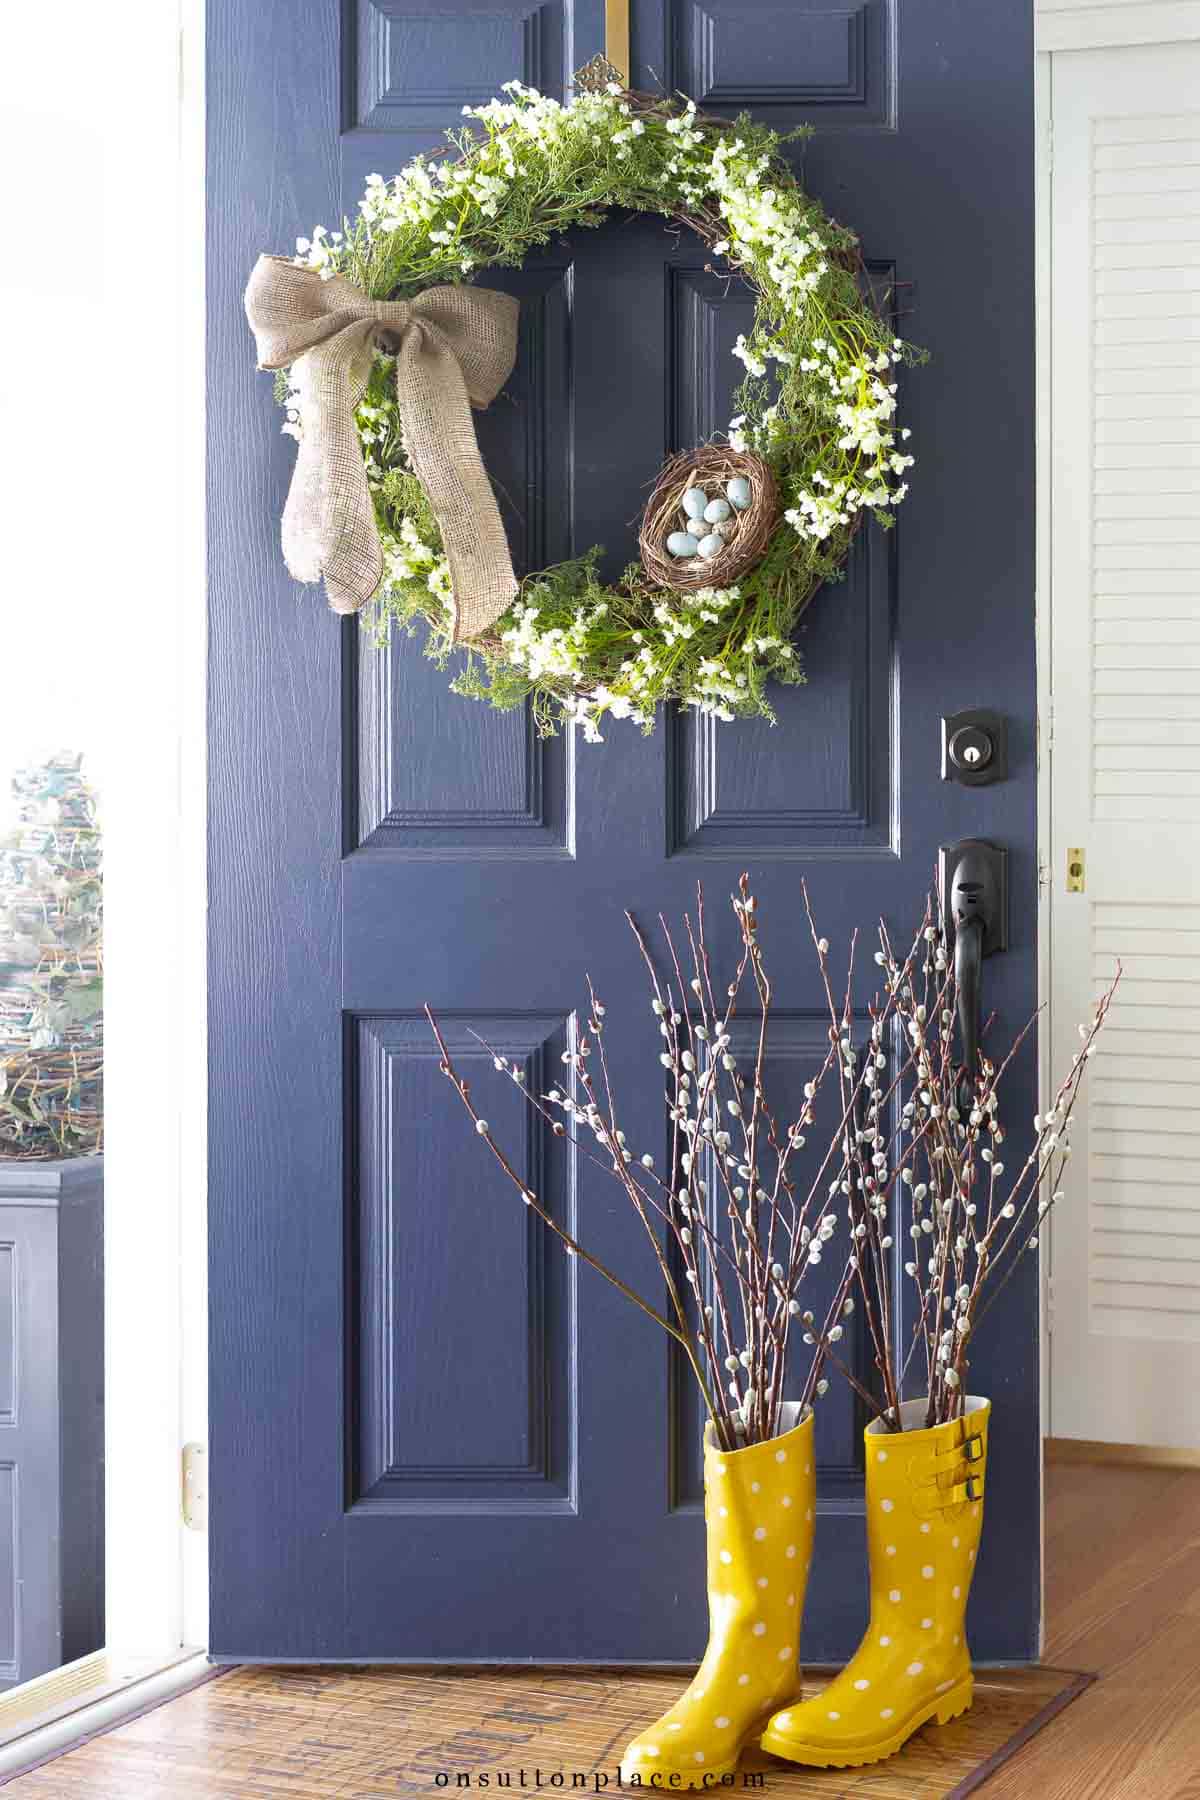
One important thing to consider when you are choosing a wreath style is the color of your door. Try to choose contrasting colors for the elements on your wreath. White always pops from my blue door, so I try to use it as often as I can. If your door is white, bolder colors are a better choice.
This post may contain affiliate links. See my disclosure statement.
How To Make A Wreath
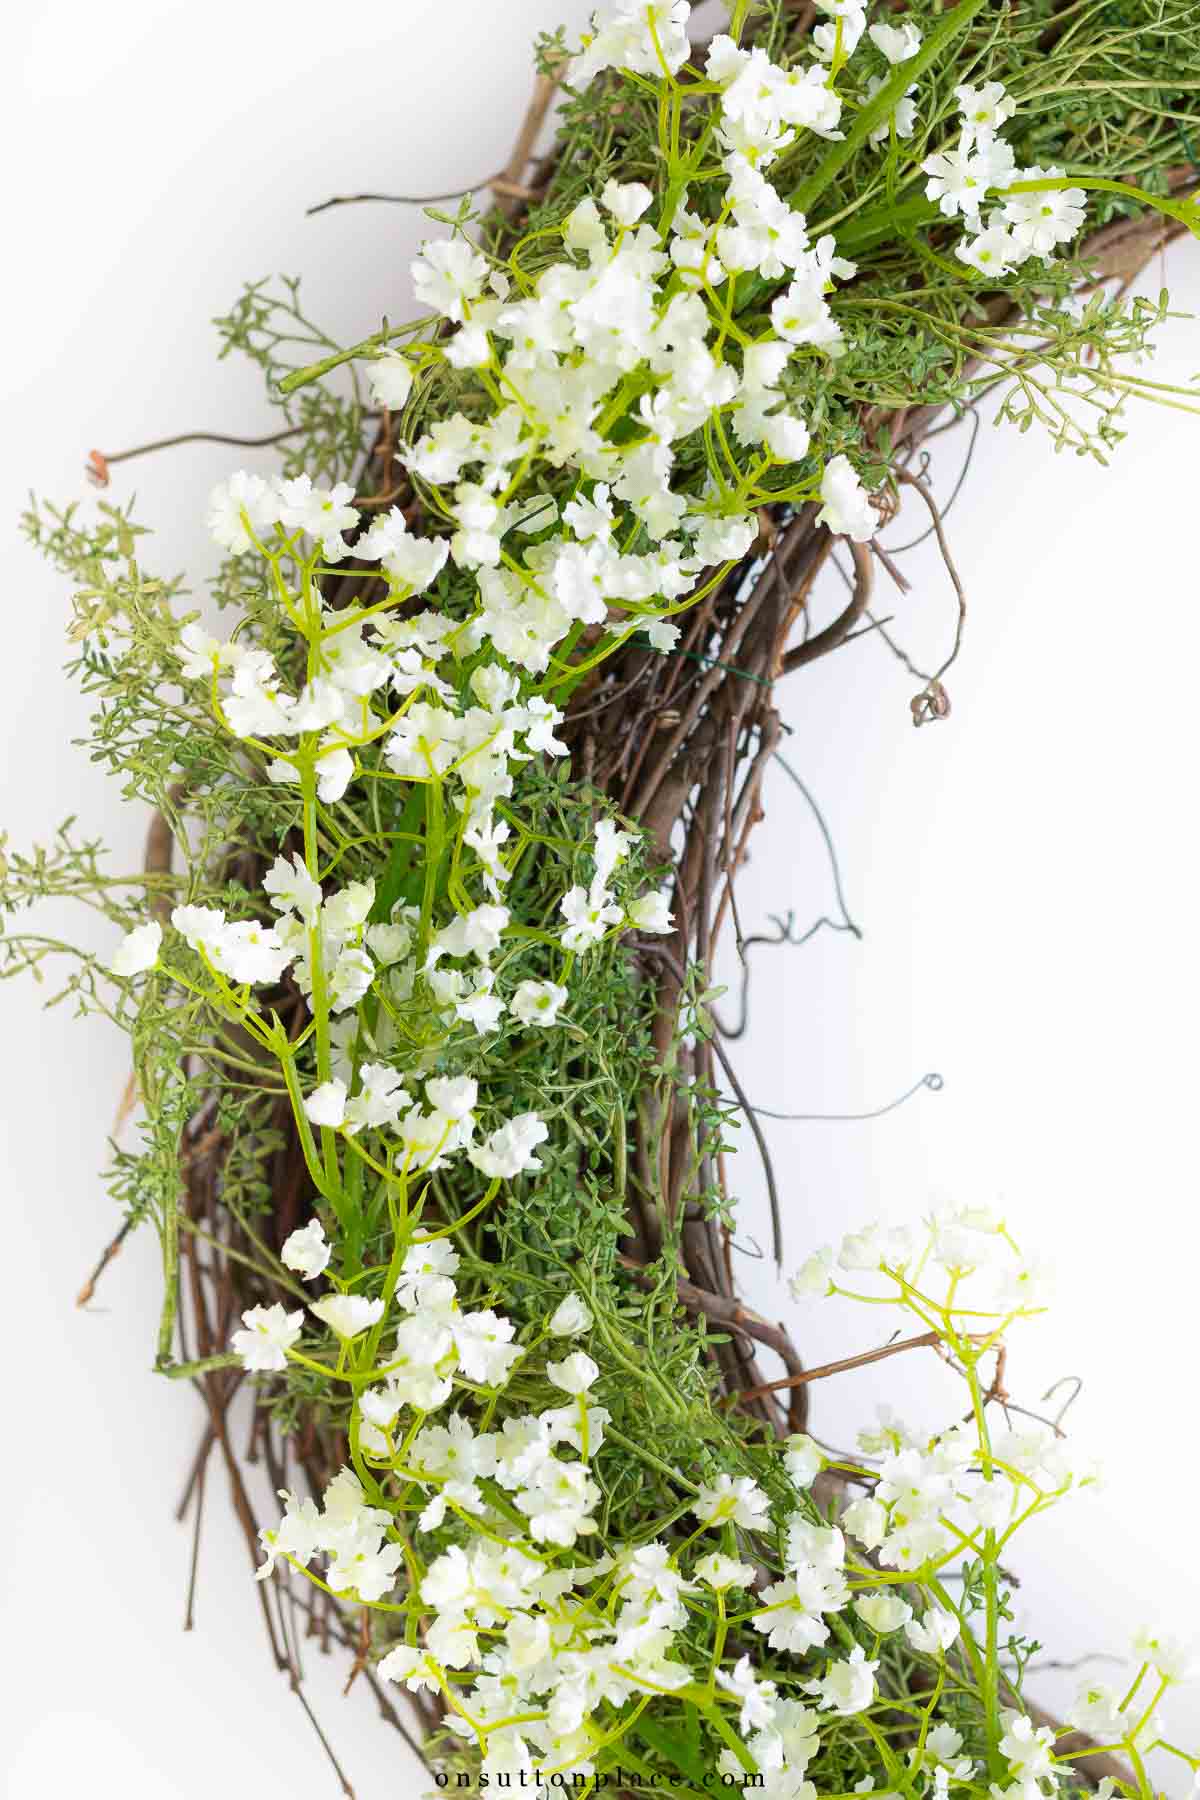
To make a wreath, start with a grapevine base and add layers for fullness. Use greenery or garland to build depth, then attach any decorative elements with floral wire. Finish with a bow or simple accent, placing it slightly off-center for a natural look. This basic method works for almost any style. Once you learn it, you can easily adjust the materials and colors to suit your home or the season.
Supplies You Need
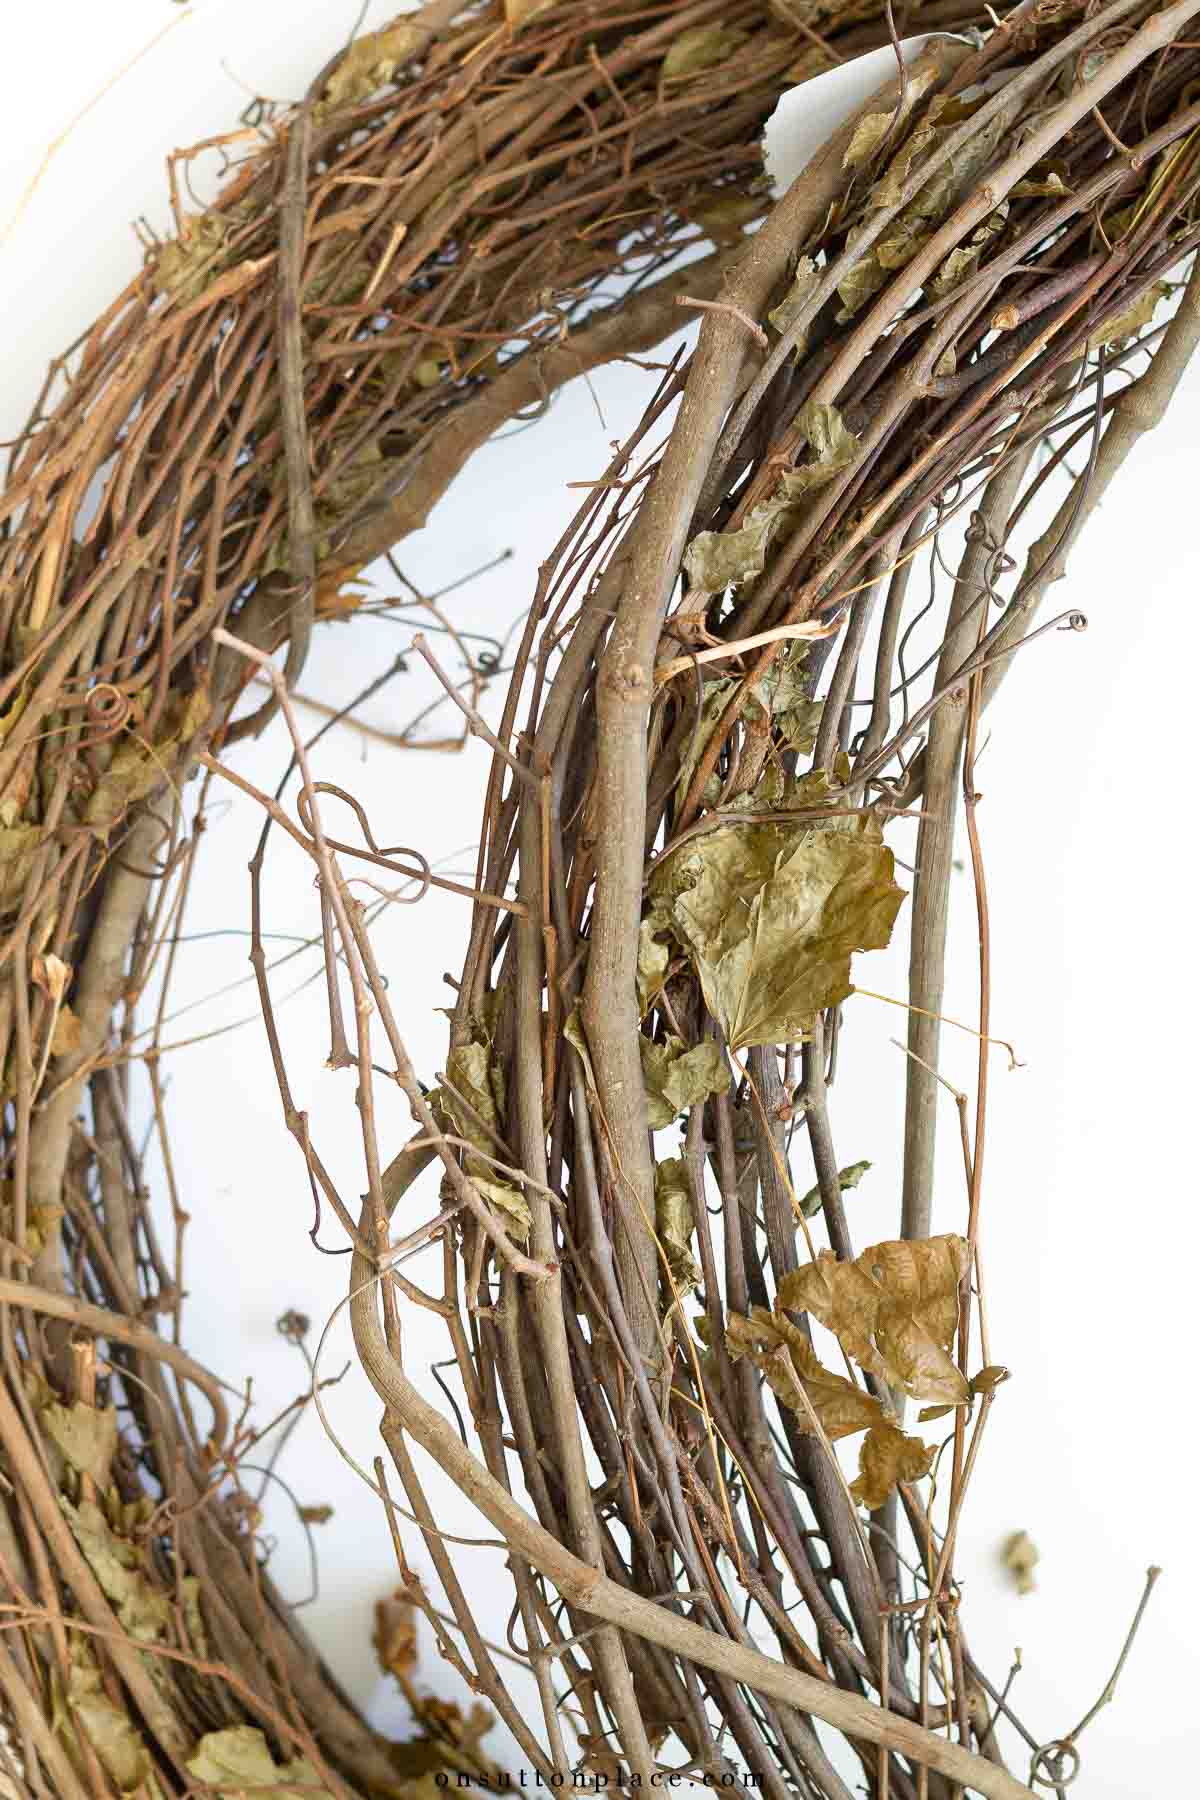
- Grapevine wreath base (use one or layer two for more depth)
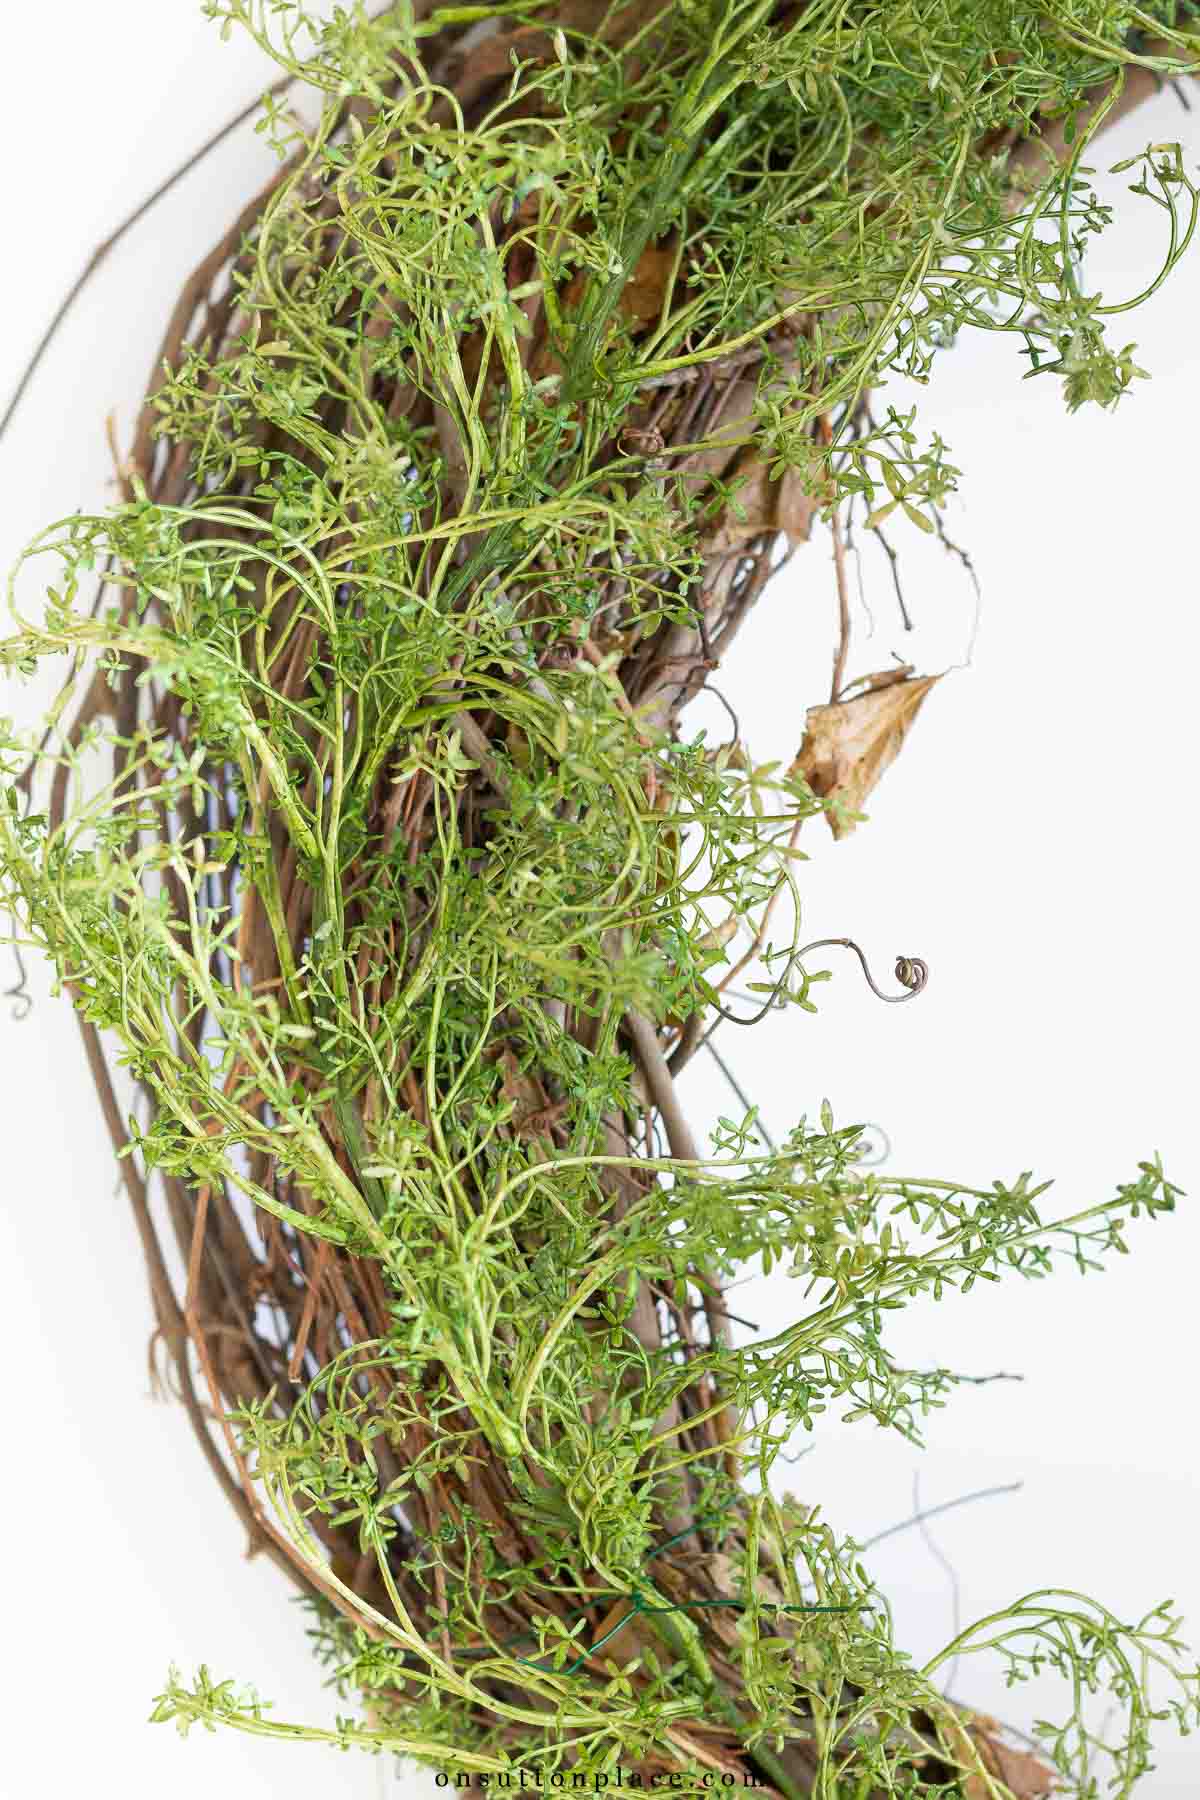
- Baby’s breath garland, greenery garland, or floral stems
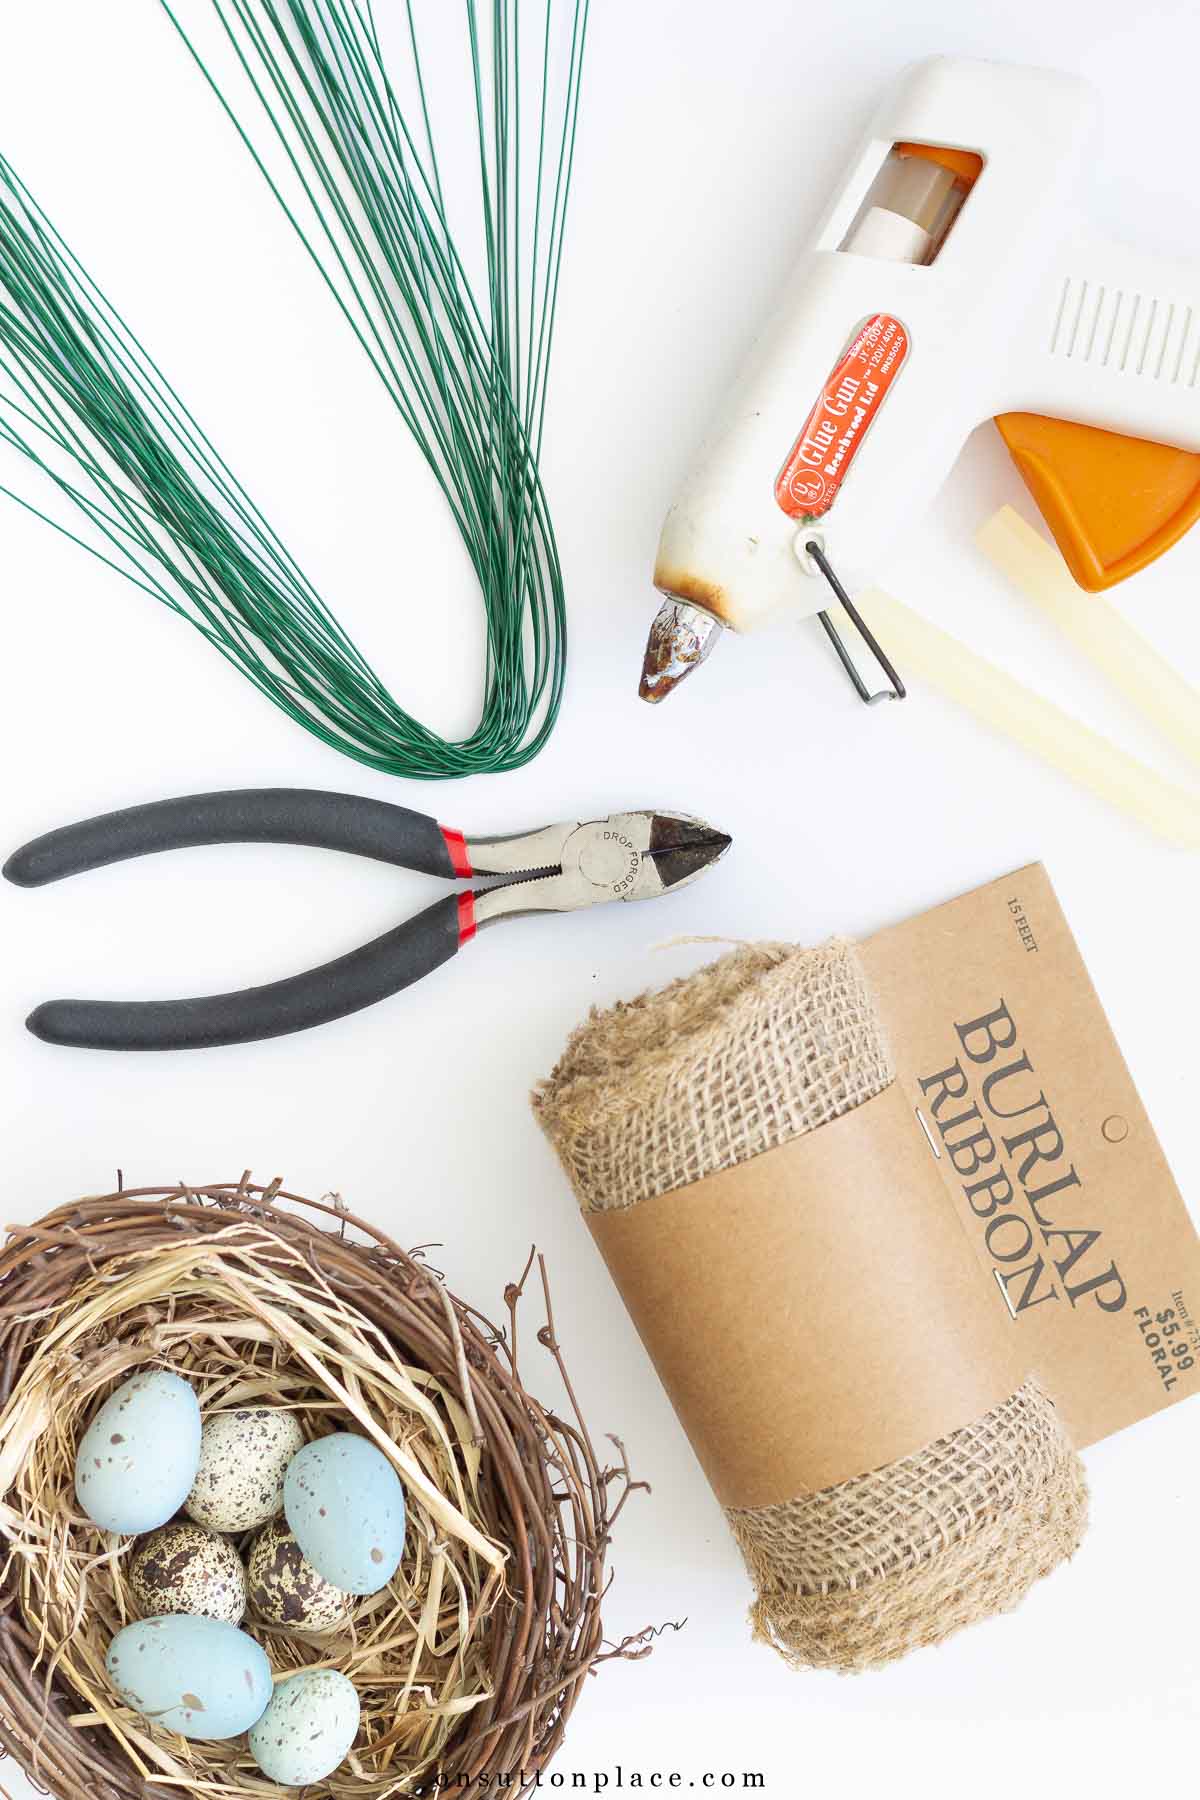
- Floral wire
- Wire cutters
- Glue gun and glue sticks (optional)
- Ribbon or fabric for a bow (optional)
- Small seasonal accents
- Natural elements like nests or branches
- Vintage or collected pieces for a more detailed look
For this wreath, I used a garden-inspired mix of greenery along with a few collected items to give it personality. The exact materials can change, but the method stays the same. If you’re just beginning, keep it simple. A wreath with greenery and a bow is always a good place to start, and you can add more details once you feel comfortable.
Step-by-Step Instructions
- Step 1: Layer the wreath bases for depth. If you want your wreath to look full and substantial, use two grapevine wreaths instead of one. Simply place one on top of the other and secure them together in a few spots with floral wire. This adds instant depth and helps your wreath stand out from the street.
- Step 2: Add greenery or garland. To build fullness, attach greenery or garland around the outer edge of the wreath. Choose something that looks natural and not overly perfect. Lay the greenery along the grapevine and secure it with floral wire, tucking the wire into the branches so it isn’t visible.
- Step 3: Attach a bow (optional). A bow is a simple way to add softness and balance. You can use ribbon, burlap, or fabric, just make sure it has enough width to hold its shape. Attach the bow slightly off-center, around the 4 o’clock position, for a relaxed look. You can also try placing it at the top if you prefer a more traditional style. Here is my tutorial on How to Make a Perfect Bow. A bow can be made from anything…burlap, drop cloth or ribbon by the roll. Just make sure it’s at least 4 inches wide and a good thickness.
- Step 4: Add decorative elements. This is where you can make your wreath unique. For this version, I used a few garden-inspired pieces and layered them onto the wreath using floral wire. Try placing your elements in different positions before attaching them. Once you’re happy with the arrangement, secure everything firmly so it stays in place.
- Step 5: Step back and edit. Before you call it finished, hang your wreath and take a step back. Sometimes removing one item or adjusting placement makes a big difference.

Easy Wreath Ideas You Can Try
Once you learn this simple method, you can change the look of your wreath in so many ways. The steps stay the same, but the materials you choose will give you a completely different result. You can use soft greenery like eucalyptus for an everyday front door wreath, add seasonal stems or florals to match the time of year, or keep it very simple with just a bow and greenery. If you enjoy adding personal touches, try incorporating a few collected items for a more detailed look. If you enjoy decorating your front door, you might also like these ideas: a cute lemon-themed door basket, these 5 easy ways to refresh your front door, and this bright summer front porch decor.

Once you understand the basic steps, making a wreath becomes something you can come back to again and again. You don’t need a lot of supplies or special skills. Just a simple base, a few materials, and a little time. Over the years, I’ve found that the easiest wreaths are often the ones I like the most. A few natural elements, a simple bow, and just enough detail to make it feel finished. If you give it a try, don’t overthink it. Start simple, step back often, and enjoy the process.

JOIN THE OSP COMMUNITY
Sign up to get uncomplicated recipes, unlimited seasonal decor, and
understated ways to refresh your home sent straight to your email inbox!


amazon storefront
Discover simple and affordable
ways to refresh your home.
Follow my Amazon Storefront
for all my favorite finds!
Which color and gauge of wreath wire is the best? I’m guessing if your colors are more holiday/Christmasy, use silver. If it’s more rustic or more greenery is wanted, stick w green to blend better?
Hi Sam! I always use green wire because that’s what I have on hand. It would be fine to match your wreath colors though. Have fun!
Luved it ! You made it simple, easy to understand. Thanks !
So in love with this easy wreath, Ann!
Thank you, Ann. This is a wonderful post! Taught me things I did not know! Thank you!!~~Angela
I enjoy making wreaths, as well. Especially when we lived in Washington and were surrounded by an abundance of different (and free) types of greenery.
Thanks for the tutorial, Ann.
Fondly,
Glenda
So lovely, Ann.
Love it. Looking forward to geting more crafty decorating ideas. Thanks
thanks for those tips! I think I am going to try to make one for spring also!
BEAUTIFUL wreath!!! The bow really makes the whole wreath, it’s lovely! A perfectly put together wreath!
What pretty wreaths. It’s crazy but I’ve never made one myself…and I think I am almost ready! Thanks for sharing your wreath creating tips. I’ve already got some ideas brewing…:) Have a great weekend, Ann!
I love your spring wreath! Thanks for the tutorial!
Oh, my gosh…that wreath is stunning!
Great tips, Ann. Your wreaths are always so beautiful.
All of your wreaths are gorgeous! Thank you so much for sharing your tutorial, lots of great info.! I love the idea of layering two for depth, I will have to give that a try next time. Have a great weekend : )
Thanks so much for the wreath making tutorial. I have been wanting to make one for a long time and you’ve just inspired me to do so. I need a little spring right about now!
I love how that wreath turned out. I never thought to layer 2 grapevine wreaths. Thanks for the tips.
I love your creativity. Beautiful!!
I love making wreaths! Thanks for the inspiration!
This is just the idea I need to cure my spring fever! Thank you for sharing your creativity. :)
Ann, your wreaths are beautiful! Thanks for the tutorial.
Oh, Ann! Such a beautiful and full spring wreath. I make my wreaths the same way,using two grapevine wreaths as a base. It just makes it so full and professional looking!
I adore the bow too!!!! A masterful job indeed!
Love this! That wreath is gorgeous! ANd the tip for the 2 wreaths…I didn’t know?? Picking up my jaw now. And, now I am going to try a wreath again. Maybe now I can achieve wreath awesomeness!