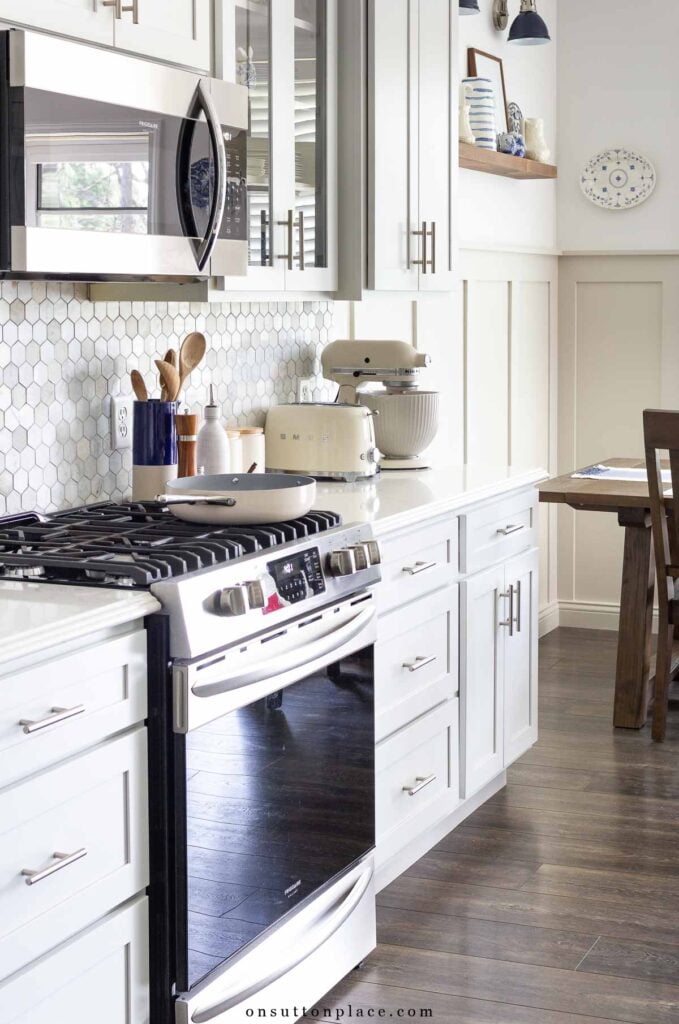
For years, I believed our small kitchen would never truly work. The cabinets felt crowded, the corners were dark and impossible to reach, and no matter how much I straightened up, the frustration always returned. I even convinced myself that the only real solution was a full renovation. But what I eventually discovered was this: our kitchen didn’t need to be gutted. It needed systems.
By emptying each cabinet, editing what we actually use, and adding a few practical tools in the right places, everything changed. The space didn’t grow, but it became functional. I could see what we had. I could reach what we needed. And for the first time in years, I felt at ease in my own kitchen. If you’re working with a small kitchen, older cabinets, or awkward layouts, these kitchen cabinet organization ideas are designed to help you make the most of what you already have, without tearing everything out and starting over.
This post may contain affiliate links. See my disclosure statement.

Start Here: A Simple 4-Step System That Works
Before I purchased a single bin or moved a single shelf, I followed the same four steps with every cabinet in our kitchen. This simple process kept me focused and prevented me from rearranging clutter instead of truly organizing it. I found that if I skipped even one of these steps, the results never lasted. This method works in pantries, drawers, under the sink, and even inside the refrigerator. It’s the foundation of every small kitchen organization system in this post.
- Empty the space. Take everything out. Yes, everything. It’s the only way to see what you actually have and how much room you’re truly working with.
- Clean the space. Wipe down shelves, vacuum crumbs, and start fresh. A clean cabinet makes it much easier to put things back with intention.
- Edit ruthlessly. If you don’t use it, need it, or love it, let it go. Small kitchens cannot afford to store “just in case” items. Keeping only what you truly use is what creates breathing room.
- Restore order with purpose. Now it’s time to bring items back in. Group like things together, think about how often you use them, and choose simple tools that support access and visibility.
Small Kitchen Organization Principles
Once I finished organizing the first cabinet, I realized something important: small kitchens don’t need more space. They need better strategy. These simple principles guided every decision I made and kept me from slipping back into old habits.
- Store by frequency. Keep everyday items at eye level and within easy reach. Store seldom-used items higher up, farther back, or in less convenient cabinets.
- Keep daily items at the front. In a small kitchen, anything pushed to the back might as well not exist. Use bins, risers, or turntables so nothing gets lost.
- Make hard-to-reach spaces work. High shelves, deep cabinets, and awkward corners need the right tools. Lazy Susans, shelf risers, pull-out trays, and handled baskets.
- Eliminate stacking whenever possible. If you have to move three things to reach one, the system isn’t working. Use dividers or simply reduce what you own.
- Use clear, uniform containers. Visibility prevents waste and keeps categories from blending together.
- Work with what you already have. Adjust shelf heights, use built-in features, and reuse baskets before buying new containers.
Pantry Cabinet Organization Ideas
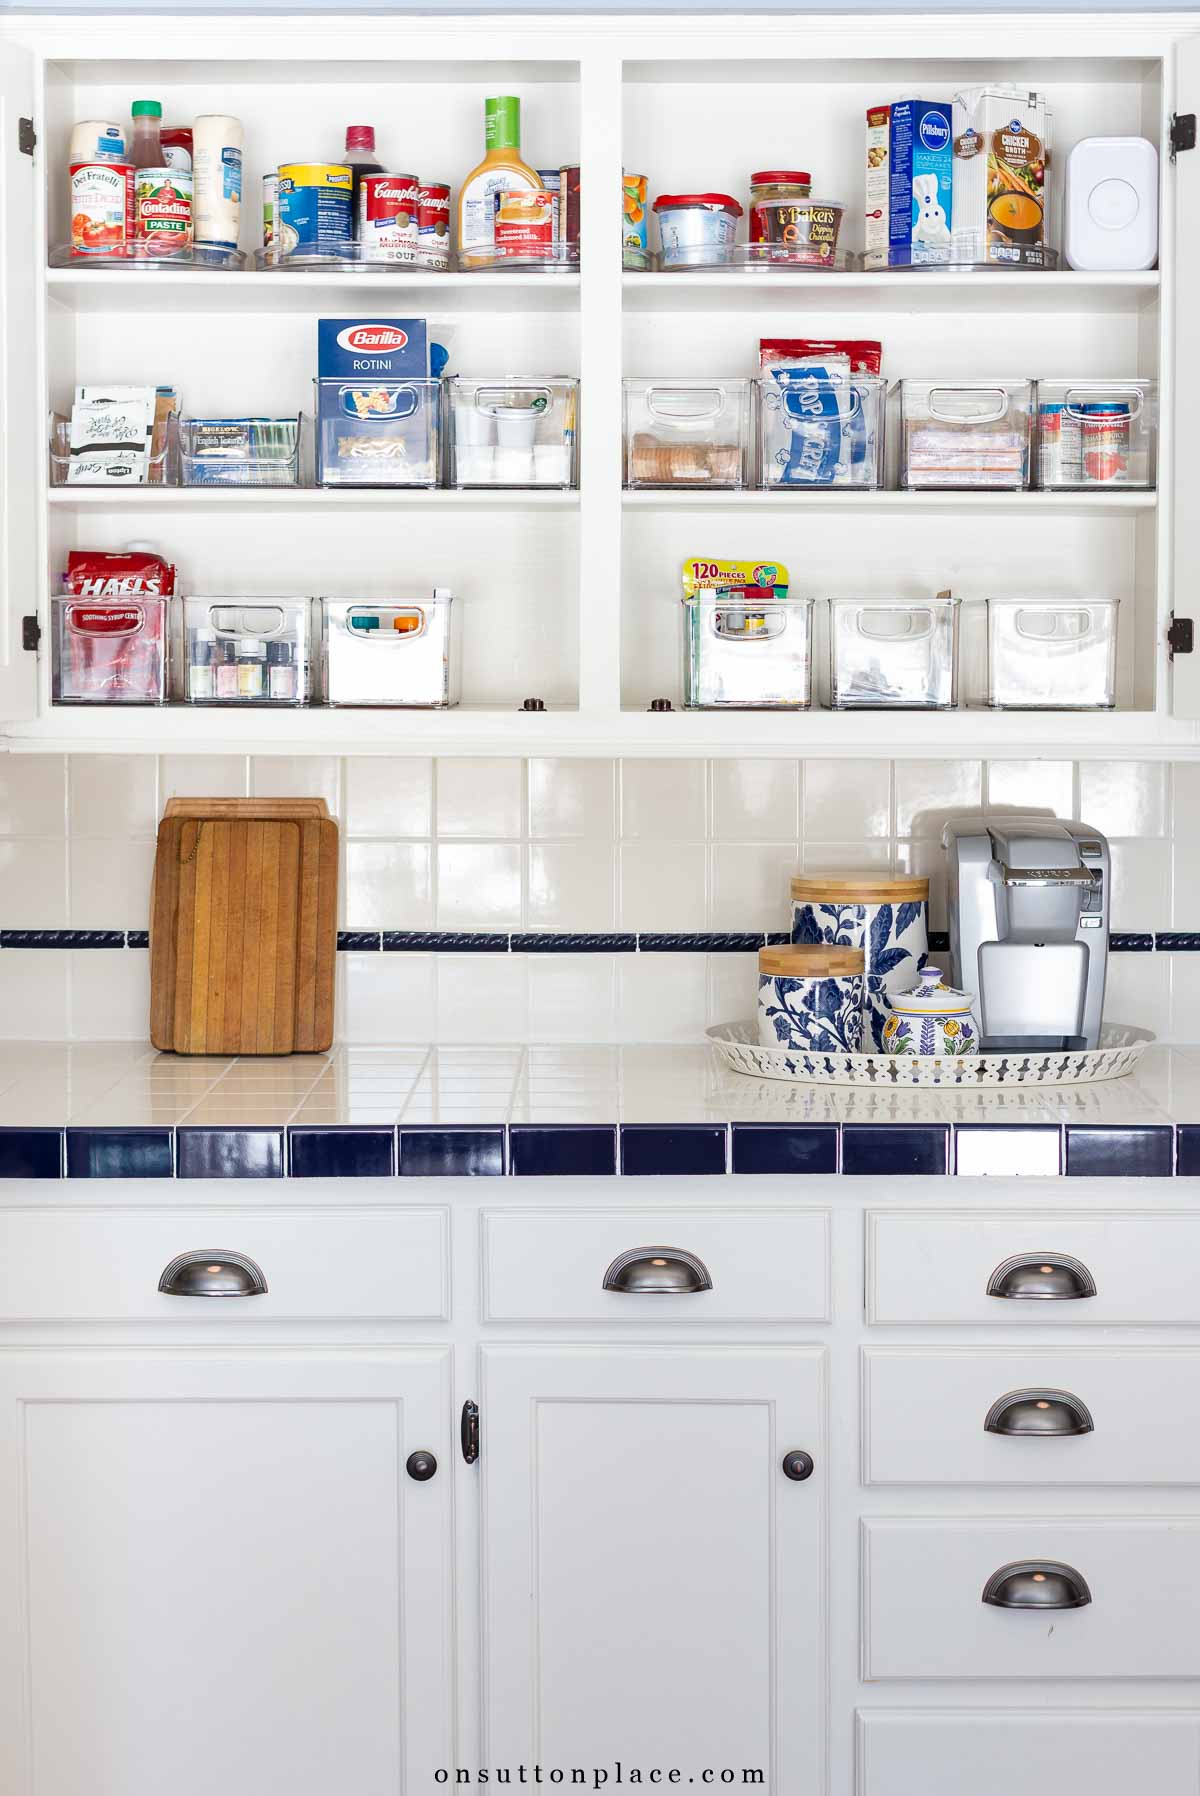
In a small kitchen, the pantry often isn’t a walk-in closet. It’s a single cabinet doing a big job. When shelves are shallow or placed too high, it’s easy for food to get pushed to the back and forgotten. The biggest improvement I made was focusing on access and visibility instead of trying to fit more inside. I started by zoning each shelf so everything had a logical place:
- Top shelf: canned goods and items I don’t use often
- Middle shelf: snacks, coffee, tea, and everyday staples
- Bottom shelf: miscellaneous items and things I need within reach
Instead of tall opaque bins, I switched to smaller clear containers that could be lifted in and out easily. Being able to see what was inside each bin immediately reduced clutter and overbuying. For deep or high shelves, lazy Susans made all the difference. I can’t easily reach the back of an upper shelf, but I can turn a tray, and that small shift transformed a frustrating space into one that actually works. It isn’t fancy, but it’s functional, and that’s what matters most.
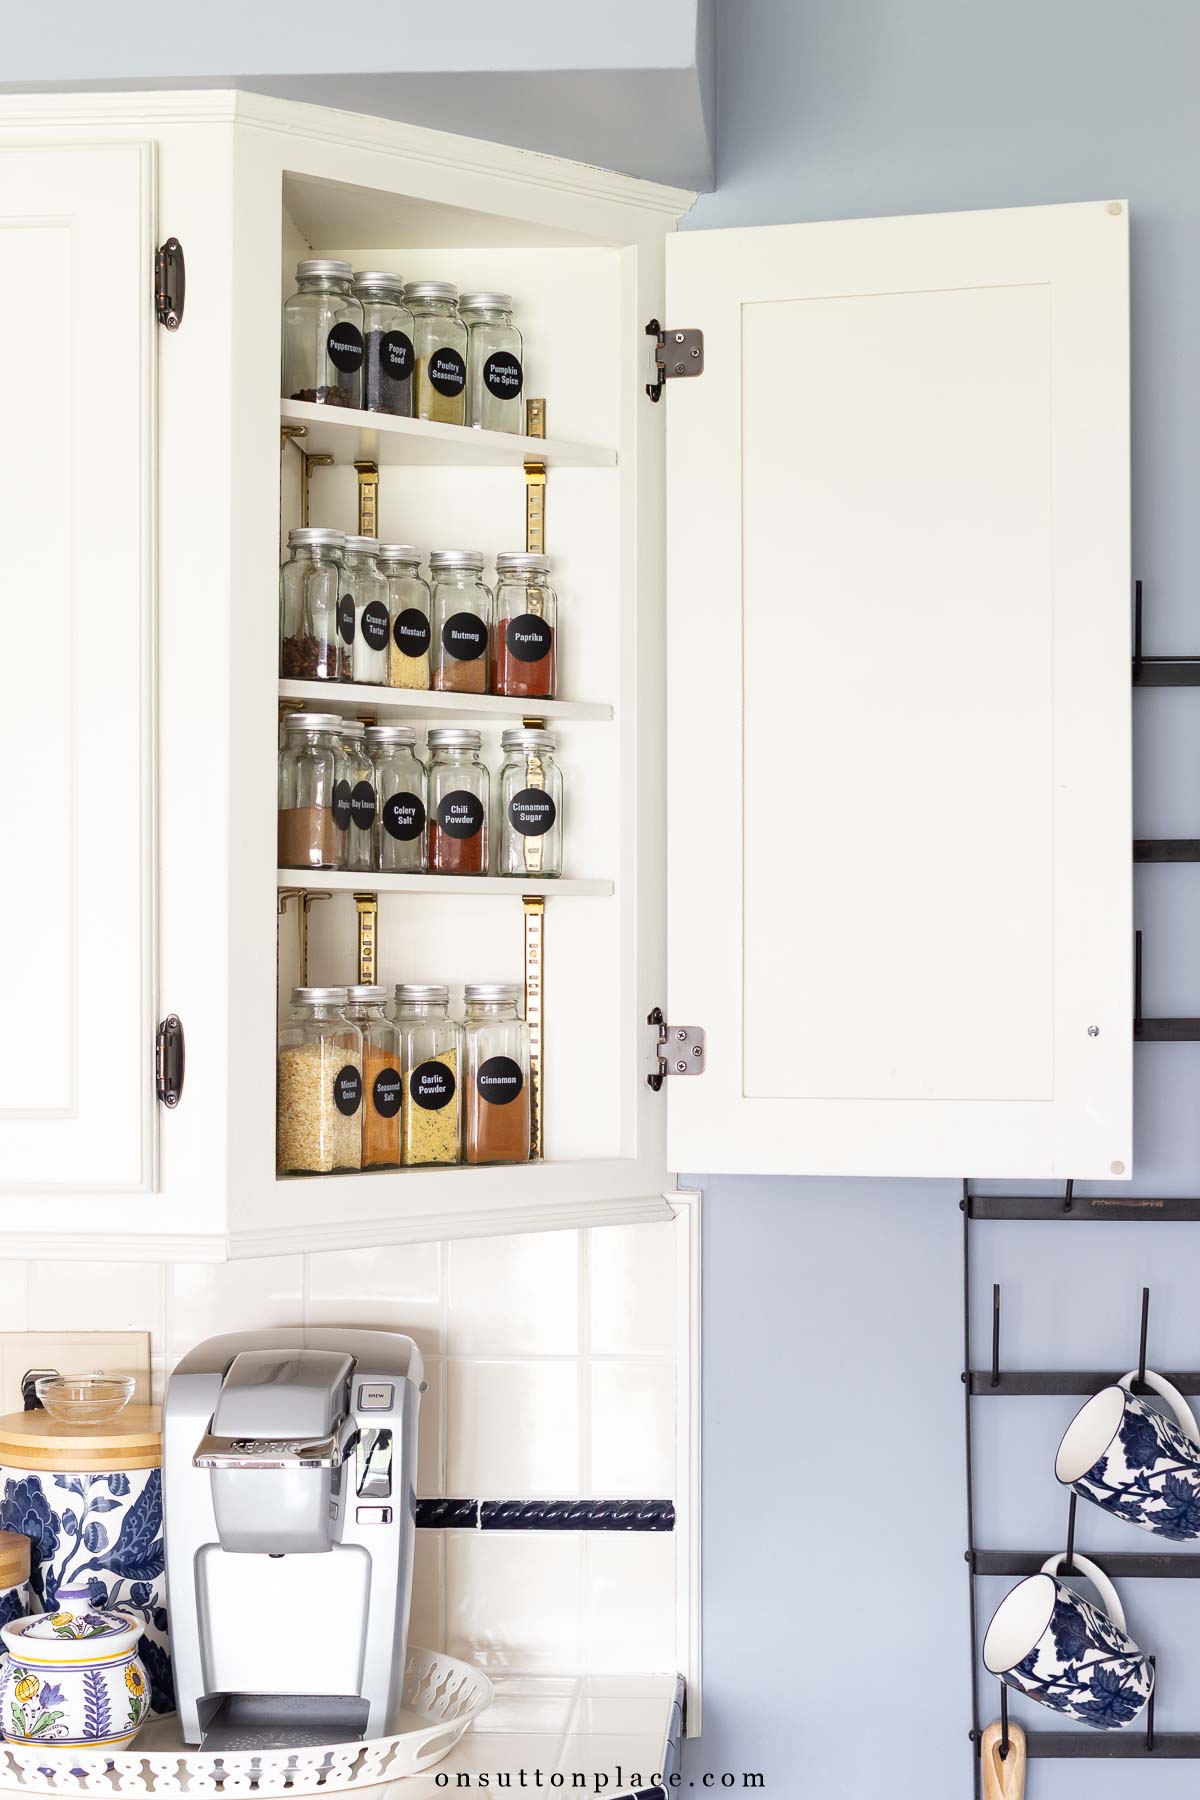
Baking Cabinet & Spice Storage Solutions
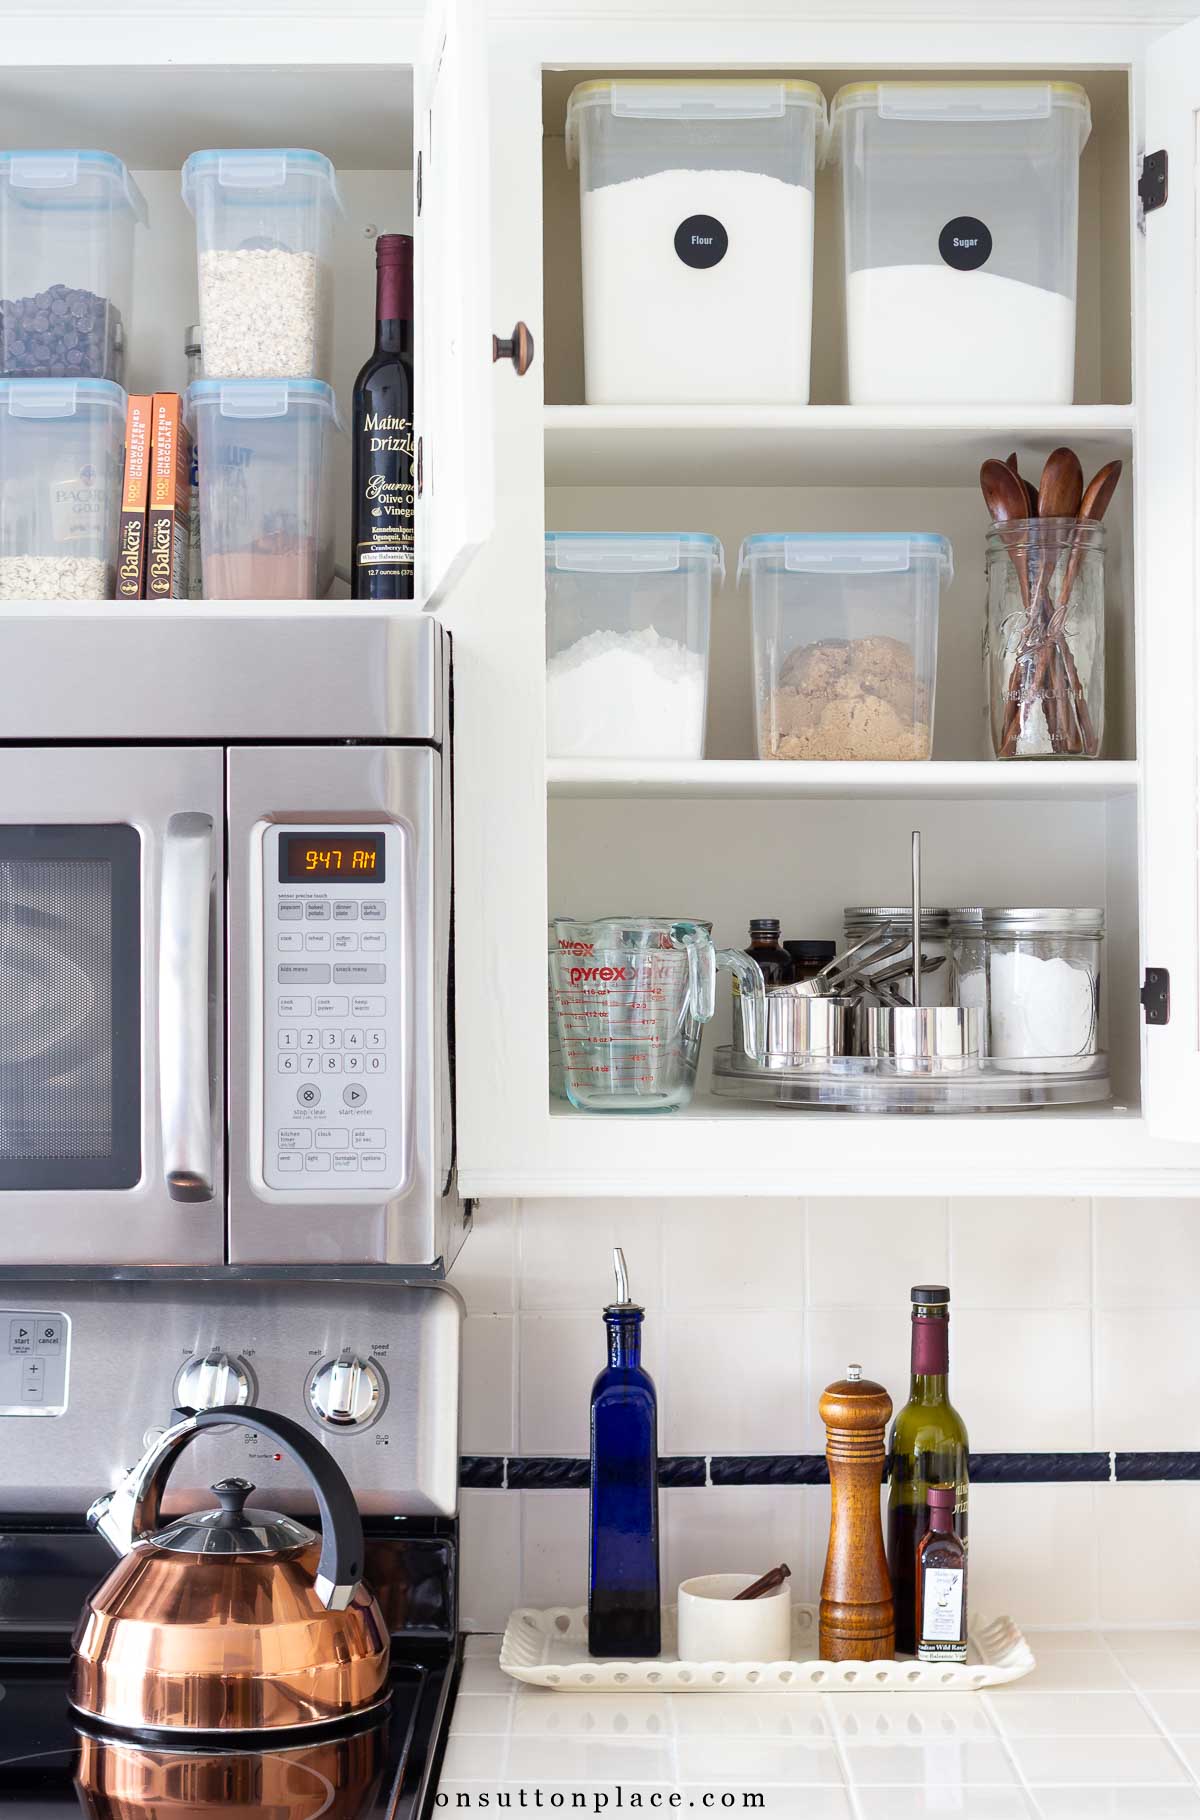
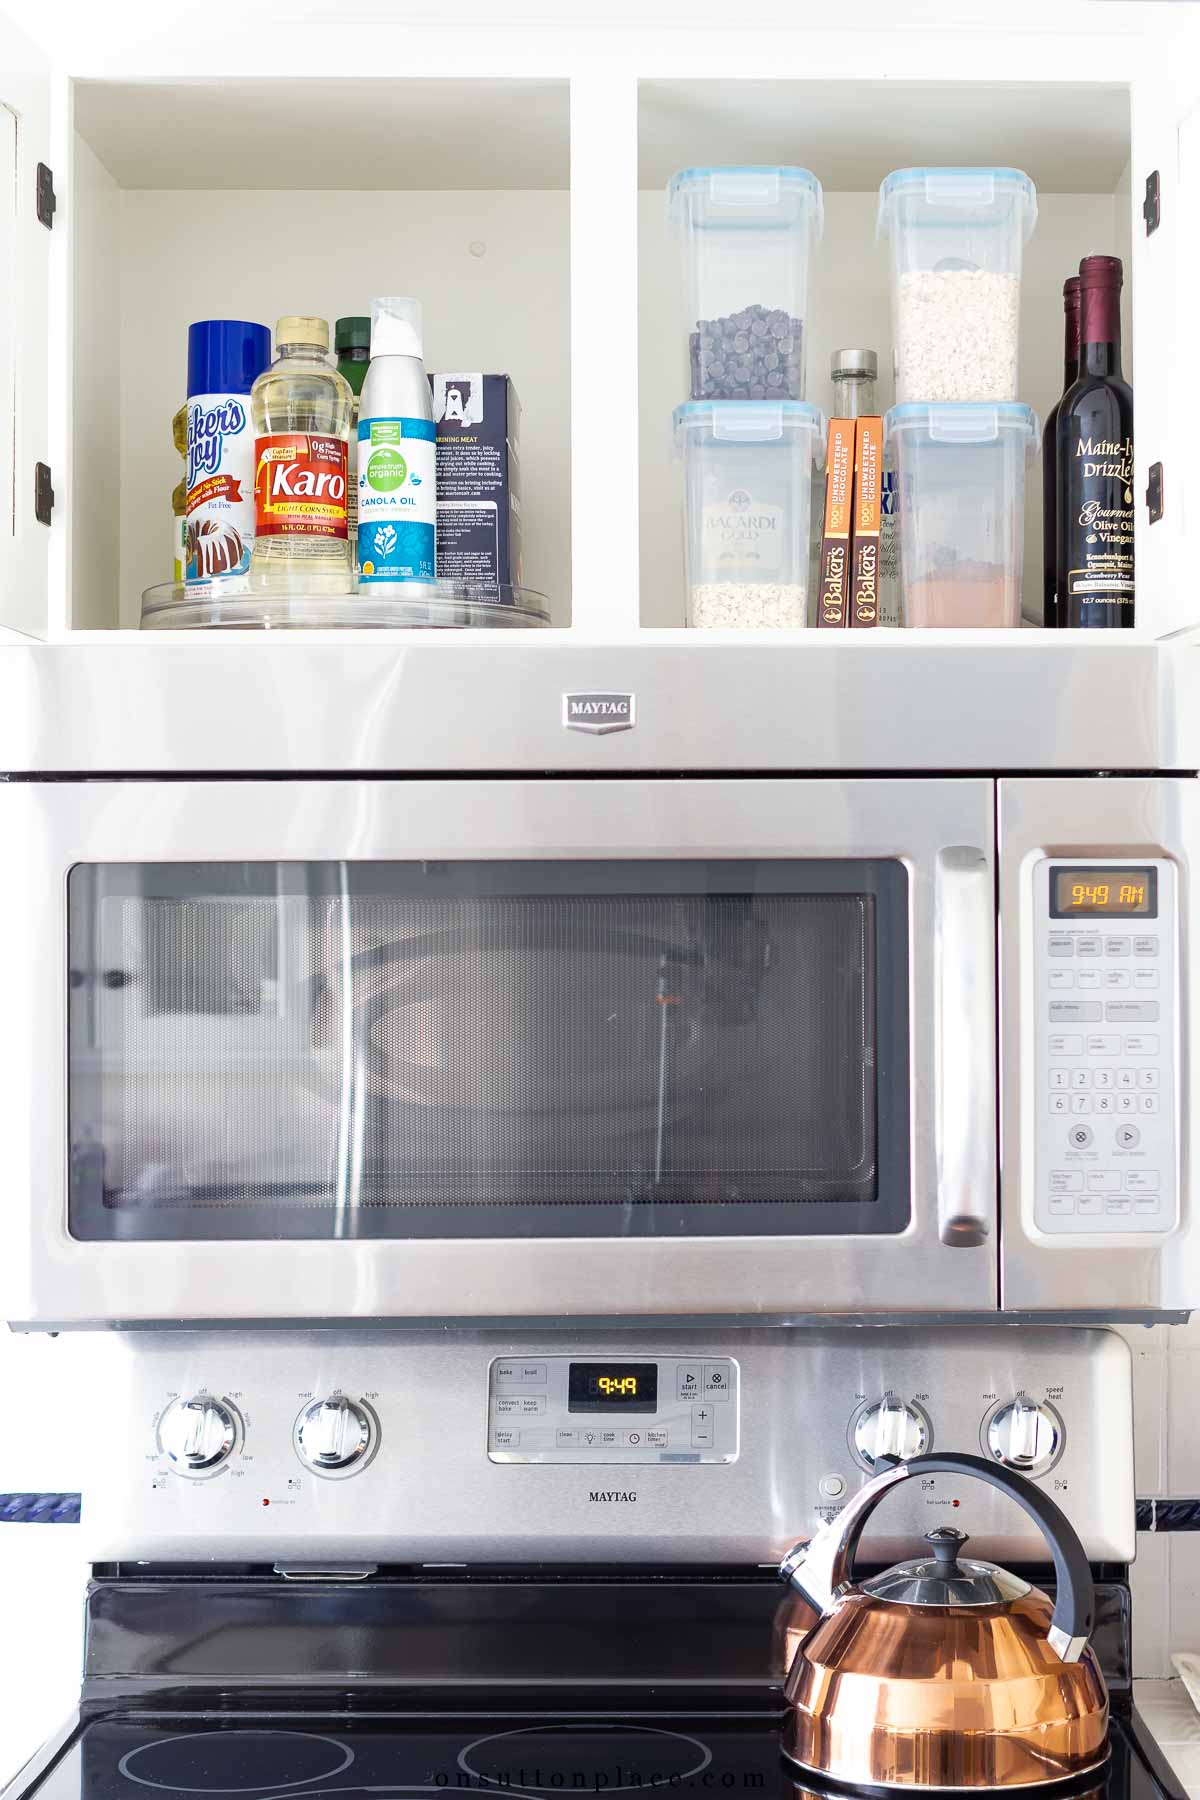
Baking cabinets can quickly become overcrowded, especially in a small kitchen where flour, sugar, spices, and mixing tools are competing for space. For years, I kept bulk ingredients on the counter in heavy glass canisters, but they were messy and took up valuable workspace. Moving everything into the cabinet, in containers that actually fit the shelves, made a dramatic difference. Here’s what worked best in this space:
- Airtight containers sized for the cabinet height so flour and sugar could sit at the front of the top shelf without being difficult to reach.
- Shelf zoning by frequency, with everyday baking tools on the lowest, most accessible shelf.
- A lazy Susan to keep smaller baking items grouped and easy to grab.
- Uniform spice jars with labels so everything looks consistent and is easy to identify.
- Expiration dates placed on the bottom of each jar using removable labels. Simple to update and completely out of sight.
Once everything had a designated spot, baking became easier because I wasn’t constantly shifting things around to find what I needed. Uniform containers reduced visual clutter, and grouping like items together brought a sense of order that lasted. In a small kitchen, that kind of consistency makes all the difference.
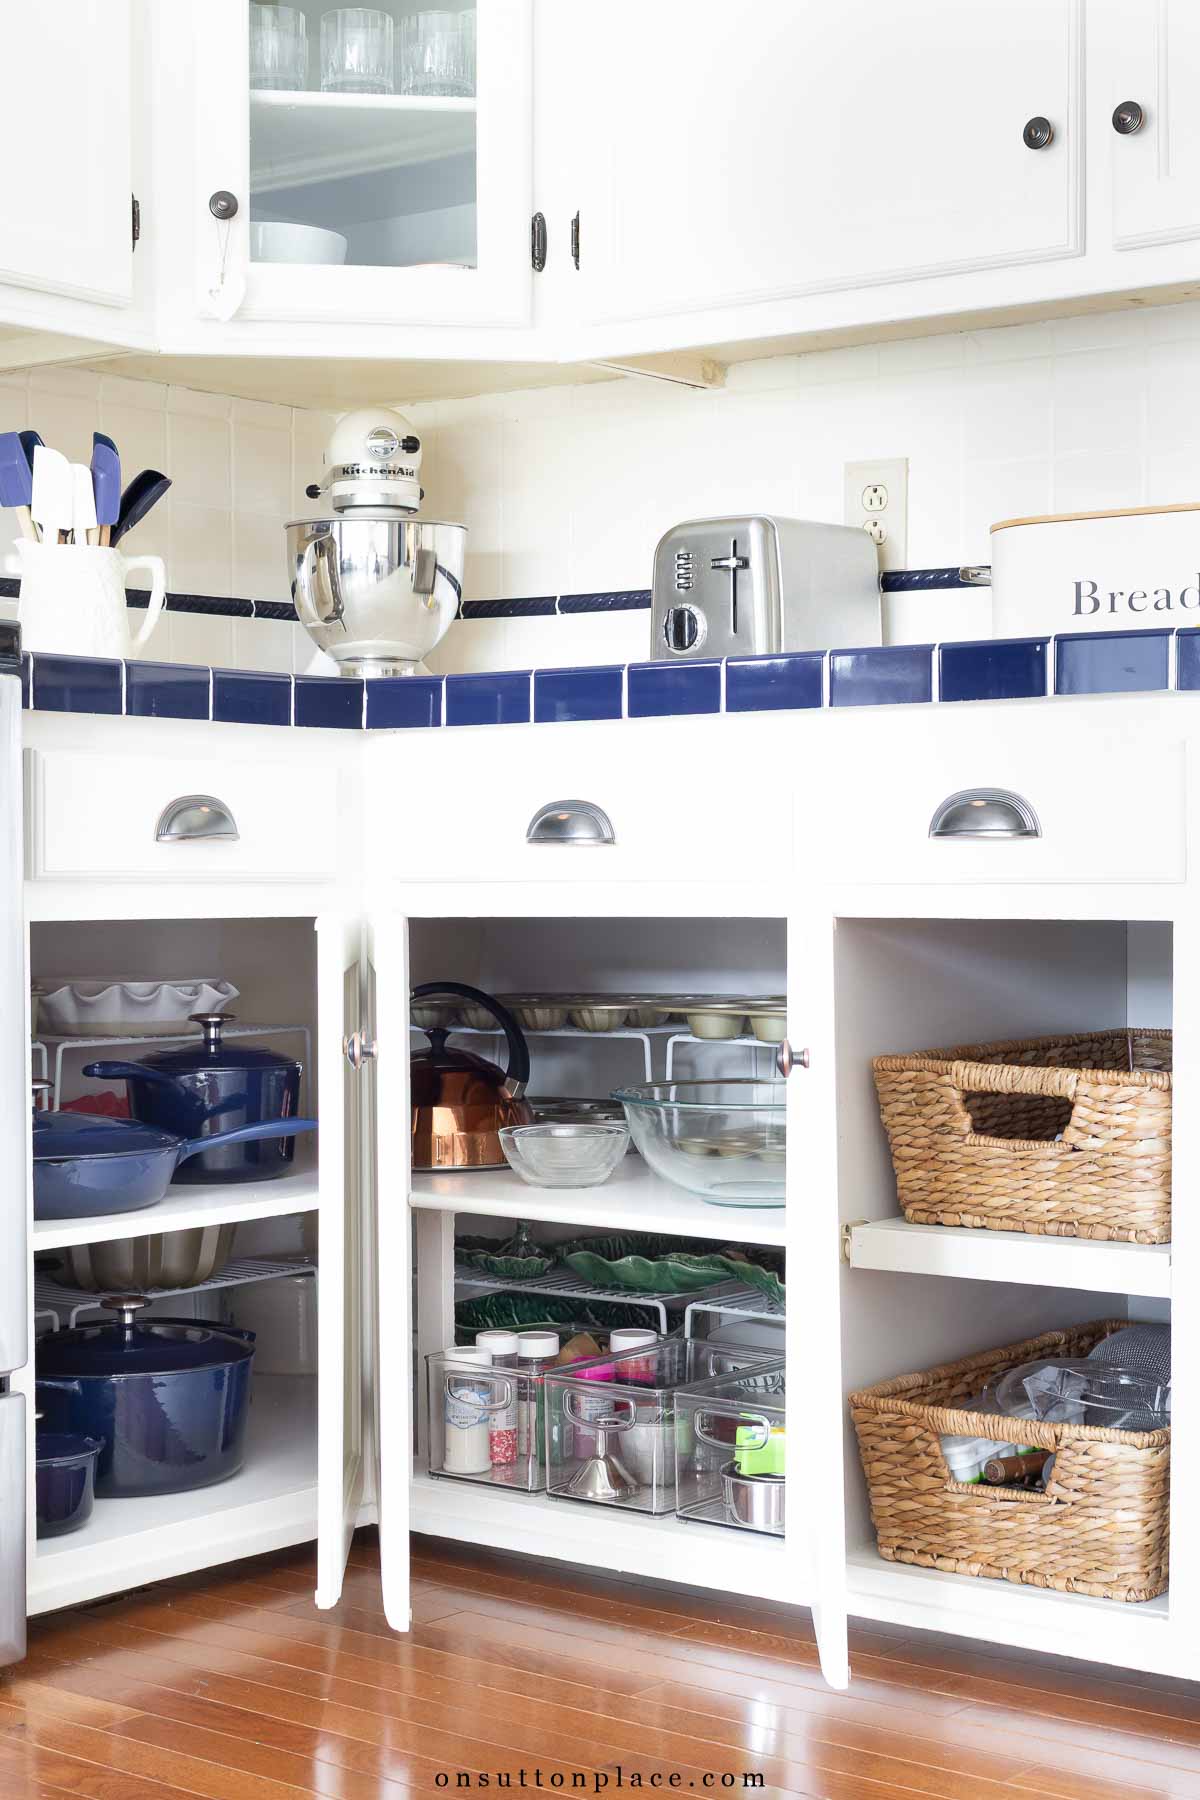
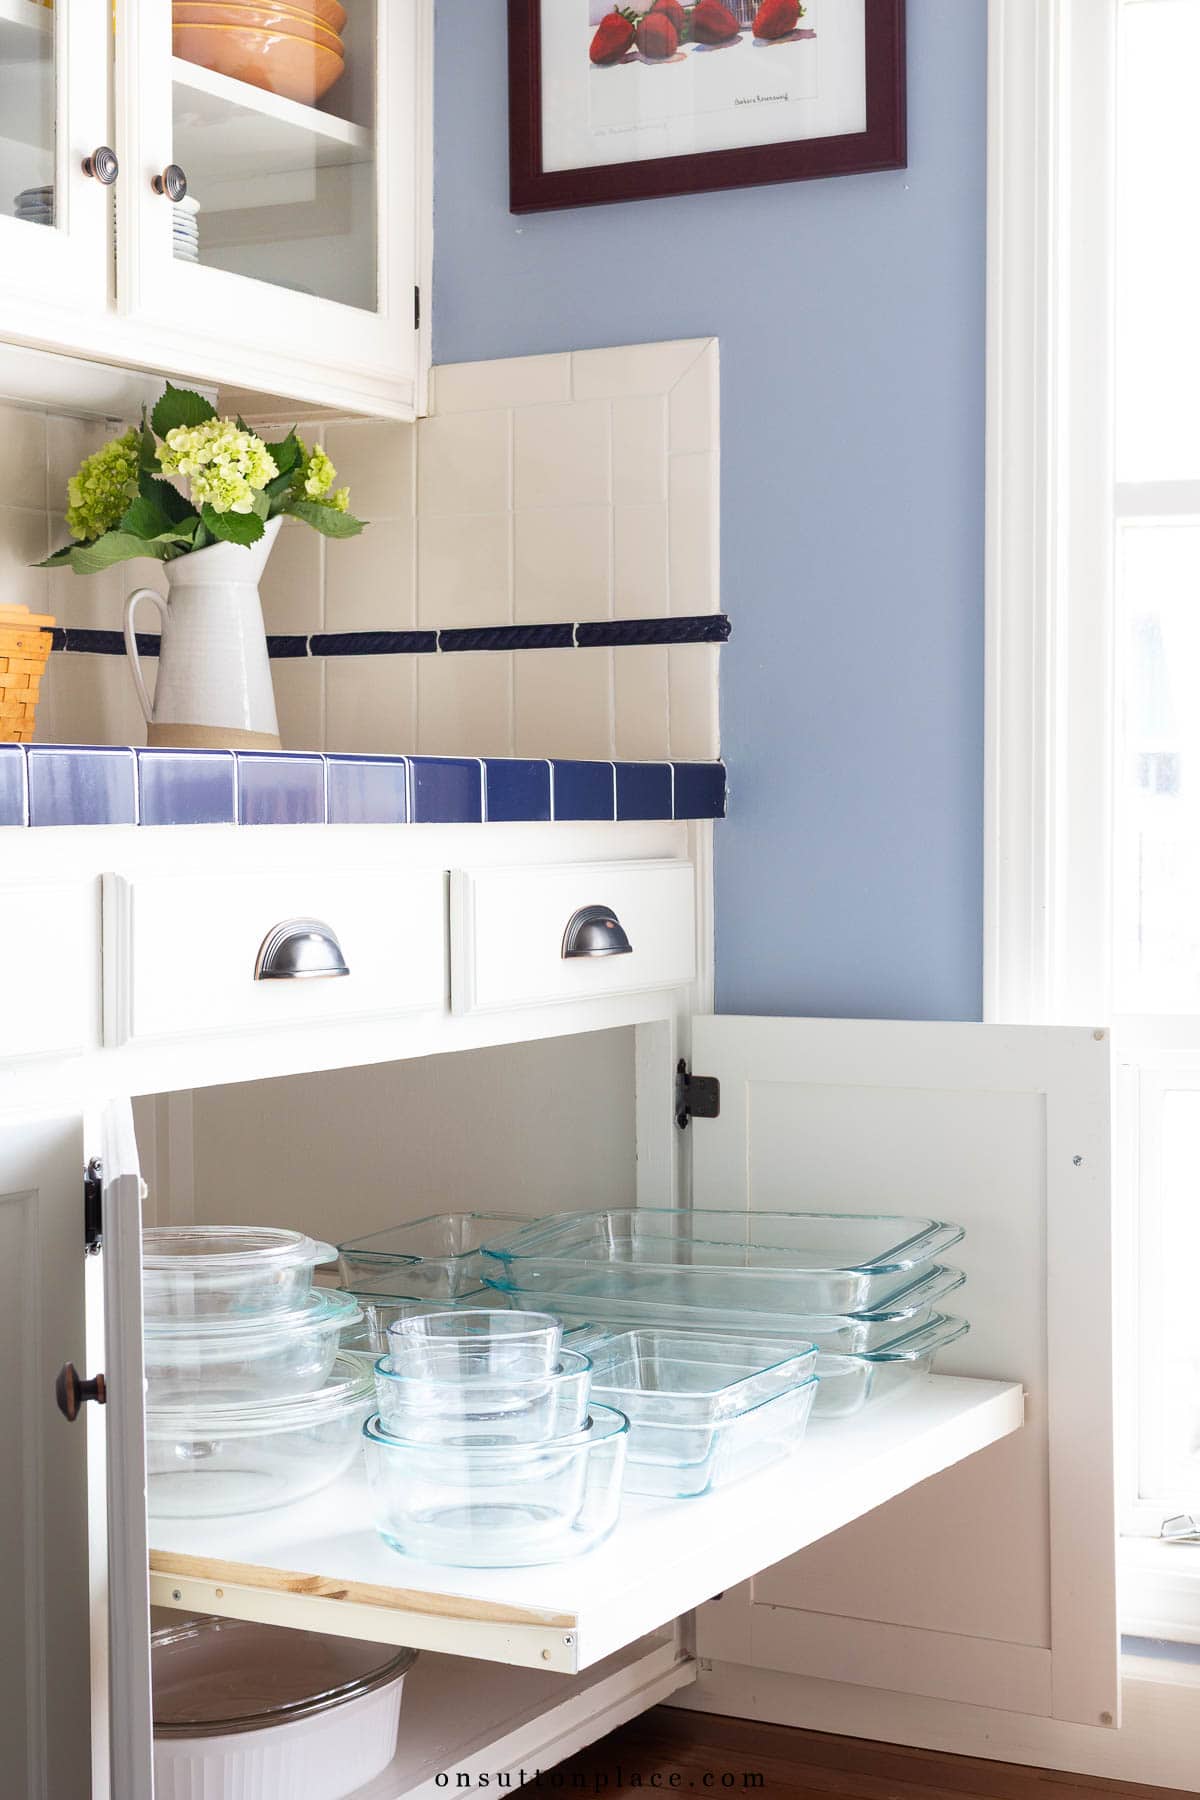
Cookware & Corner Cabinet Storage Ideas
Corner cabinets and deep lower cabinets can feel like black holes. For years, pots and pans were stacked on top of each other, and anything stored in the back was nearly impossible to reach. I realized that the problem wasn’t the cabinet itself. It was how I was using it. These changes made the biggest impact:
- Shelf risers to create levels in deep cabinets so items in the back could be stored without stacking.
- Storing seldom-used pieces toward the back and keeping everyday cookware at the front.
- Reducing the number of pots and pans so only the pieces we truly use take up valuable space.
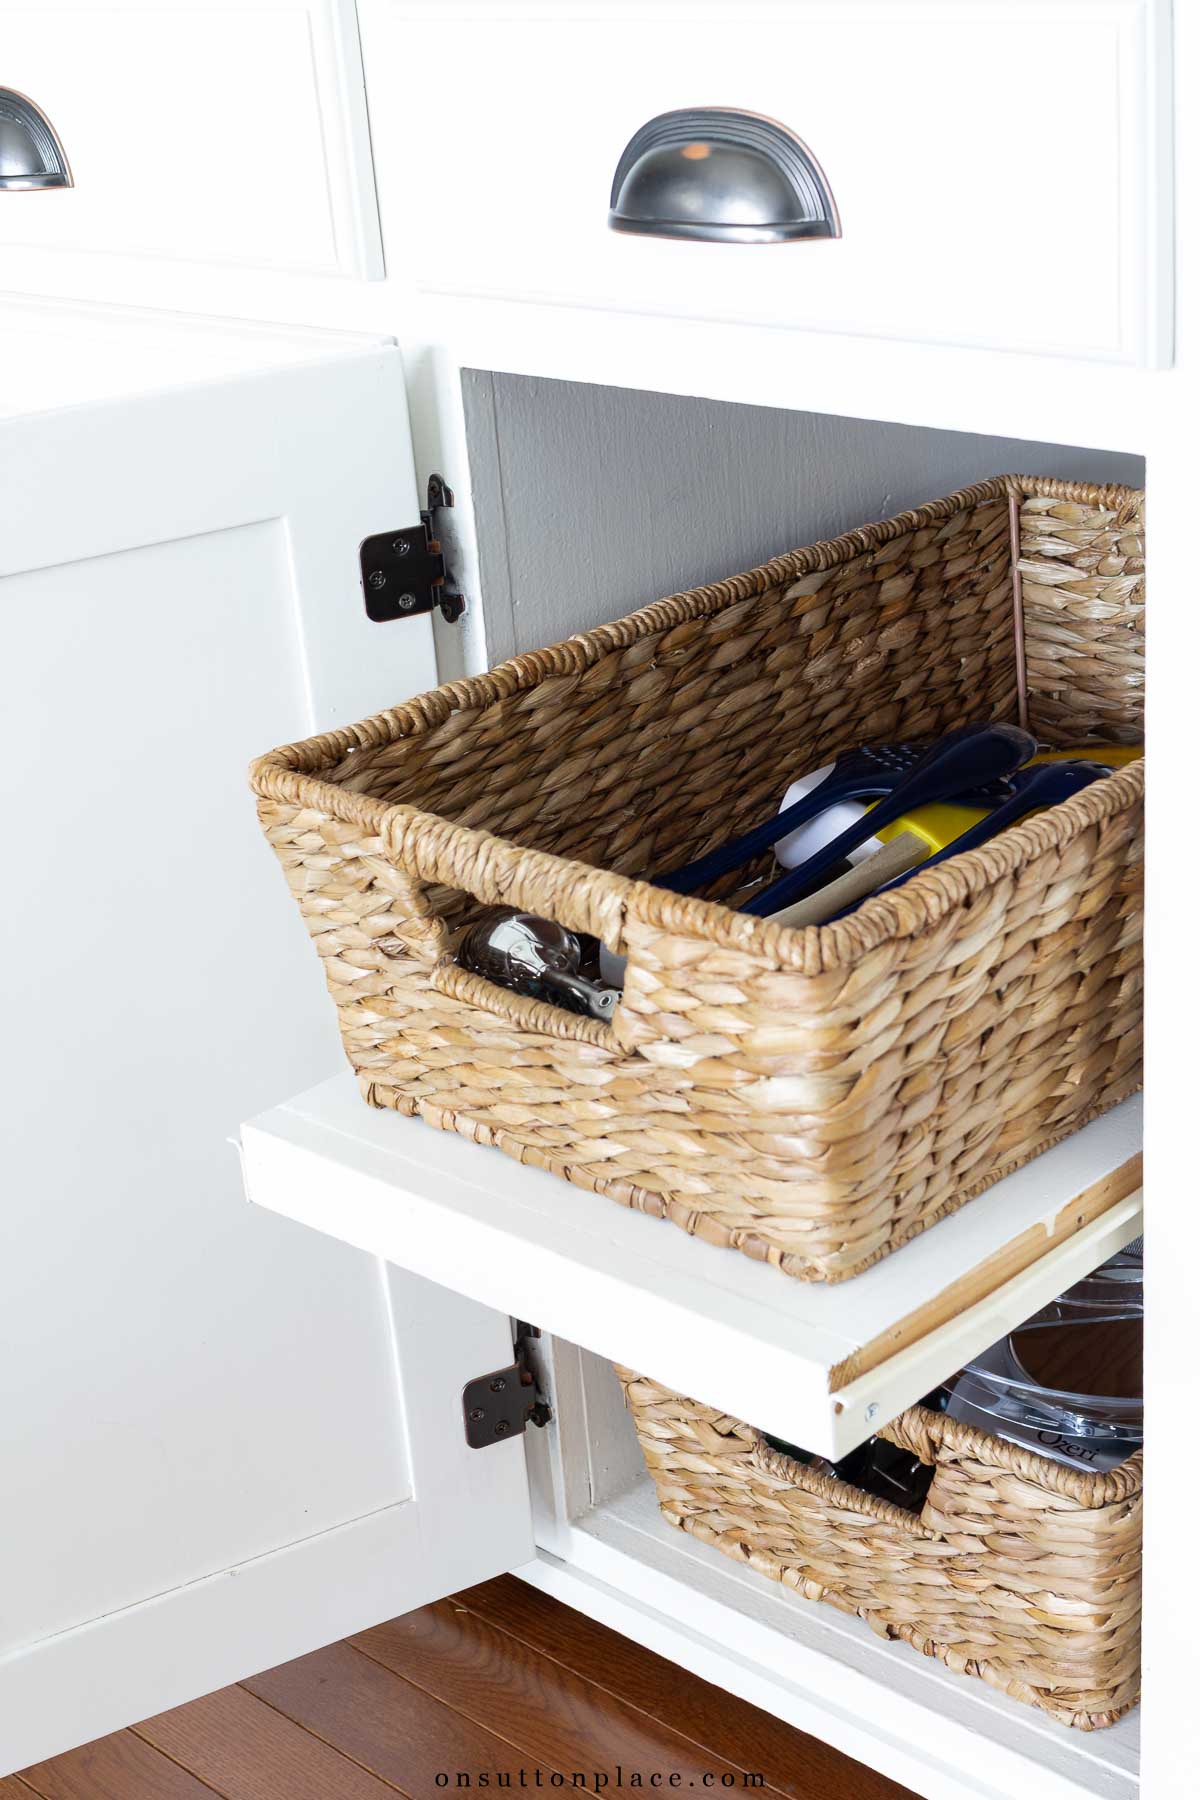
- Using baskets in narrow cabinets to create “drawer-like” zones for utensils and smaller items.
- Taking advantage of pull-out shelves to store heavier pieces where they can be accessed easily.
The most surprising improvement came from simply owning fewer pieces. When I replaced mismatched cookware with a smaller, more functional set, I gained both space and ease. In a small kitchen, eliminating stacking and reducing excess creates breathing room you can actually feel every day.
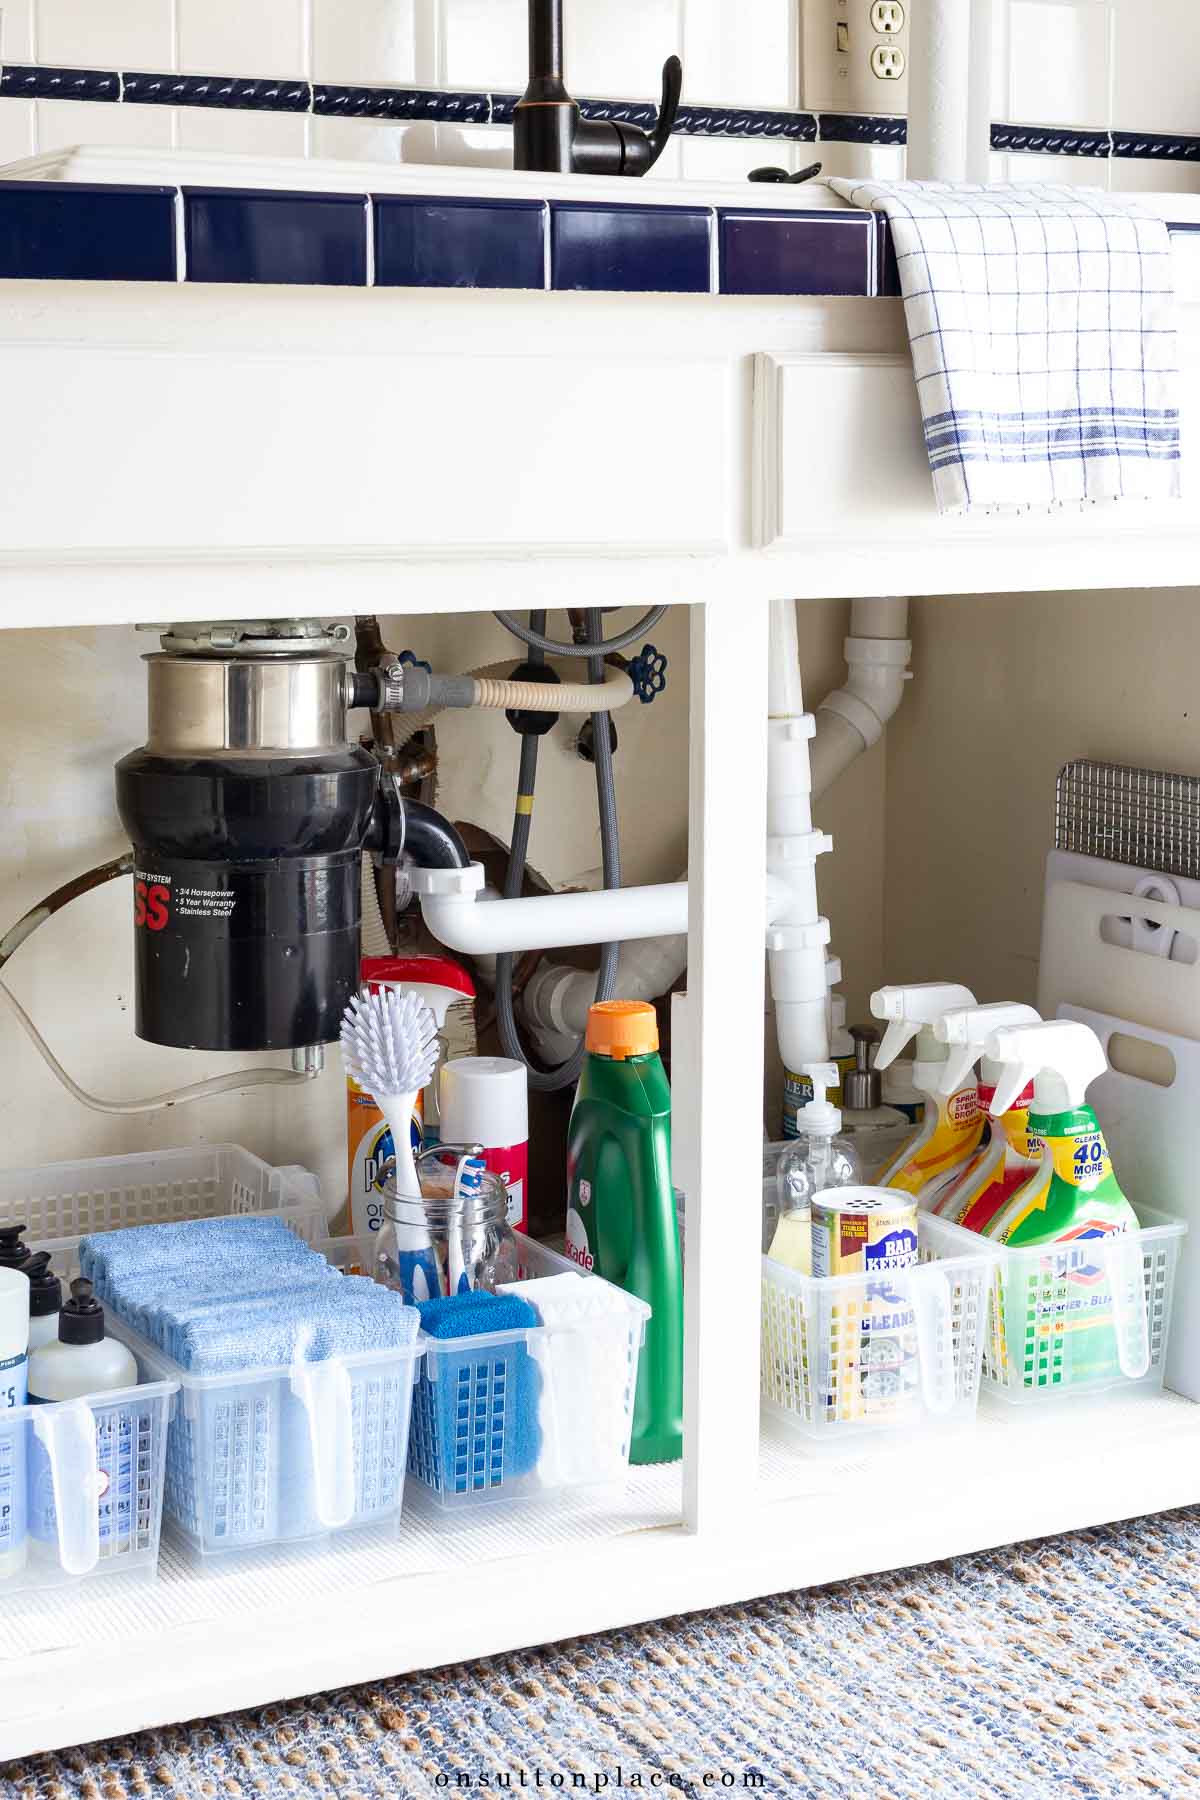
Under Kitchen Sink Organization Ideas
The cabinet under the kitchen sink comes with built-in challenges. Plumbing, uneven space, and limited height. It’s easy for cleaning supplies to get pushed to the back, where they’re forgotten or hard to reach. Instead of trying to fit more into this cabinet, I focused on keeping only what we actually use and making those items easy to access. By simplifying what lived under the sink and keeping daily-use items at the front, this cabinet became functional instead of frustrating. It doesn’t need to look perfect. It just needs to work. And when it works, maintaining it becomes much easier.
- Lining handled baskets along the front so everyday supplies are within reach.
- Grouping similar items together instead of scattering them throughout the cabinet.
- Storing tall or flat items vertically along the side walls to maximize usable space.
- Removing anything we didn’t regularly use so the cabinet didn’t become overcrowded.
- Relocating the trash can to another cabinet (if possible) to free up valuable room.
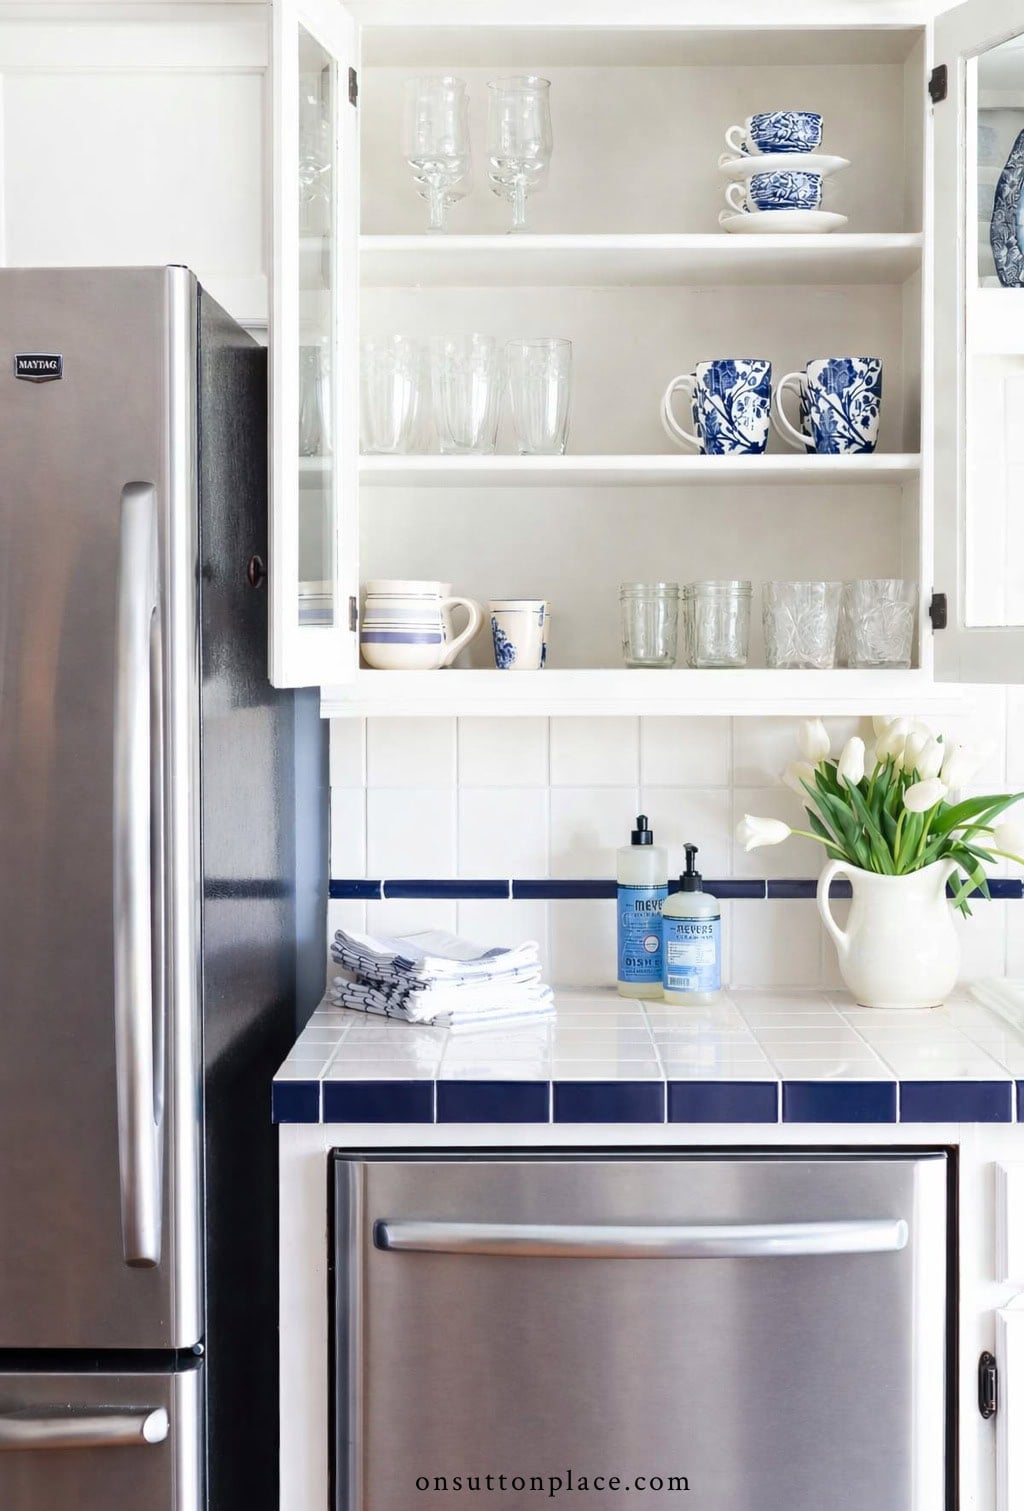
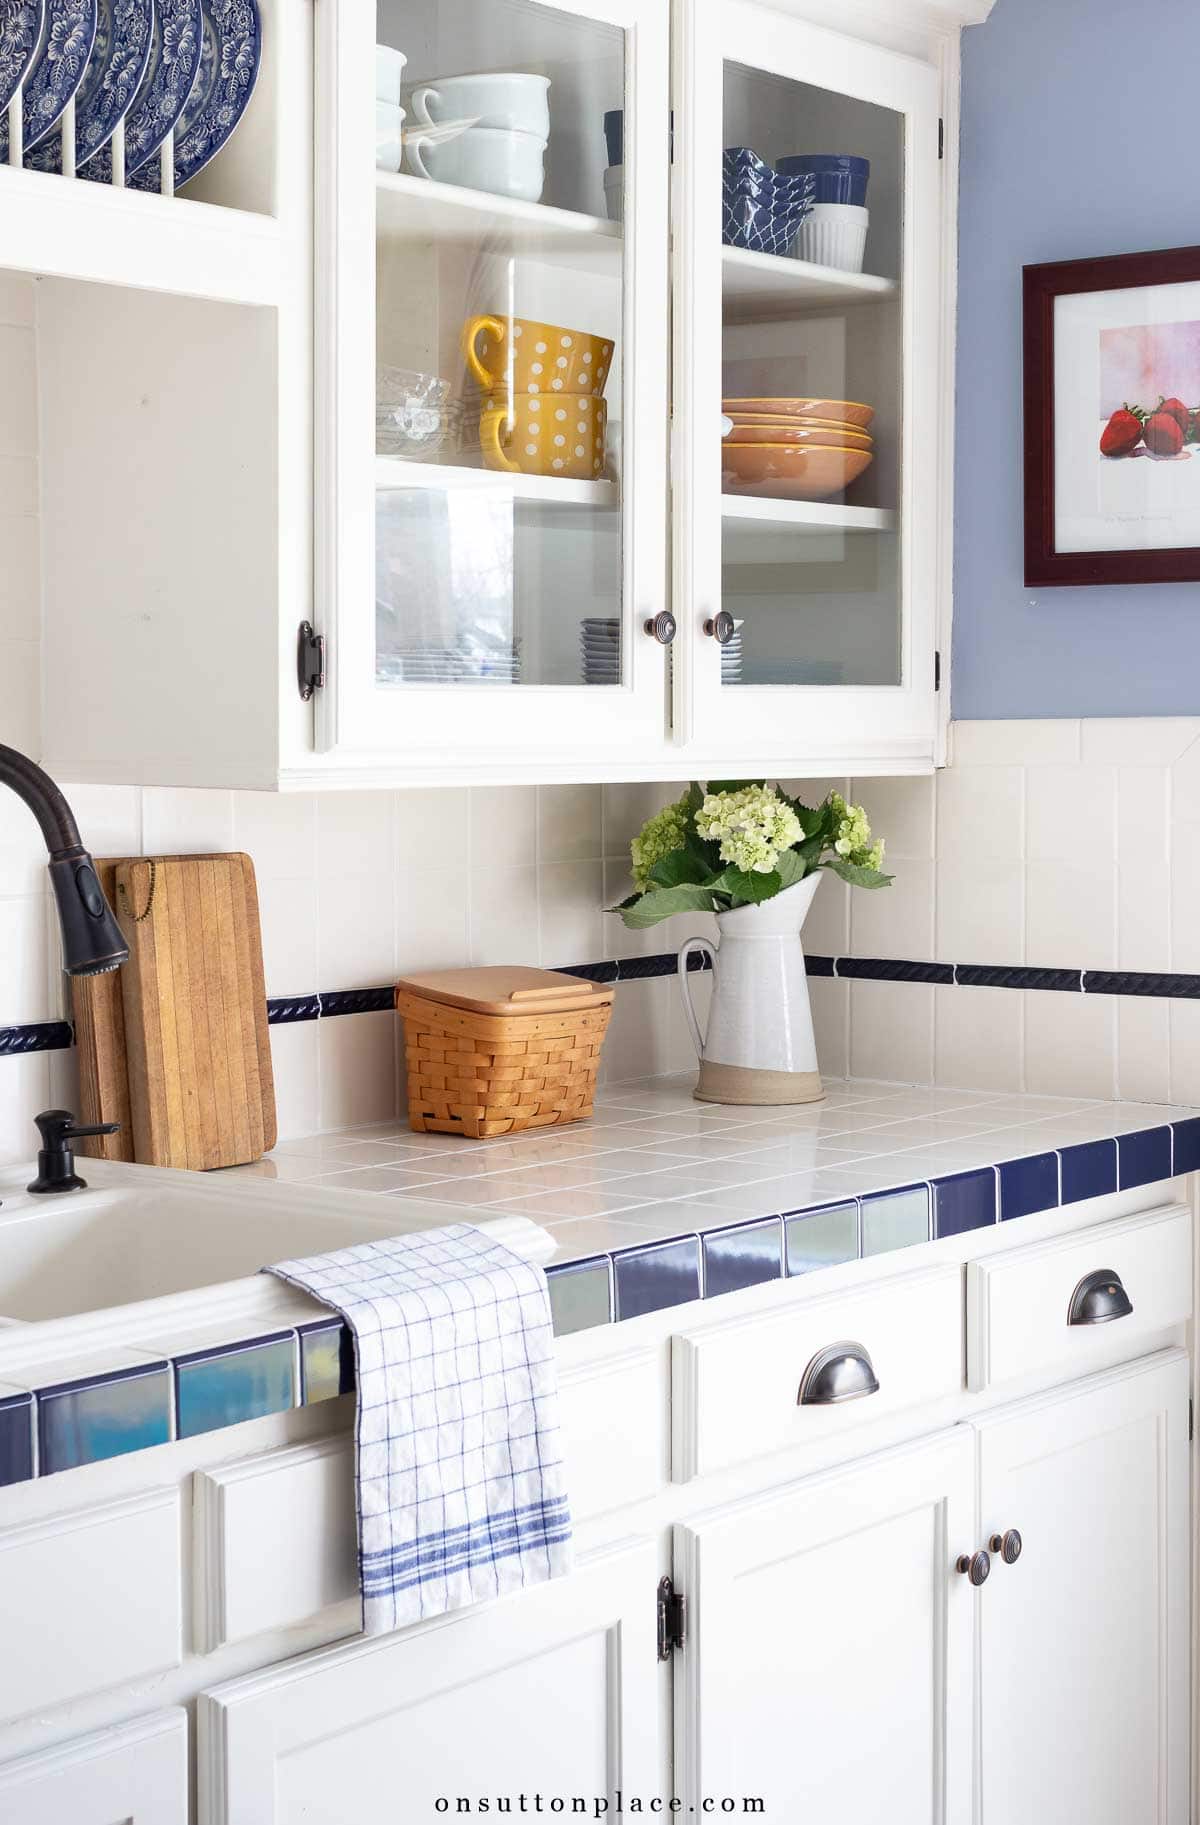
Dish & Clean-Up Zone Organization
Not every cabinet needs dramatic change. Sometimes organization is simply about placing things where they make the most sense. In our small kitchen, the area around the sink and dishwasher became the natural clean-up zone, and arranging cabinets with that in mind made everyday routines smoother.
- Storing everyday plates, bowls, and glasses close to the sink and dishwasher for easy unloading.
- Moving seldom-used pieces to higher shelves or less convenient cabinets.
- Using pull-out shelves for heavier items like casserole dishes and glass bakeware.
- Taking advantage of any built-in cabinet features, even if there are only one or two.
- Leaving a little room to grow instead of packing every shelf to capacity.
When cabinets are organized by proximity and frequency, the kitchen naturally flows better. Unloading the dishwasher becomes simple, clean-up feels less like a chore, and everything has a logical home. Small adjustments in placement can have a surprisingly big impact.
Organizing our small kitchen wasn’t about buying containers or making it look perfect. It was about creating systems that made everyday life easier. By editing what we didn’t use, zoning cabinets thoughtfully, and keeping daily items within reach, the space became calmer and more functional. Small kitchens don’t need to be bigger to work better. They just need intention.
This small kitchen was part of our Sutton Place home. A house that evolved slowly over time as we updated each space with intention. If you’d like to see how this approach carried into other rooms, you might enjoy our living and dining room makeover, the paint colors we chose throughout the house, or the full story of our home and how it changed with us. Each update was simple, thoughtful, and designed to work with what we had.

JOIN THE OSP COMMUNITY
Sign up to get uncomplicated recipes, unlimited seasonal decor, and
understated ways to refresh your home sent straight to your email inbox!


amazon storefront
Discover simple and affordable
ways to refresh your home.
Follow my Amazon Storefront
for all my favorite finds!
Ann,
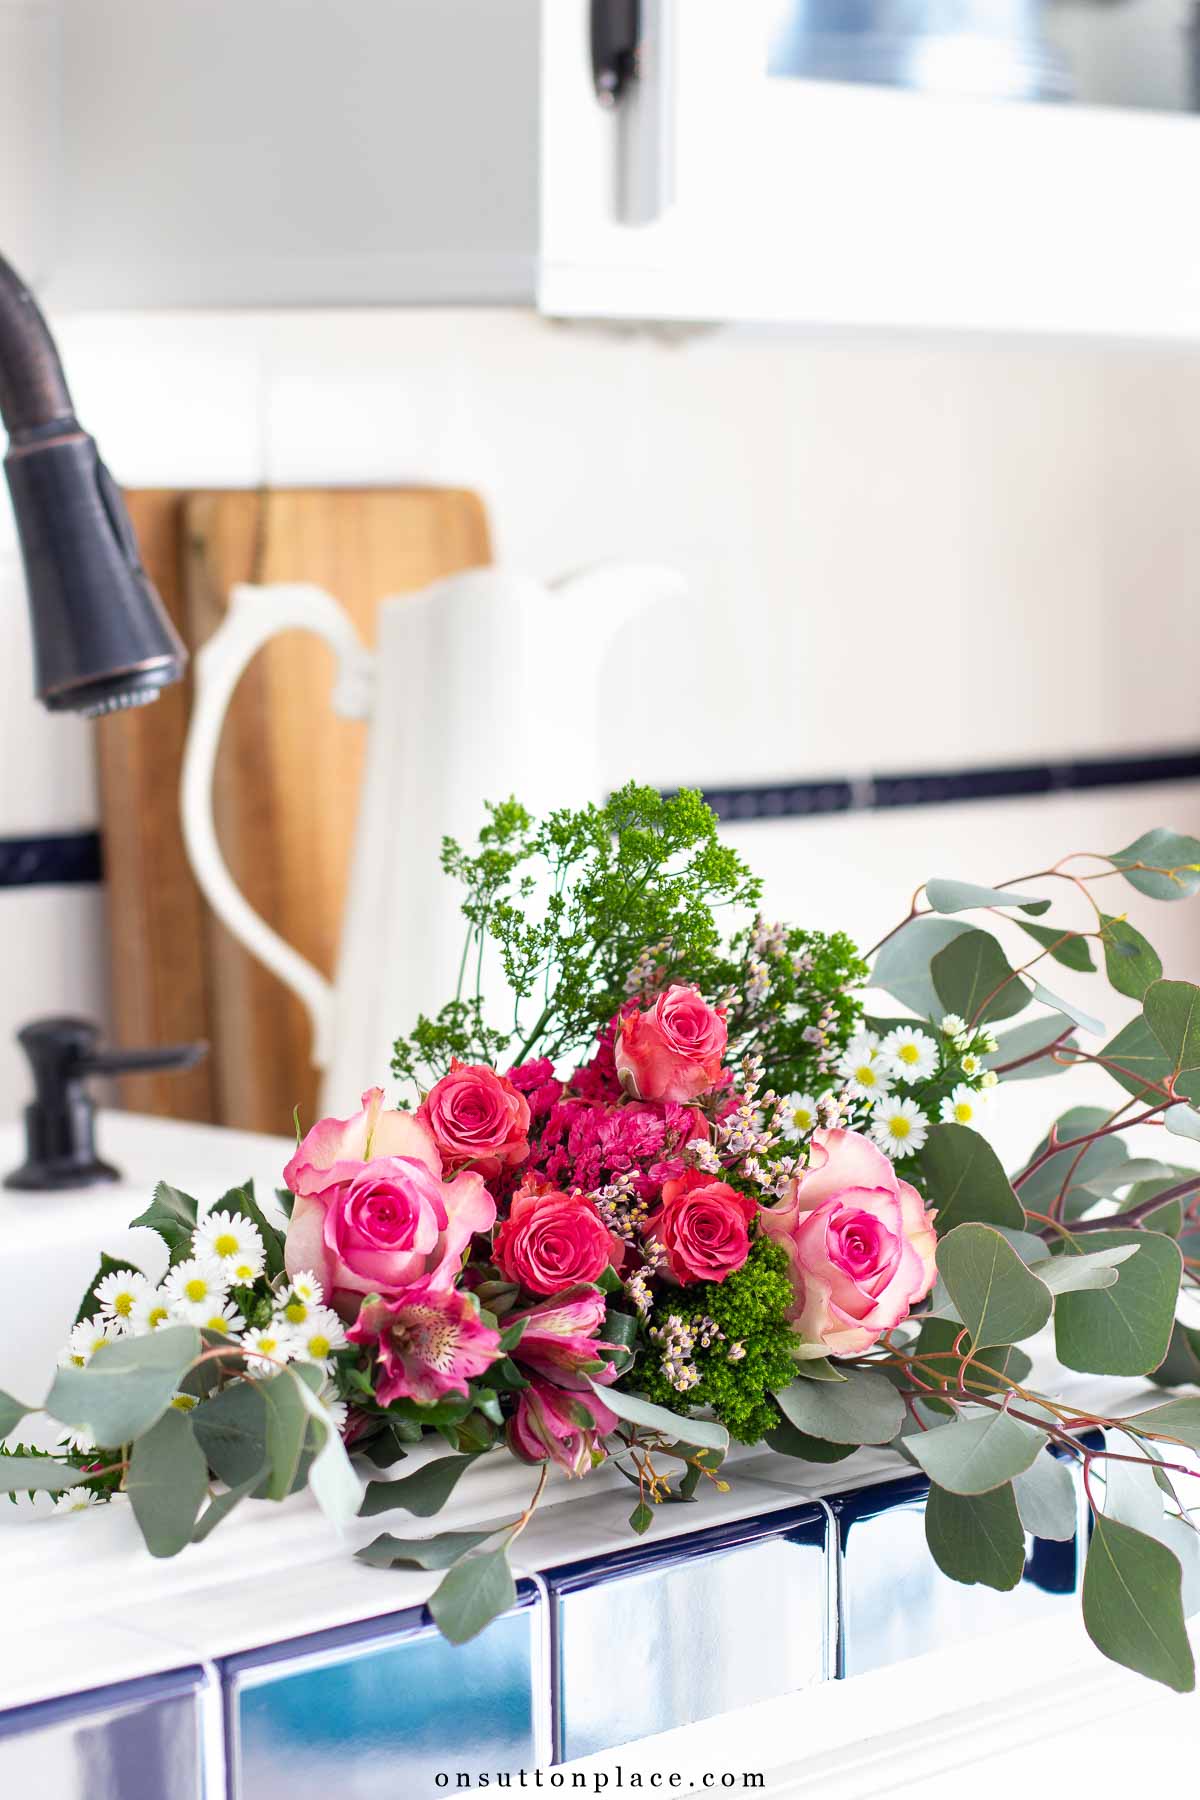
Your blue and white kitchen is beautiful. I love your navy accent tile stripe on the backsplash and as the countertop edge.
Thank you for the tips on organization. I need to purge many things, but find it hard to let them go.
Judith
Thanks for sharing your ideas.
Hugs from Northern Spain.,
Charo.
Your house/kitchen look so incredibly clean!
Ann, I followed your lead and cleaned out two cabinets in the kitchen! They really had been neglected for decades so I unearthed many cleaning supplies that were hiding under the sink. It looks so much better with the handled plastic bins holding the essentials so attractively. THANK YOU for the inspiration you provided!!!
Your beautiful sunny kitchen inspired me to reorganize – my pantry, under sink area and lazy susan cabinet are now looking…well organized! An affordable project, perfect for a blustery, snowy day here in Pennsylvania.
Thanks for the inspiration.
These posts have been great. You inspired me…I finally organized my spice cabinet…and a couple of others. Your kitchen looks so warm and cozy…I can’t imagine anything changing. Now, you know it’s well organized as well. Looking forward to seeing your new ideas, however. Although…I think your kitchen, as it is, is lovely! ;)
It’s always such a great feeling when you declutter, reorganize, rearrange and start fresh! Love your blue and white with little pops of yellow and I love the lazy susan idea and need to see where I can implement it to create some more space in my cabinets.
I agree! I love the countertops and backsplash!
Your kitchen is lovely! I love the blue and white combo!
Omg-read your post first thing this morning and it was soooooo perfect. Been promising my husband I would clean out and declutter. I went to target, purchased plastic bins and cleaned under the sink. Not only is it all organized but it looks pretty and my hubby is very happy! It’s a great start. Thank you!
Hello Ann,
I have so enjoyed your kitchen re-organisation. You have made it look so clean, colourful and organised.
Your kitchen looks really beautiful and kudos to you for making the most of what you have!
I enjoy your emails immensely because they are full of totally doable ideas.
Keep up the good work
Kindest regards
Heather
Great posts! The older I get the more I purge those items I bought but never used. LOL the power of advertising!
Beautiful ! I love your existing counter top and back splash , too!
Reading this has me geared-up to tackle my kitchen – you describing the great feeling it brings! Am envious of your plate rack & lovely plates.
Congratulations on a well – organized kitchen. I have made some notes from all that you did. I love all your blue and white. I especially love your plate rack.
Your kitchen is beautiful! I love your blue and white theme; it makes everything so cohesive. I would love for my kitchen to all go together so well. I understand not wanting to keep tile counters, but they look amazing and it gives your kitchen the perfect feel of being a teeny bit older but still gorgeous and welcoming. Thank you for this post, I would love to get a pull out shelf like yours for Pyrex, and seeing yours solidified the idea in my head. Thank you!
Love the organization tips! We just finished a kitchen remodel that included completely reconfiguring everything and adding an island. I did the same as you and even bought all new organizational items. Specifically we have and use a lot of knives, and I found some awesome knife holders that fit in our drawers. Oh, we also used to have the EXACT counter and backsplash as you, right down to the decorative blue “rope” tile!
One take-away that I got from your reorganization posts is the calming effect of limiting options and the power of a color pop. In your case, clear & whites with blue.
I’m reorganizing with the “aging in place” concept in mind, so I am looking at everything with respect to ease and safety in access as well as frequency of use. Sometimes, I wonder why something was stored in a location and it’s fun to readjust to where things are now placed.
I’m checking out my refrig now, wondering how to use it more effectively. It would be interesting to see how you have organized yours.
You do everything so well. Good for you making your kitchen work. We gutted our kitchen 15 years ago, and there are many times I miss the original layout.
Wow, looks great! And, thank you Ann, for the inspiration to act once again! I so appreciate your practical advice and your easy directions and research for any projects you do. I have now organized under my kitchen sink and bathroom cabinets, and rewarded myself with the brownie from your recipe! Delicious, by the way!
Hi Ann, your kitchen organization posts are so helpful…you continue to be my favorite blog, your home is understated, classic and gracious…I love your down to earth approach …your kitchen sparkles…! Well done… Thank you for your continual inspiration…wishing YOU laughter and grace !
Lovely, peaceful! Looks like your happy place!
Looks lovely Ann…I have done some organizing as well. It makes my heart sing when everything has a place and things look orderly.😍
I love your home. It reminds me of a different era, not because it’s dated or old, (so fresh and updated!) but the atmosphere is of a different time in America. 😍
Ann, this is absolutely beautiful and functional! Thanks so much for sharing this project. I’m inspired to really tackle mine! You made an ok kitchen very nice! I love your blog and have for many years. You are a blessing, and I wish we were neighbors!
Ann, your kitchen looks great & even better it is now functional! You did a wonderful job & provided much inspiration!
I have never cared for tile counter tops but yours are the prettiest I’ve seen. You manage to keep them spotless. Can’t wait to see what you replace them with.