

Make a beautiful DIY pinecone garland with this easy tutorial…perfect for fall, winter, and the holiday season.

DIY Pinecone Garland Tutorial… and it took everything I had to include the word “holiday” in the title. I know it feels early, but I’m trying to think ahead and share a project you can make now that will last straight through Christmas. I had planned to make this garland last year, but it never happened. This year, I was determined to give it a try, and I have to say, it turned out even better than I expected—though I did make one tiny mistake, which I’ll share with you later.
This post may contain affiliate links. See my disclosure statement.
Prepare your pinecones
If you’re collecting pinecones from the ground, you’ll need to make sure they’re bug-free before using them. There are two easy ways to do this. The first is to bake them: spread the pinecones on foil-lined baking sheets and bake at 225 degrees for about 30 minutes. The second option is to seal them in large zipper bags or small garbage bags, then place them in the freezer for a day or two. Either method will take care of any unwanted critters.
If you’d rather skip collecting, pinecones are easy to find. Craft and discount stores stock them every holiday season, and I’ve even seen them at the grocery store. I’ll share a few online sources at the end of this post as well. Once your pinecones are ready, it’s time to make your garland.

Supplies Needed
- Natural Oasis Bind Wire or regular florist wire. (The natural oasis bind wire is covered wire that looks like twine. The covering doesn’t tear, and you can attach it like a twisty tie.)
- Scissors
- Heavy twine
- Pinecones: it’s hard to say how many you need. It just depends on your garland length and the size of your pinecones. I guarantee you will need more than you think!

Assembly Steps
- To begin, cut lengths of the oasis wire long enough to wrap around the large end of the pinecones, with generous tails.
- I used the assembly line method to make this garland. First I cut all the wire pieces. Then I wrapped the wire around the pinecones.

- When most of your pinecones are wrapped with floral wire, it’s time to determine the length of your garland. For mine, which hangs around the front door, I cut a piece of heavy twine about 12 feet long, adding an extra couple of feet just in case.
- If you’re making one for a mantel, measure the mantel length and add a few extra feet. This garland also looks beautiful draped along a staircase or framing a window.
- Once your twine is cut, attach it to the base where you’ll be hanging the garland.
- I secured mine by tying it around small nails in the door casing, but Command Hooks would work well too.
- To add the pinecones, twist the floral wire around the twine and trim any excess.
- At each end of the garland, knot one pinecone in place to keep the others from sliding off. To do this, tie a loose slip knot in the twine, thread the floral wire from the pinecone through the knot, tighten the knot, then twist the wire securely.
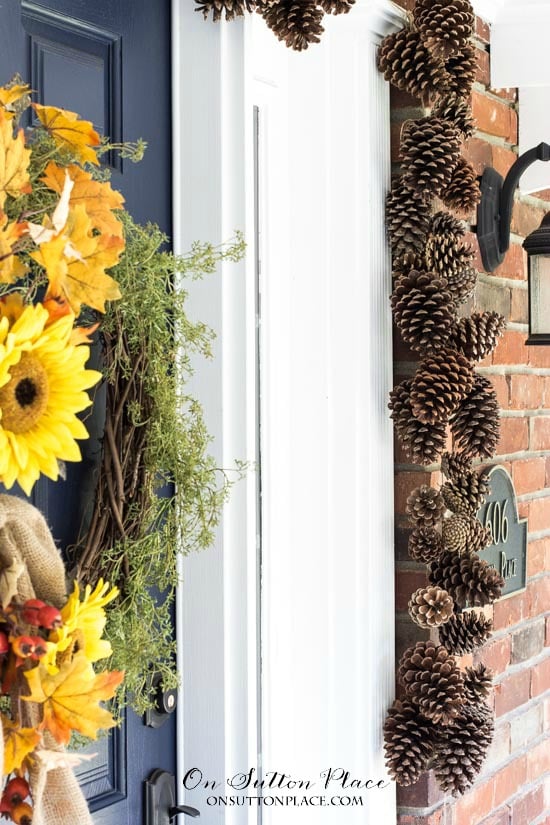
I used larger pinecones at the ends of my garland to give it a bit more weight. Earlier, I mentioned a possible mistake…here’s what happened. I didn’t have any heavy-duty twine on hand, so I used regular craft-store twine instead. I’m hoping it will be strong enough to hold the pinecones, but there’s always a chance it could break. To be on the safe side, I recommend using a sturdy, thick twine that can easily support the weight.
UPDATE: After attaching pinecones to the twine on both sides of the door, I decided to make the top section its own separate piece. I cut another generous length of twine and secured it along the top of the door, using the same nails that held the side garlands. Standing on a stool, I attached the pinecones to this top piece. You could also make the garland in three sections. One down each side and one across the top, which is probably the easiest method. If you’re creating a garland for a mantel or the top of a window, one continuous piece of twine works perfectly. There’s no right or wrong way to do this…just whatever works best for your space.
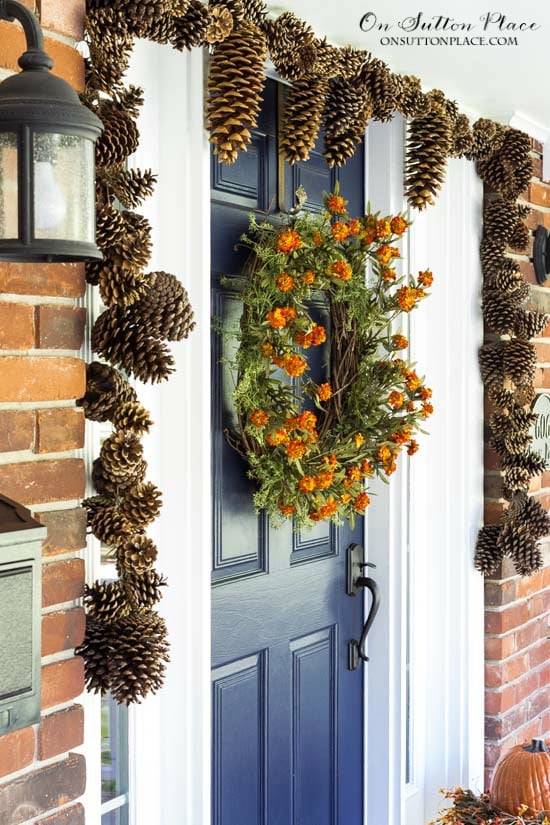
This project was such fun, and it didn’t take nearly as long as I expected—even with a very long garland. Watching it take shape was so satisfying, and I love how it looks around our door. I’ll be storing it carefully in a plastic bin, and with a little luck, it should last for several years.

JOIN THE OSP COMMUNITY
Sign up to get uncomplicated recipes, unlimited seasonal decor, and
understated ways to refresh your home sent straight to your email inbox!









amazon storefront
Discover simple and affordable
ways to refresh your home.
Follow my Amazon Storefront
for all my favorite finds!

Love the pine cone garland It will be fun to make. The wreath is lovely. Your wreath ideas are great and I have made several of them. Thank you so much for sharing.
I love it Ann, I’m going to try it, I already have a bunch of pine cones that I baked last year, thanks for the great idea!!
I have been collecting pine cones all summer! I have a garden cart full, a 5 gallon bucket full, and a window box full of them. I see a garland in my future!
Love pine cones, thank you. It’s a totally new idea. I hadn’t seen it anywhere.
This is a great idea if you have a huge basket of them and i do, thanks Ann.
Can’t wait to trying it! Thank you!
So lovely. And thank you for the tip.
Thanks again, Ann, for sharing another project that looks elegant but is not too difficult to do. This garland would look great on our fireplace mantle so I hope to get busy and get it done for the holidays.
Looking forward to seeing your entire door!
Blessings as you continue to be a blessing to all of us.
Thank you so much for the great garland idea. Also thanks for the EARLY heads up. Many times I see great ideas but…….it’s just way to late for crafts around the holidays. I enjoy your blog.
Where do you buy natural oasis bind wire??? Heavy twine??? Does anyone have an EASY way to bleach pinecones w/o turning it into a big mess??? I’ve always wanted bleached pinecones. I live in NC and pinecones are Everywhere!
Hi Charley! I included links to all the supplies needed in the post. As far as bleaching pinecones, I have never done it. There is a comment on this post by one of my readers and she shared her process. Good luck!
I see it now!