How to make an adorable star Christmas tree garland from wool felt and wool felt balls. All sources and instructions are included!

When it comes to Christmas tree ornaments, I love everything. Over the years, we’ve had trees using every combination of ornaments possible. Lately though, I’ve wanted a simpler look. The perfect way to get that is with handmade ornaments. This wool felt Christmas tree garland takes a bit of time, but it’s such an accomplishment when it’s finished. Spread the sewing out over a few evenings in front of the TV, and in no time, you will have a handmade treasure that, if stored properly, will last for years. Read on for the easy tutorial.
Supplies Needed
*As an Amazon Associate, I earn from qualifying purchases.
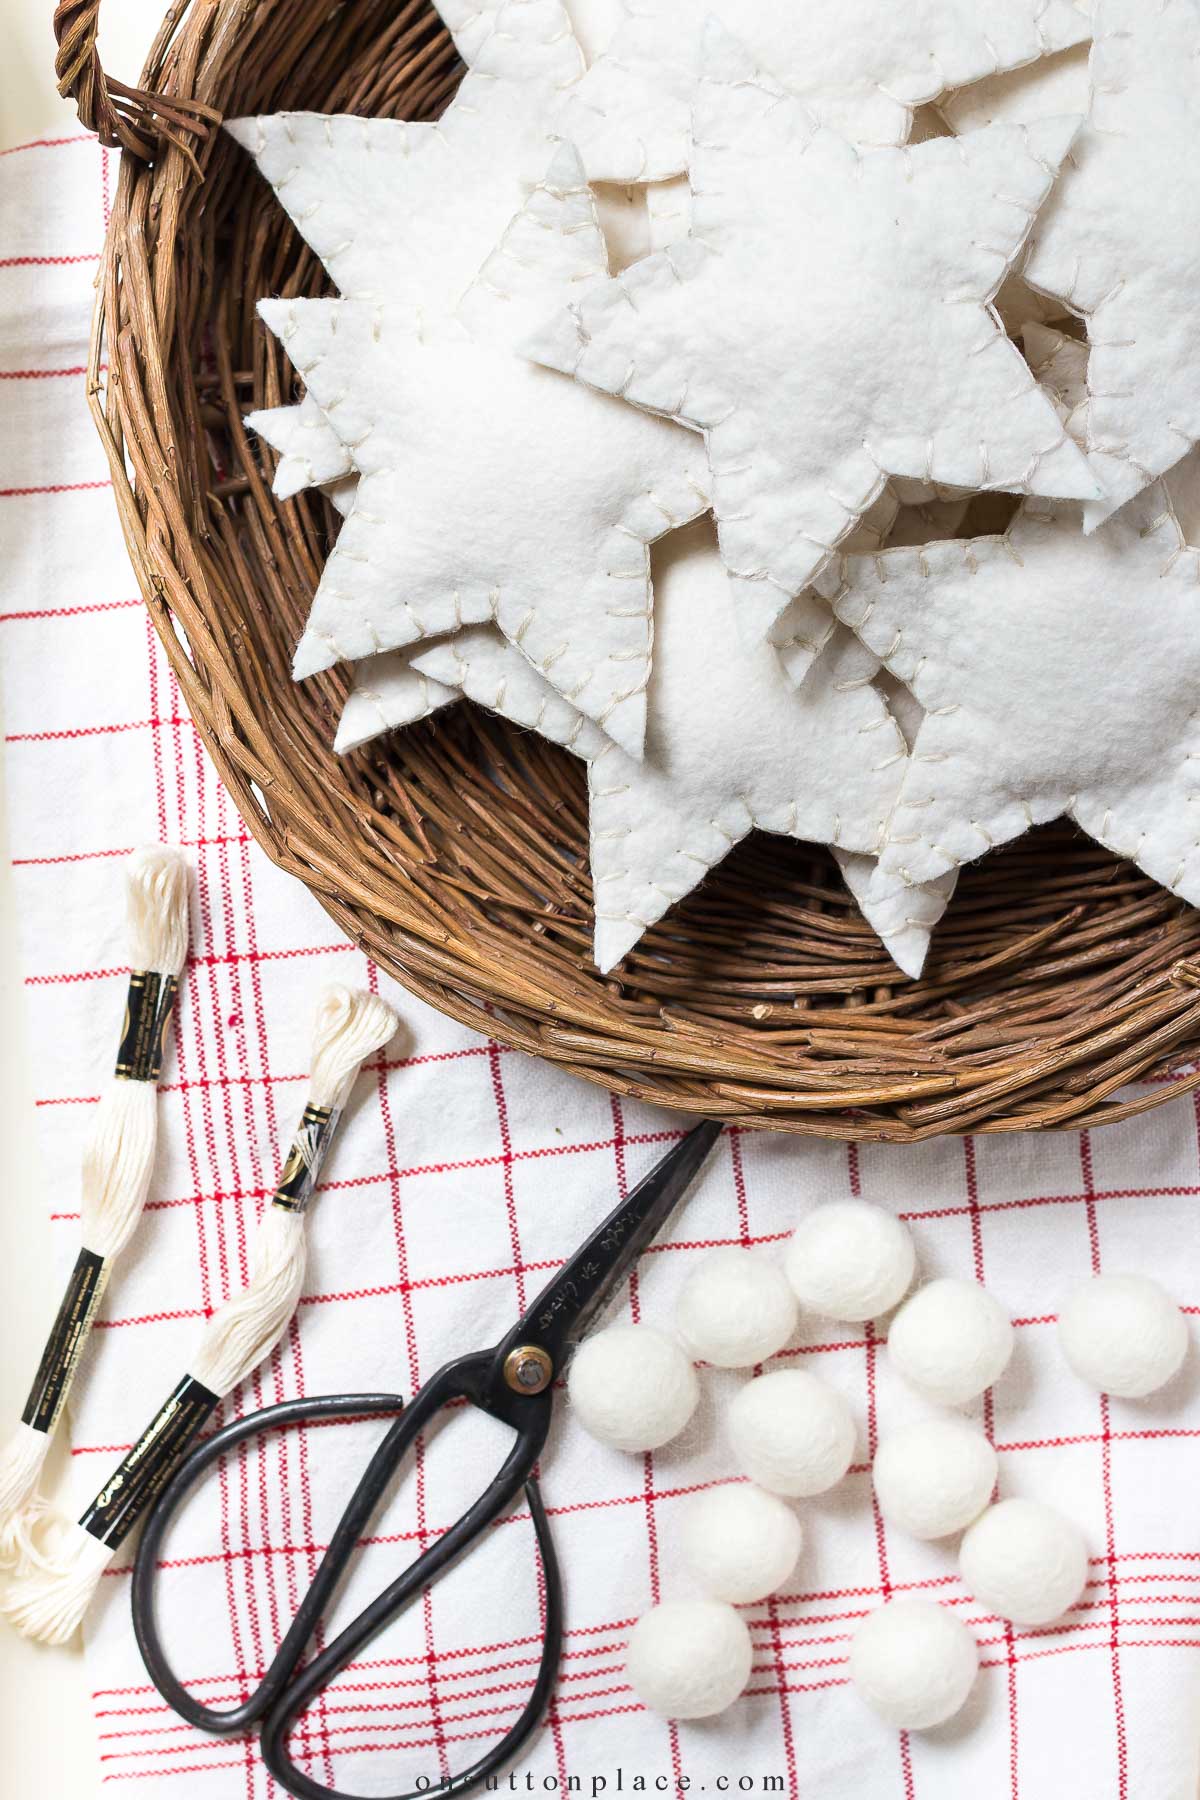
What you need for 16 stars:
- Wool felt – one piece that measures 36 x 36 inches in Linen
- 20 Felt balls in White (2.5 cm)
- Embroidery floss in Ecru
- Star template
- Sharpie marker
- Scissors
- Large needle
- Polyfil
About Wool Felt
Wool felt can be used as is, or it can be “felted.” Felting wool brings out the texture, and makes it a bit fluffier. All you do is fill your kitchen sink with lukewarm water. Dunk the piece of felt until it has absorbed as much water as possible. Remove it and, very gently, wring out the water. Use more of a squeezing motion and not a wringing motion. Throw it in your dryer along with a large, dry towel and a dryer sheet. Remove it when it’s still slightly damp and lay it flat to dry, smoothing out any wrinkles with your hands. That’s it! *I felted my wool before I began cutting out stars. This is a totally optional step.

This post may contain affiliate links. See my disclosure statement.
Assembly Instructions
- Make a star template. I recommend using a sturdy piece of cardboard. It is much easier to trace around than paper. Click {HERE} for the template.
- Trace 32 stars on the wool felt and cut them out. Make sure to cut just inside the trace line.
- Place two stars together and, using a blanket stitch, sew them together with the embroidery floss. When you get to the last point, stop and stuff the star with a tiny bit of poly-fil or two cotton balls. Continue with the blanket stitch around the last point. Repeat this process until you have 16 stars.
- Click {HERE} to see how to make a blanket stitch.
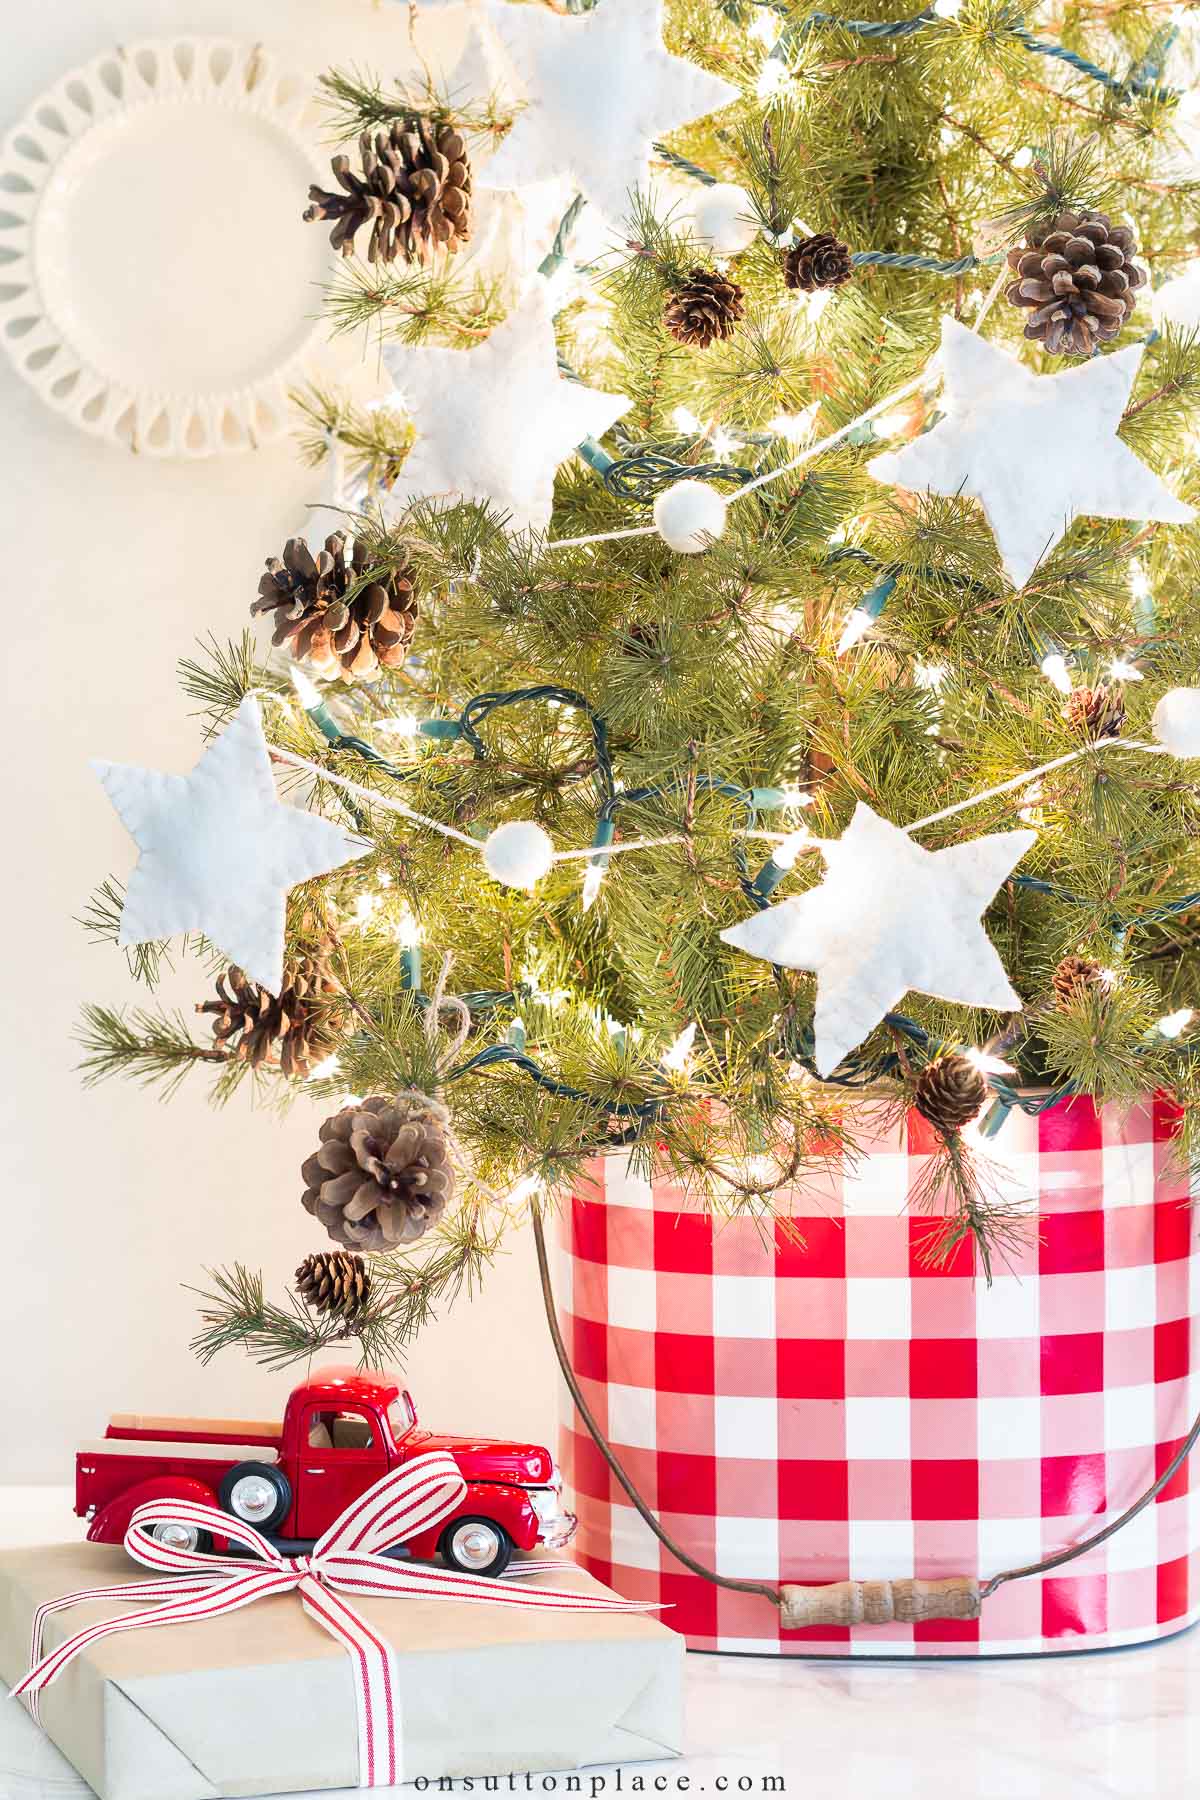
- Cut a piece of embroidery floss or cotton yarn about 8 feet long and place your needle on one end. Beginning with a felt ball, string eight stars and balls onto the yarn in an alternating pattern. Space them about 5 inches apart. This will give you a garland that’s approximately 6 feet long and has 8 stars.
- (To string the stars so they hang correctly, make a small stitch in the back of each star, near the tip of a point.)
- Repeat the process for the remaining 8 stars.
- When finished, you will have two garlands that measure approximately 6 feet long with ample yarn for tying off on the ends.
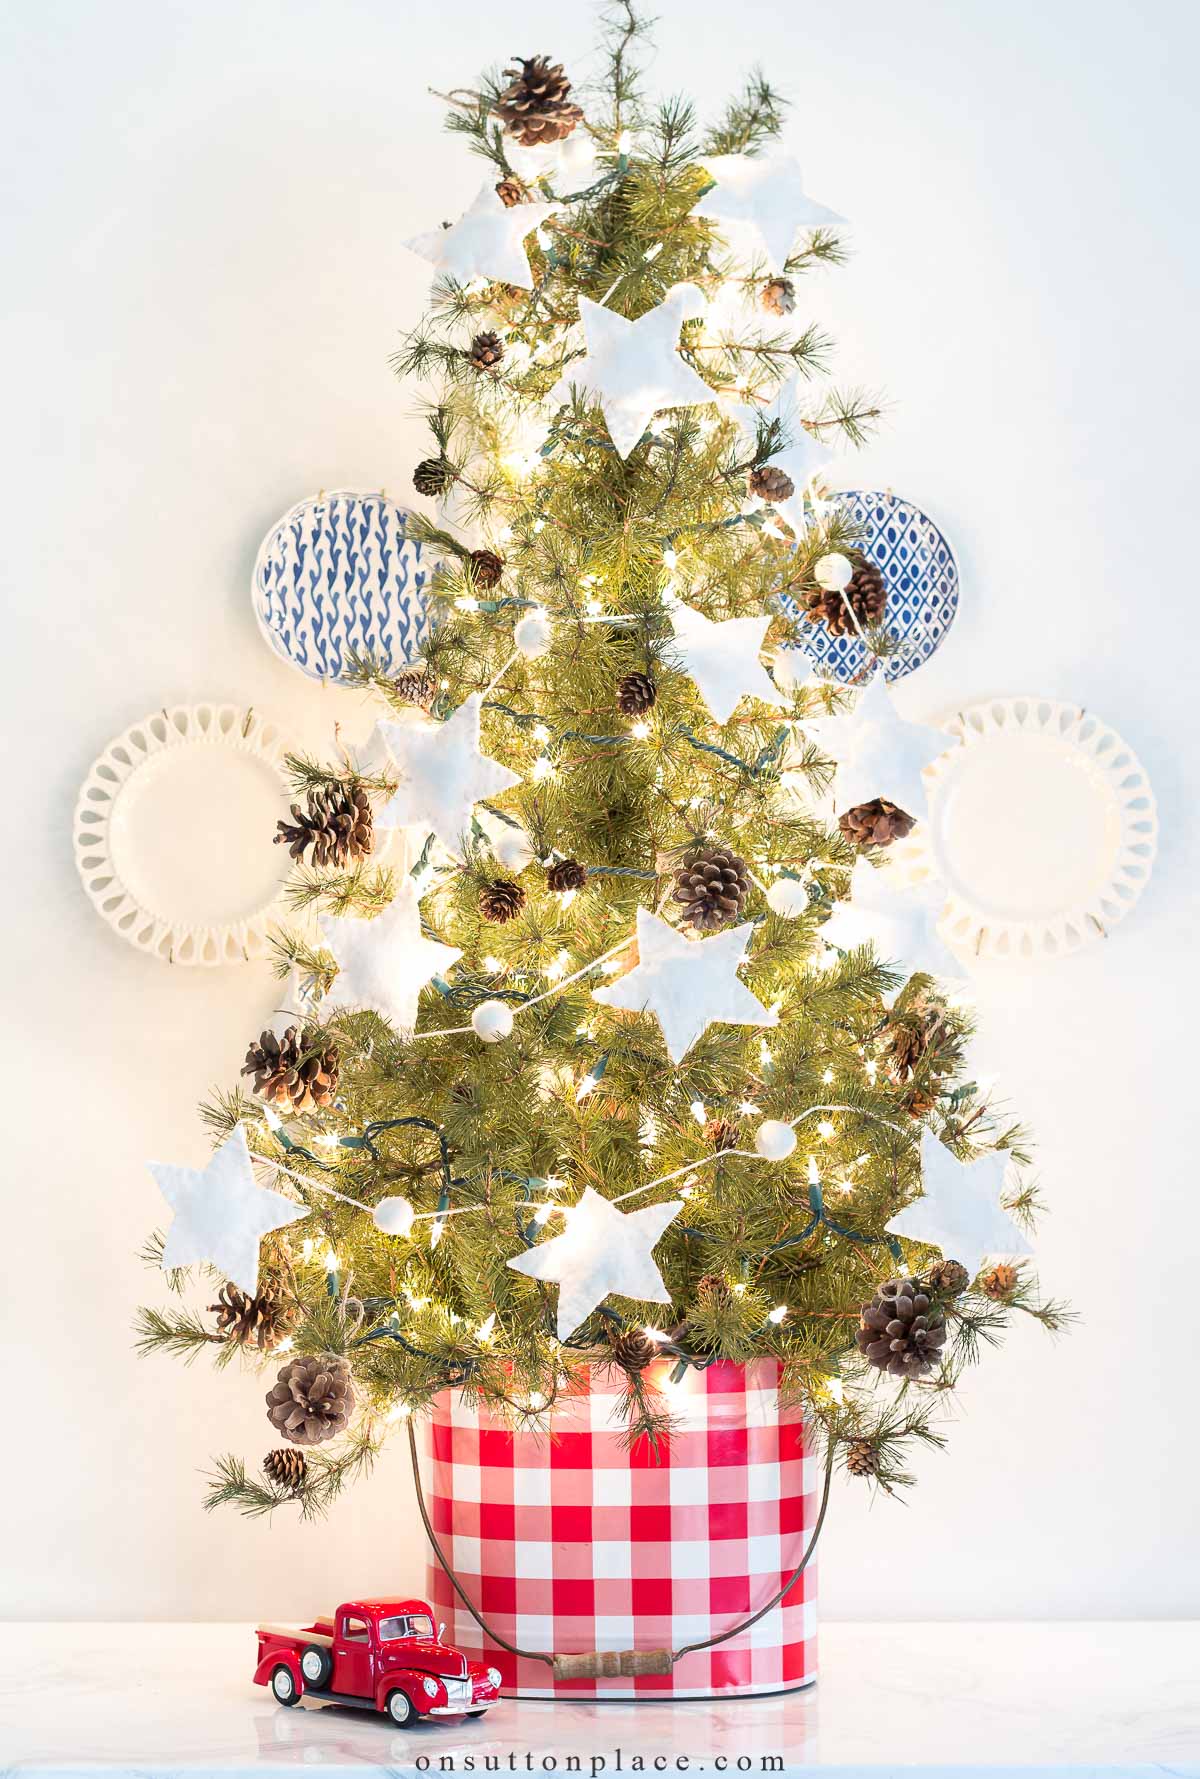
Tabletop Christmas tree (similar)
Gingham bucket no longer available
You can, of course, use any kind of fabric you want for this project. You can also simply make ornaments, and not a garland. When you get to the last point, just attach a tiny hanger. Narrow ribbon works perfectly for this. If you don’t enjoy hand-stitching, simply use a straight stitch on a sewing machine.

Storing Wool Felt Ornaments & Garlands
To store your wool felt ornaments and garlands, place them in resealable bags. This will protect them from dust, and help prevent the musty smell that stored fabric sometimes gets. It’s also helpful to add a dryer sheet to the bag before sealing.

Christmas
Garlands + Ornaments
- How to Make Dried Orange Slices
- Wool Felt Ball Christmas Tree Garland
- No Sew Christmas Garland Ideas
- Stairway Garland Ideas
- Countdown To Christmas Advent Paper Chain
- How to Sew Heart Ornaments
- Cinnamon Applesauce Christmas Tree Ornaments
- DIY Air Dry Clay Ornaments
- Fabric Rag Ball Christmas Ornaments


Wrapped With A Bow
Unlock the art of beautiful gift wrapping with this free guide,
and turn every present into a magical moment this Christmas!


The wool felt link doesn’t seem to. work. Is there another place we can get it?
I found the fresh linen wool felt in another Etsy shop. I’ve updated the link. Thank you for letting me know!
I love these stars and felt balls. I don’t see where you tell the size of the felt balls to order, though. Could you please tell me how big the ones you have used are? Thanks.
My apologies for the delay in answering. I missed some comments and am trying to catch up! I included a link in the post to the exact balls I used. They are 2 cm, or about 3/4 inch. Merry Christmas!
Absolutely love these! The stars and wool balls are perfect.
Ann this year I decided to decorate the house with white and gold and your star garland is perfect and yet so simple. Thank you for sharing.
Hi Ann, can’t wait to try these out! I’ve ordered the wool felt, but had to get white- Linen is sold out. I was wondering if I added a bit of fresh brewed tea to the rinse when ‘felting’ if that would achieve the linen color? What do you think?
Thank you for sharing!!
Hi Jackie! I think that’s a great idea. I have used tea or coffee dyes many times. I would suggest that you try it with a very small piece first just to make sure it doesn’t do something wacky! Let me know how it comes out…and happy holidays!
Thank you, Ann! I’ll keep you posted😊. Have a wonderful Thanksgiving !
Jackie
What a sweet little garland, I love the fabric! I’m going for simplicity this Christmas and loving all things natural and classic. Thanks for the inspiration!
I adore these, love it mixed with the pom poms!
So cute!
I just adore this whimsical garland! And I love the tip to use cotton balls if you don’t have any polyfil on hand….never would have thought of that! XO
Ann these are gorgeous and such a nice evening project while catching up on shows. I love hand sewing and this is just perfection.
Darling Ann,
Way back when I was 21 and our first Christmas I made felt stuffed things to hang onnour first Christmas tree. I used cookie cutters to trace out patterns. Long been replaced but the love we had made them so special.
Beautiful garland. And a great tutorial!
I love this, Ann. So simple and pretty!!
Hugs, Jamie
So pretty! I always wondered how you felt wool! I love the grain sack version of the stars too.
Love the gain sack fabric stars !!!! Wish I had known about you and your great style then. Keep the wonderful post coming.
So simple and cute! I made lots of felt ornaments when my children were small. I stick a bounce sheet in with them when I store them.
This is a great tip Susan…I am going to add it to the post! Thank you and happy holidays!
That garland is so pretty! I am doing a scandinavian type christmas this year and LOVE that! Pinned :)
xoxo
Wow,did this bring back memories.As a newlywed 45 years ago,I made felt ornaments for our 1st Christmas tree exactly the same as you with additional shapes.I also connected yards of pom poms for a garland.Love how your little tree came out’s cute.
Love love! How ever so cute and it def makes the tree just perfect
Ann, I love your white star and pom-pom garland (just have to try making that!) and your cinnamon and applesauce ornaments. Where do you purchase the red and white twine? It is much prettier than any I have seen at our local craft stores! Thanks for all of your amazing ideas.
You are so very talented. The white star garland would be just the thing to drape on one of my kitchen shelves. Guess I better get to work.
I love how you make simple look best Ann!
You are so correct. Couldn’t have said it better.
Thank you for the dropper tip. It was like magic!