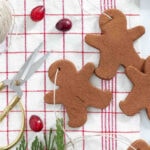
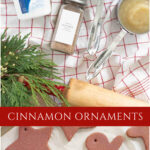
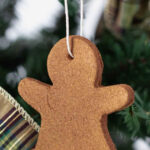
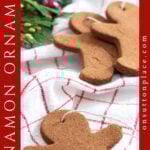
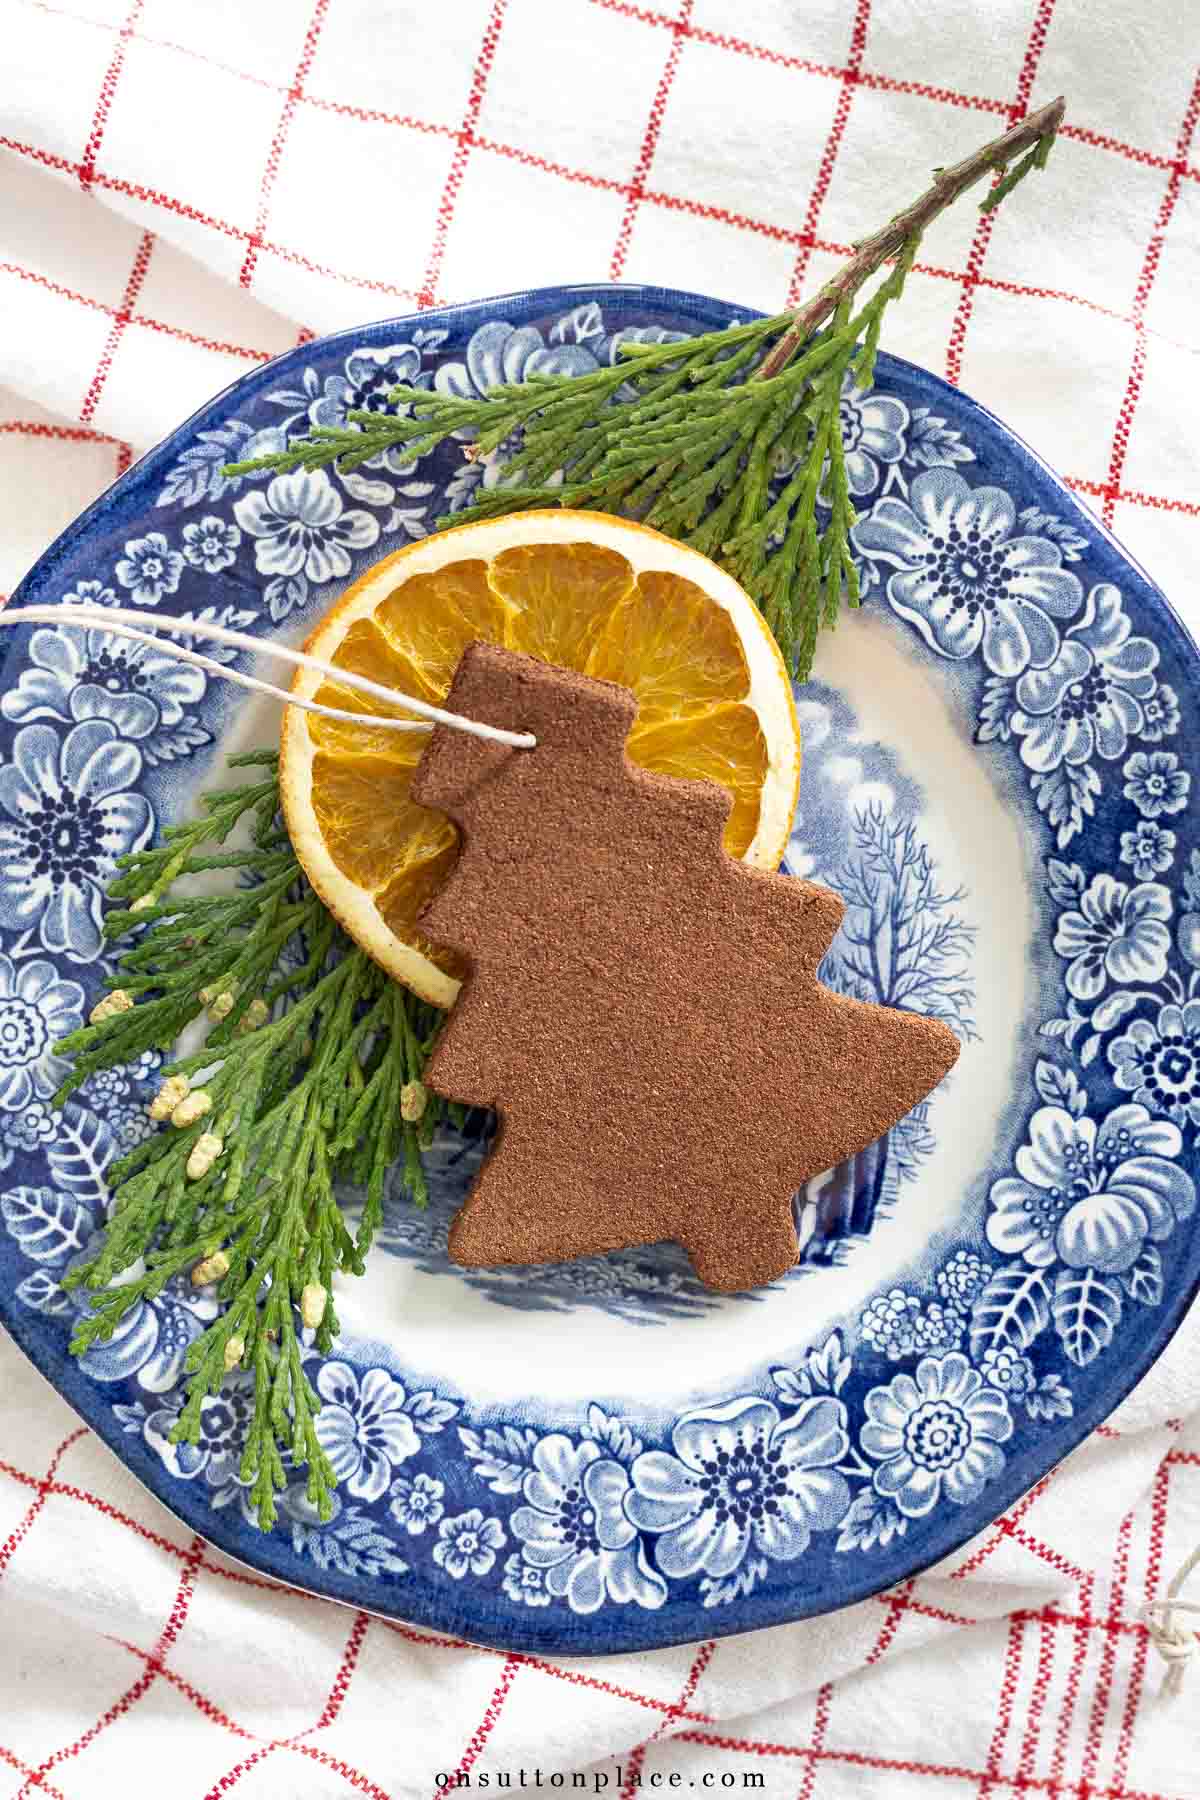
Make these easy, DIY no bake cinnamon applesauce ornaments for your Christmas tree. They can also be used as gift tie-ons or stocking stuffers!
The holiday season is here…and it’s time for a very fun craft project! These cinnamon applesauce ornaments are simple and so satisfying. Not only are they a perfect Christmas decoration, they make an adorable gift for just about anyone. These little ornaments are very fun to make and more important than that, they are quick and easy. I’ve made these cinnamon ornaments several times, and from start to finish, they take about an hour. This is a great Christmas craft to make with your kids or grandkids. They love rolling out the dough, and using the cookie cutters to make the ornaments. A printable recipe with the ingredients and instructions can be found at the end of the post.
This post may contain affiliate links. See my disclosure statement.
Supplies Needed
*As an Amazon Associate, I earn from qualifying purchases.
Exact Items used for the dough
Additional Supplies
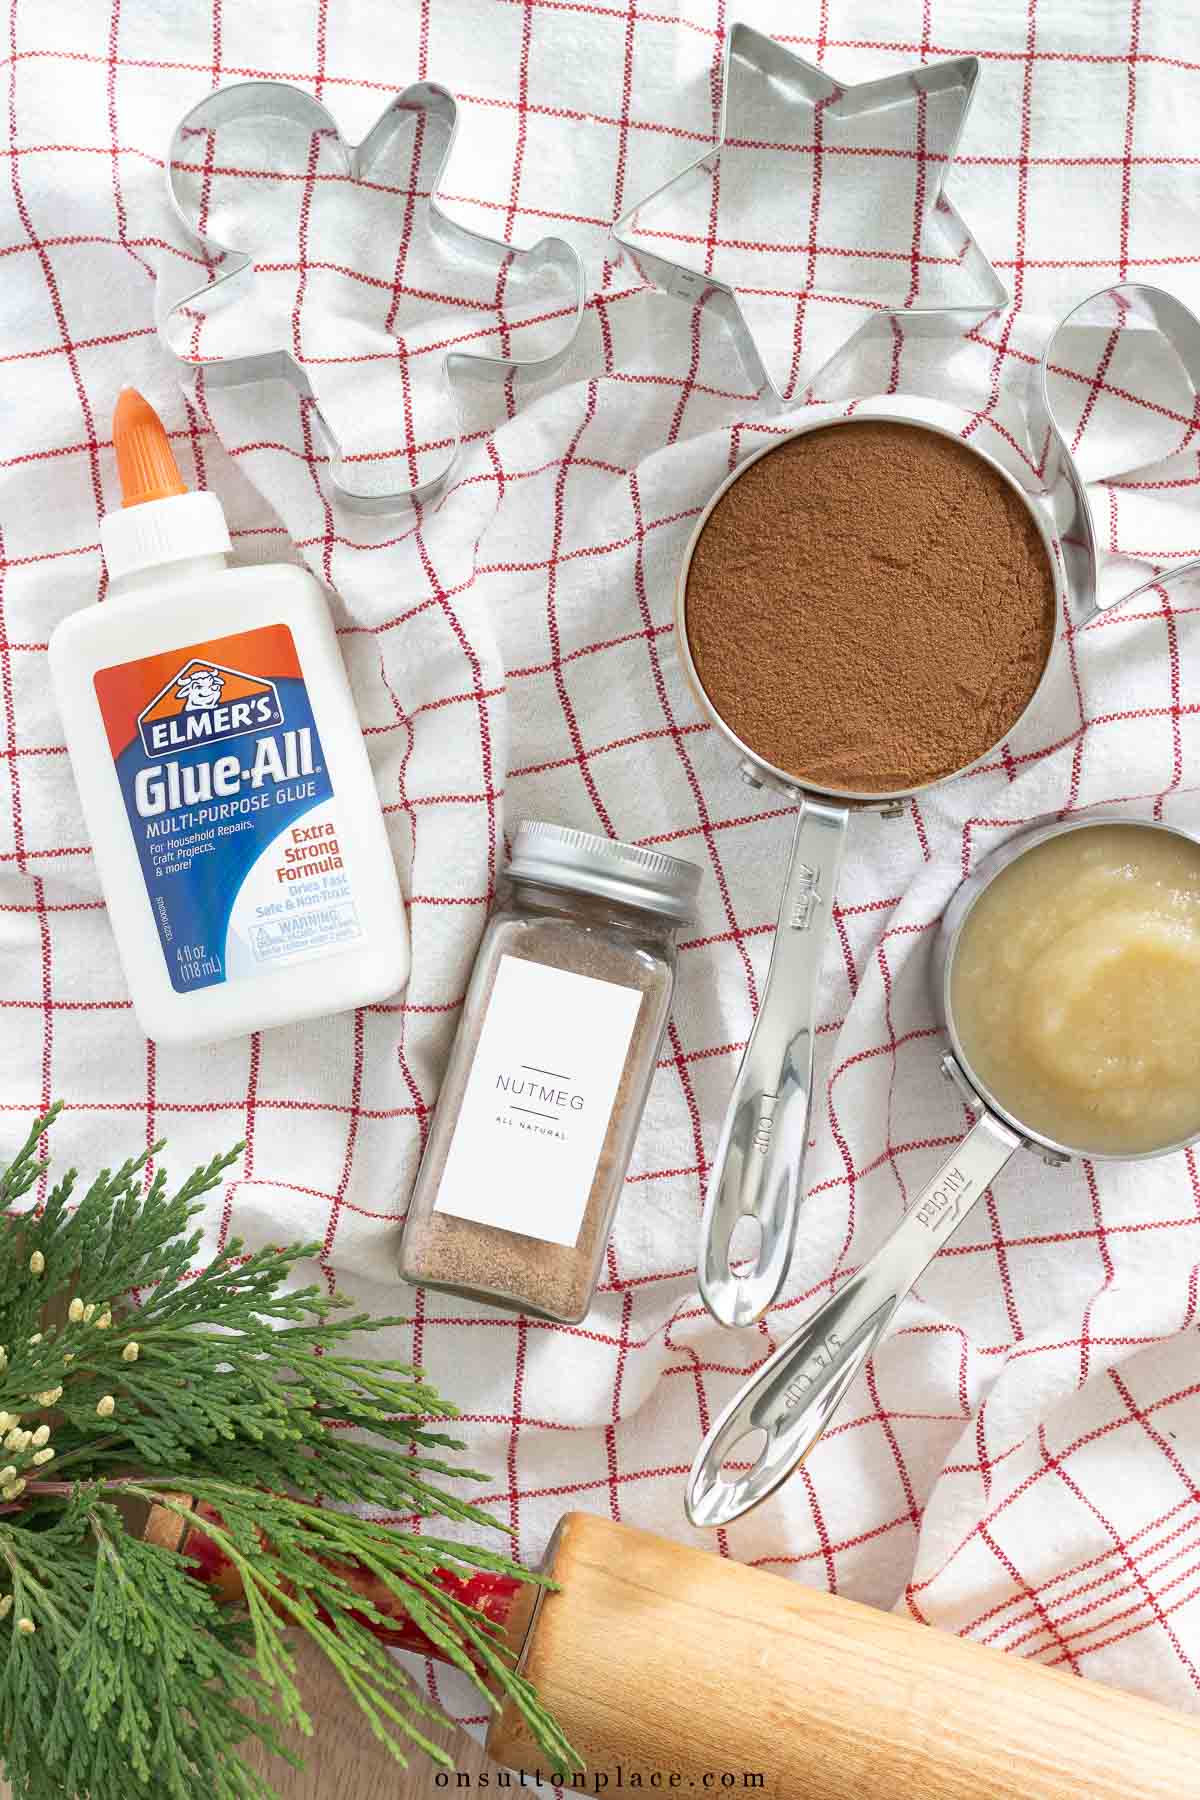
Dough Ingredients
- 1 cup ground cinnamon
- 3/4 cup applesauce
- 2 tablespoons basic white glue
- 1 tablespoon ground nutmeg, ground cloves, or other preferred spices
Instructions
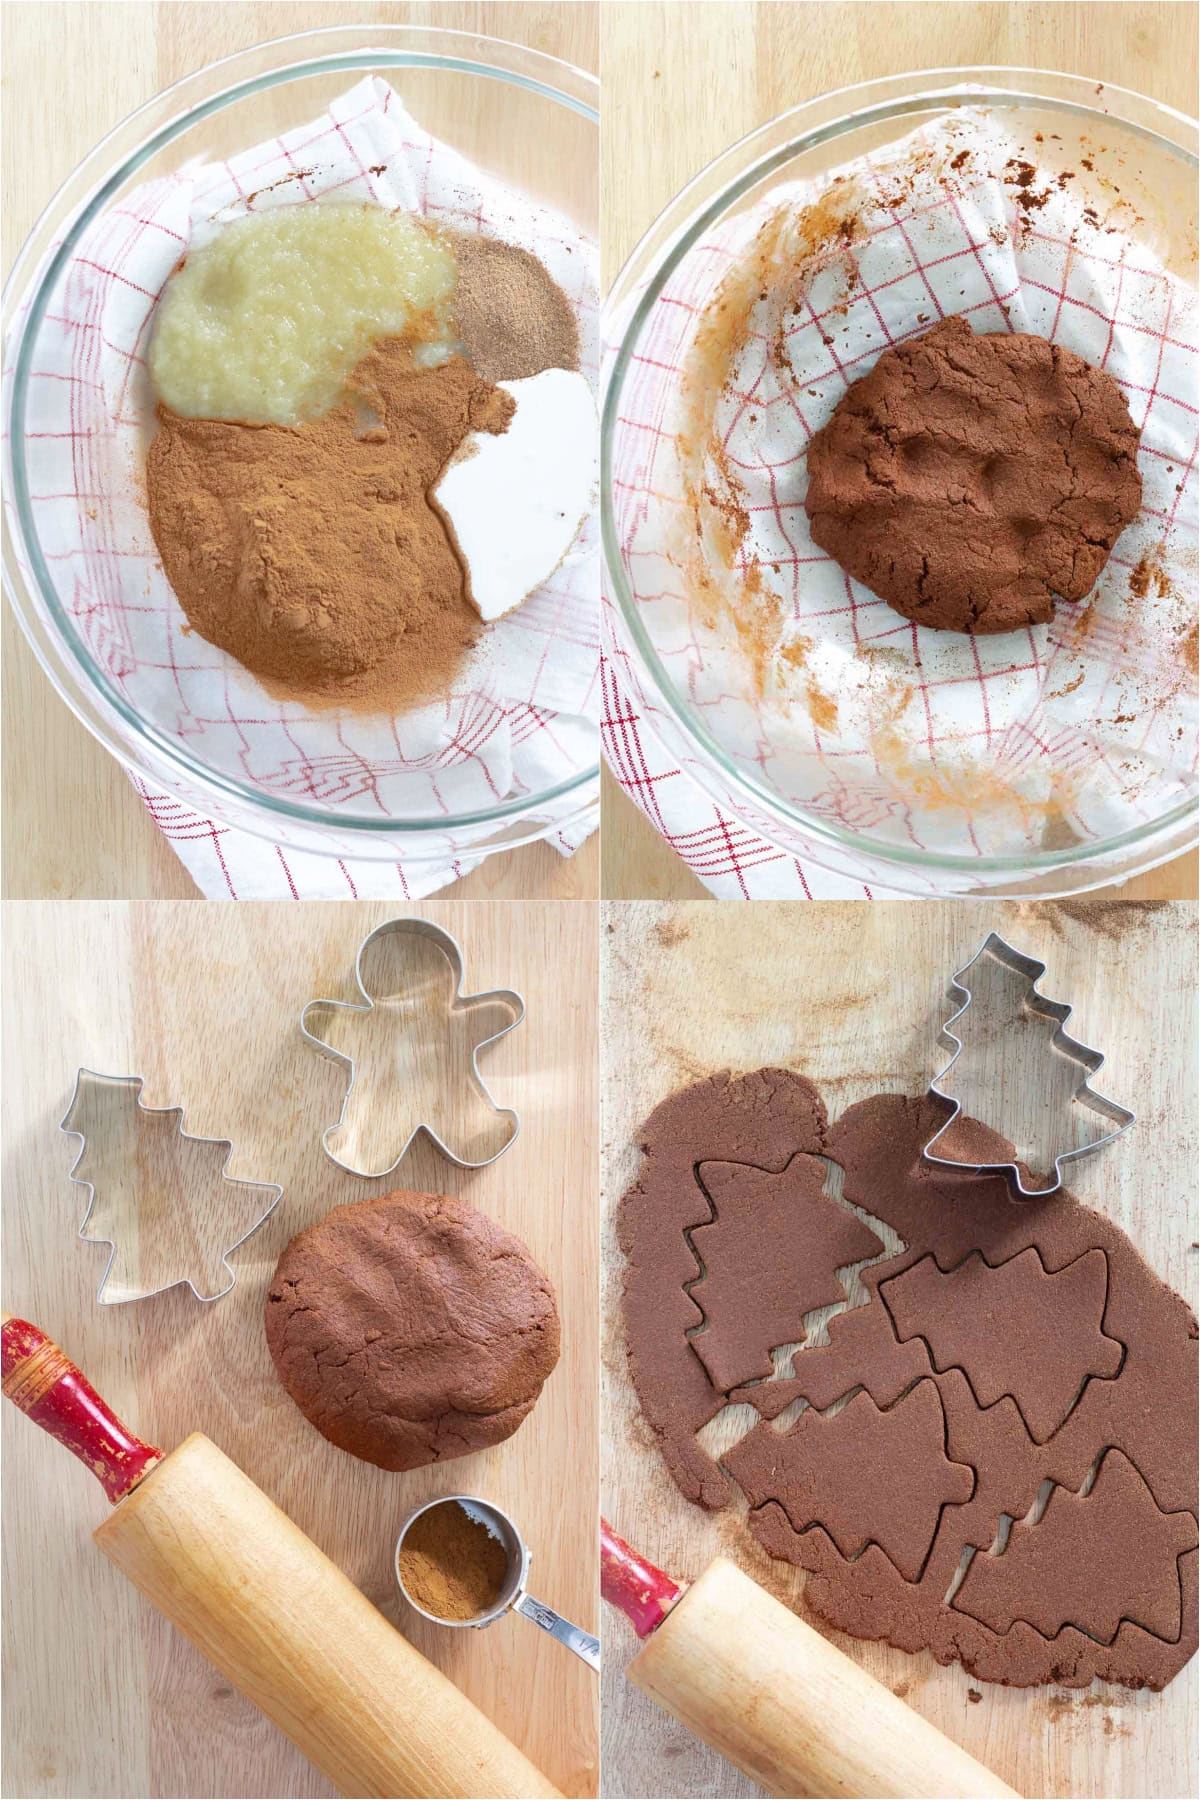
- Combine all ingredients in a large bowl. Use a spatula, or large spoon, and make sure all the cinnamon is absorbed into the applesauce.
- Gather the mixture with your hands. Knead it several times, pressing the dough firmly into a ball. It will be about the size of a softball.
- Sprinkle some cinnamon on a cutting board or other smooth surface. Flatten the ball into a disc with your hands. Using a rolling pin, begin to roll out the dough. Turn the dough several times while rolling, adding more cinnamon to prevent sticking.
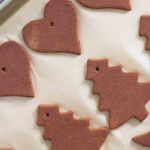
- Roll until the dough is about 1/4 inch thick and cut out the shapes using cookie cutters.
- Gather the leftover dough after the first cutting and again knead it several times, pressing it firmly into a ball. Repeat the rolling process.
- Repeat until all the dough is used.
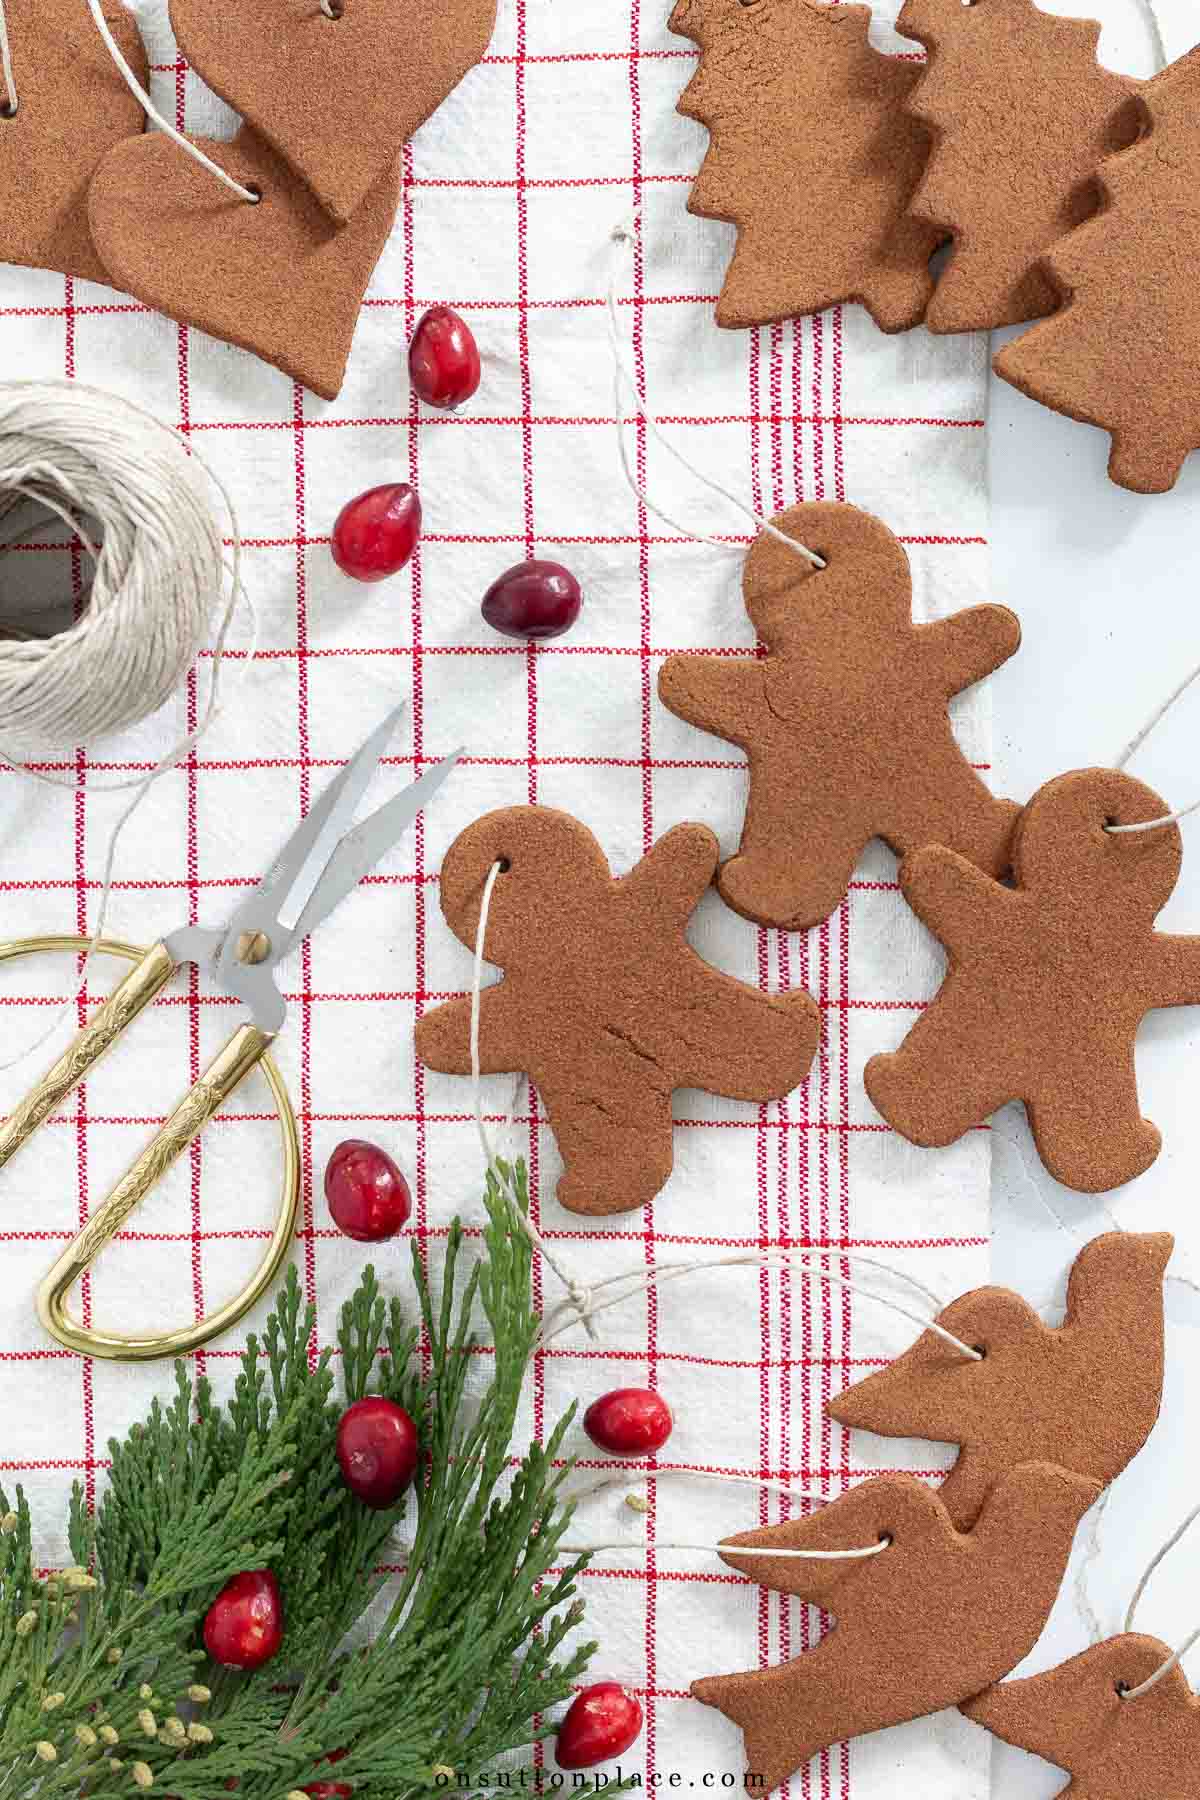
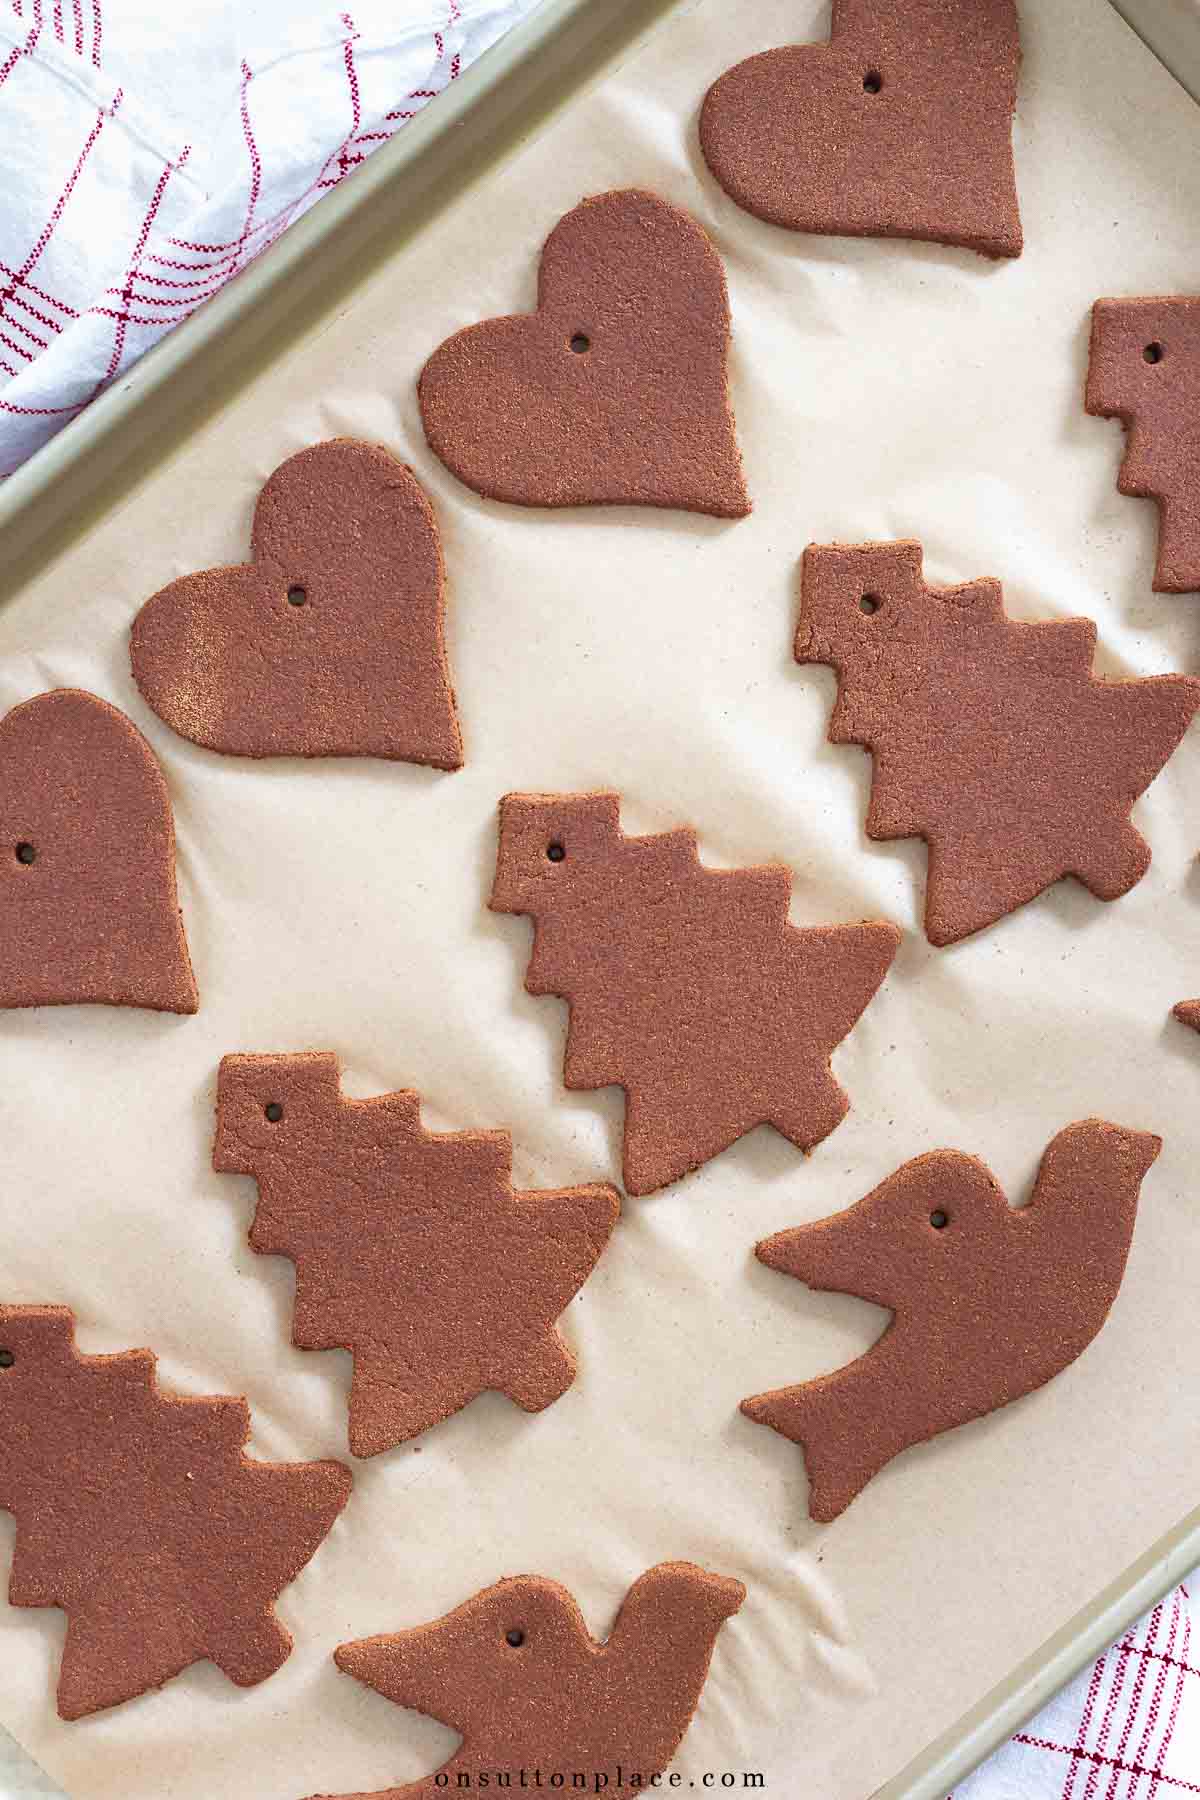
- Place the ornaments on a cookie sheet covered with wax or parchment paper. Using a skewer or small drinking straw, make a hole in the top of each ornament.
- Ornaments should dry at room temperature in 24 to 48 hours. It helps to turn them occasionally so they dry evenly.
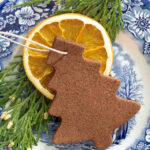
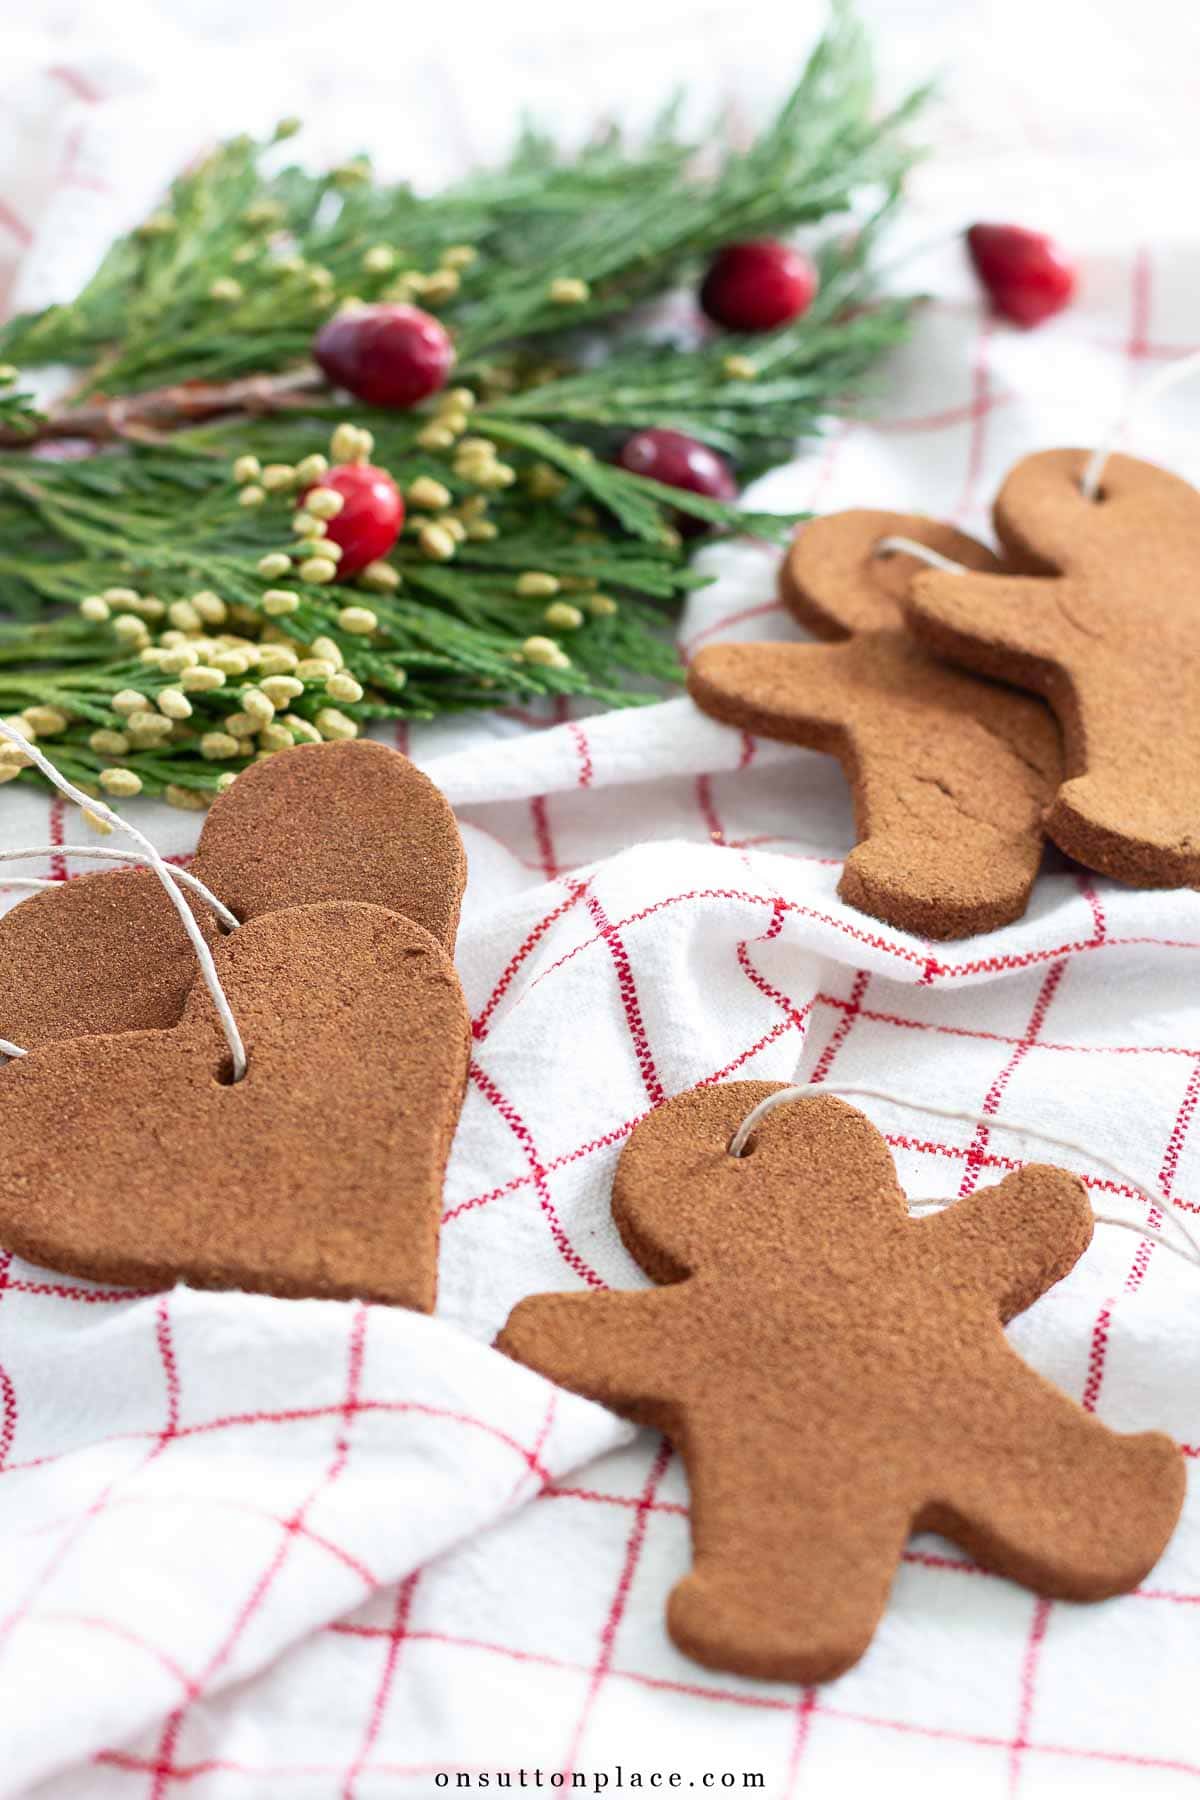
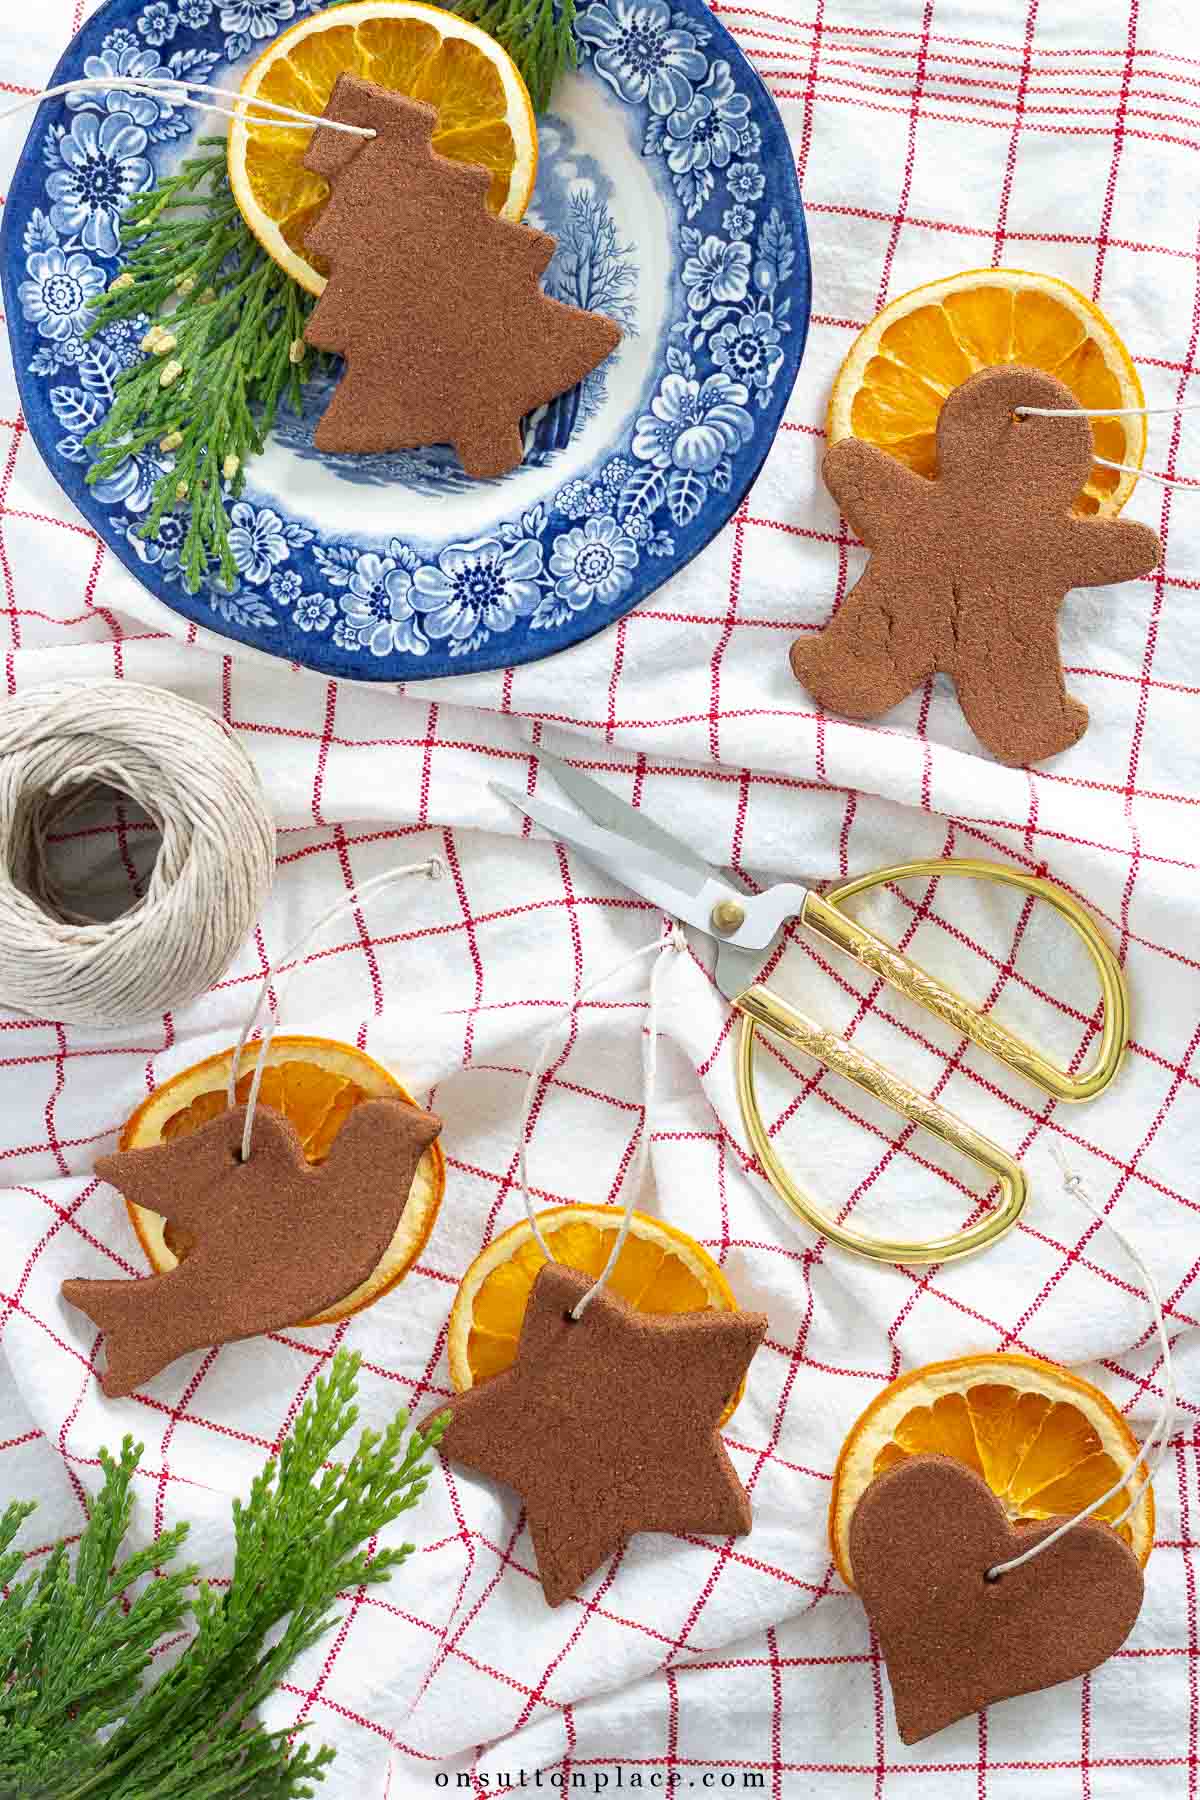
- String with a piece of twine or ribbon to hang.
Tips and Tricks
- Roll the dough to at least 1/4 inch thick. Anything thinner may curl as it dries. Thicker ornaments work fine, but they take a little longer to finish.
- One batch makes about 12 ornaments. If you need more, mix separate batches rather than doubling the recipe. Smaller batches come together more easily and roll out better.
- Try to keep all the batches the same thickness. This gives the ornaments a uniform look and helps them dry at the same rate.
- If your cookie cutters leave rough edges, wet your fingertip and lightly smooth around each shape. It takes just a minute and makes a big difference.
- If you air dry the ornaments, turn them over whenever you think of it. A few turns over two days works well.
- Because the recipe contains glue, the ornaments are non-edible. They look very sweet packaged in cellophane bags with THESE TAGS.
- If you are short on time, preheat your oven to 200 degrees F, place the baking sheets inside, and turn the oven off. They may not be completely dry in the morning, but they will be close.
- Wear gloves when handling the dough to keep your hands and nails clean.
For Best Results
Start with a fresh bottle of McCormick cinnamon. Cinnamon varies from brand to brand, and older bottles lose their natural oils. If your dough feels dry or cracks when you roll it out, add applesauce one tablespoon at a time and knead well after each addition. If your dough is too wet and sticks to the surface, add a dusting of cinnamon. When the dough feels smooth and holds together, it’s ready to roll and cut.
How to Store
- To store the ornaments safely, use a plastic container with a tight lid. Place the ornaments in single layers, with wax or parchment paper in between the layers.
- Store these ornaments in a place where the temperature is controlled. Avoid attics, damp basements, garages, etc.
Frequently Asked Questions
Of course, in addition to looking adorable, these little ornaments have a wonderful scent. These handmade ornaments are slightly imperfect, but they come from the heart…and that’s very special indeed.

Christmas
Ornaments + Garlands
Cinnamon Applesauce Ornaments Recipe
Ingredients
- 1 cup ground cinnamon
- 3/4 cup applesauce
- 2 tablespoons basic white glue
- 1 tablespoon ground nutmeg or cloves
Instructions
- Combine all ingredients in a large bowl. Use a spatula and make sure all the cinnamon is absorbed into the applesauce.
- Gather the dough with your hands. Knead it several times, pressing the dough firmly into a ball. It will be about the size of a softball.
- Sprinkle some cinnamon on a cutting board or other smooth surface. Flatten the ball into a disc with your hands. Using a rolling pin, begin to roll out the dough. Turn the dough several times while rolling, adding more cinnamon to prevent sticking.
- Roll until the dough is about 1/4 inch thick and cut out the shapes using cookie cutters.
- Gather the leftover dough after the first cutting and again knead it several times, pressing it firmly into a ball. Repeat the rolling process.
- Repeat until all the dough is used.
- Place ornaments on a baking sheet covered with wax or parchment paper. Using a skewer or small straw, make a hole in the top of each ornament.
- Ornaments should dry in 2 to 3 days. Turn them occasionally so they dry evenly.
- String with a piece of twine or ribbon to hang.
Notes
Nutrition information is automatically calculated, so should only be used as an approximation.


Wrapped With A Bow
Unlock the art of beautiful gift wrapping with this free guide,
and turn every present into a magical moment this Christmas!


Okay I’m giving this 5 star I have a question the dough when I made it was super wet, crumbly and cracked really easily. I followed the instruction to a T. What can I do if my dough comes out like this or is that how it’s supposed to be before baking?
Hi Jenna…the dough should not be wet or crumbly. If it’s too wet, add more cinnamon until it’s the right consistency to roll out. I hope you try it again. Please let me know how it works out!
I’m using this same recipe and wa Ted to know if when the ornament is dry have you ever used a fine sandpaper to smooth out the edges?
Hi Carol…yes. That’s a great idea! I have also used an Emory board and that works well too. Just be gentle!
I see a calls for white glue can I use Elmers clear glue
Hi Debbie…yes, the clear glue should work ok. Happy Holidays!
Can I use homemade applesauce?
Can’t buy ready made here.
Thanks
Hi Debbie…the honest truth is that I’m not sure. If the homemade applesauce is very smooth, it should be OK. Perhaps try just a half batch and see how it comes out? Good luck!
Do you think these would still work if you substituted the Cinnamon with Cinnamon Sugar?
Hi Summer…although I can’t say for sure because I have never tried it, I would say no. Just use cinnamon. Happy Holidays!
If we plan to bake do we decorate before baking or after
Hi Chelsea…I’m not sure what you mean by decorate? I have never decorated the ornaments. But if you want to paint them, or embellish in some other way, definitely bake them first. Good luck!
I made these 20 years ago and they still smell great I used fabric paint and put family members name on them . We decorate the tree with them every year
I can’t tell you how many times I have made these and they are always a success. The recipe is no-fail and there are a multitude of uses for them. I’ve used them to attach to gifts, used them to wrap napkins like a napkin ring. I put them on Christmas trees and keep some in my car for an air freshener. I have made them for a large group of people and I can’t think of one person who doesn’t love them. They are so easy to make! It’s October and I am already making my first batch!
Many other recipes I’ve found, including from McCormick, do not include glue. Simply cinnamon and applesauce.
I made these for the first time with two of my young grandchildren. I was concerned about the cinnamon irritating their skin, so I did most of the dough handling. They loved this! Our ornaments didn’t seem to dry out after 48 hours on parchment paper, so I moved them to a rack and left them on a counter another full day. That worked beautifully! The children were so excited to take them home!!!
The recipe for the cinnamon cut outs calls for white glue, but is not mentioned in the instructions as when to use it.
Thanks for your help,
Elizabeth
Hi Elizabeth! In the first step, I say “combine all ingredients in a large bowl.” So just add the glue to the cinnamon, applesauce, and spices. Enjoy!
I made these for the first time. They turned out so cute! The only thing that was hard was convincing my husband that they were not edible!
Can you use cinnamon applesauce in place of plain and still use cinnamon to prevent sticking?
I made these years ago and still have my daughters hand print. (33 years) It has always had a prominent place on our Christmas Tree. I gave it to her two years ago when she had a baby. Hoping to do this with our grandchildren and that they last as long as it did the last time.
I’m 76, a craft teacher & a grandma. I’ve made these spicy ornaments for many years, since 1998. I have & share several recipes for them, but this is the sturdiest, simplest, most kid-friendly recipe I’ve found. This is the one I’m sharing with everyone.
I was a CampFire leader for 18 years. We had fun doing many amazing, fun, simple crafts that my kids loved & taught others. They requested this one yearly.
These ornaments make great gifts, gift tags & decorations. They last for years. I still have my original ones. Once dried, they are sturdy & insect proof. From year to year I store mine in Ziplocs to protect them & retain the spicy smell.
Children love this craft. It’s one they can easily do. These ornaments can be decorated with acrylic paints or left as is. They make the house smell wonderful during their construction & as decor for the house & window.
Carolyn D
Thank you so much for this amazing comment. I appreciate it so much!
Love these. ❤️ Have made these over the years with family and students. Such a treasure. And the cinnamon, cloves and nutmeg continue to smell if you store them in sealed storage cintainers or zip loc bags. Thanks, Ann! A real classic Christmas treasure for everyone.
Ann,
We love this recipe!
One way we have baked these is to turn on the oven at 200’ in the evening. Once heated- and put the ornaments in on the cookie sheets and turn off the oven. The next morning the ornaments are perfect!
We have many of these throughout our family that are years old!
You can make your own Applesauce on the stove
I made a batch of these in 1986, the first Christmas after we were married. Most have succumbed to the years, but I still have THREE that we hang on the tree every year!
Thank you for the recipe, the pictures and the tips! 💖
Help! I did something wrong. After cutting with cookie cutter, we couldn’t get them to lift off the wax paper without destroying as they all just pushed into a lump. Help. We ended up making hearts by hand out of the dough! 5 year old grandson still had fun!
Hello! It’s important to use a good bit of cinnamon to dust the rolling surface. I don’t use wax paper. I use a wood cutting board that is dusted generously with cinnamon. Dust your rolling pin as well. Maybe give that a try? Good luck!
I absolutely LOVE getting your lovely emails Anne ! There is something about them , it just brightens my mood as I keep reading and I thank you for that ! I’ve been making theses cinnamon ornaments for many years but I’ve never added white glue , what is it the glue does ? I’m guessing it may keep them firm so they don’t curl up ? I’m going to add the glue this year and see the results , oh and add nutmeg too since it’s my favorite holiday scent. Happy Holidays to you .
Hello! I believe the glue holds the ingredients together and hardens everything. Nutmeg is a great idea!
Hi! Love this tutorial and the smell of these ornaments! I work at a small public library in NH and wondered if I could get permission to use one of your pictures to encourage kids to sign up and make ornaments with us. I could make sure photo credit was given onsuttonplace. Please let me know if this is possible. Thank you! Wendy, Barrington Public Library, NH.
Yes that would be fine…thank you for asking!
Thank you I tried w/o glue and were too crumbly Will try this! ❤️❤️❤️
This is one of my FAVORITE recipes! I can make up several batches and keep it in the fridge for a day or two, just make sure it is wrapped up tight. They do take a few days to dry but well worth it. I have some ornaments that are 10 years old and still smell great. I keep them in a tin to store them. We make new ones every year and yes you need the glue!
I have no idea what I did wrong, but I used all of the right ingredients and measured them out…it crumbled over and over again. Added glue, added cinnamon….nothing saved them. So frustrated as I made these about 8 years ago with no issues.
I just want to say Thank You for all the inspiration through the holiday season. I love your recipes, the printable and now the cinnamon ornaments. I look forward to your posts and sit back with deep appreciation to you. Merry Christmas and thanks for the joy!
No…I used regular sweetened applesauce.
Any tips and getting them to dry faster? They have been sitting for almost 3 days and they are still really wet! My son needs them for school next week. I’m worried they wont set in time
You can bake the ornaments in a 200 degree F oven for an hour or so. Turn them over halfway through the baking time and keep your eye on them. I am not sure of the bake time since they have been sitting out for a while.
When u say white glue do u mean the PVA sort? Like liquid or stick glue like pritt stick?
Thanks
I used regular white Elmer’s glue. Here is an affiliate link so you can see: https://amzn.to/38H89Sr
Is one whole cup of cinnamon really necessary? Seems like so much! (But I’ve never attempted this recipe…just wanted to check before our first try!)
Yes…the recipe is correct!
🌲 Greetings:
Thank you so much for this lovely recipe for the cinnamon applesauce doubgh, the children in my daycare and I had a lot of fun making all sorts of Christmas ornaments with it today and I wanted to pass on two tips that I thought would help you and your viewers.
1). if you wear gloves during the mixing of it it’ll save your fingernails from getting messy and then you could remove the gloves once the dough is aIll kneaded up.
2). if you place the moist cut out ornaments on a cookie drying rack, so that there’s ventilation “underneath” the items, you Won’t have to turn them over at all won’t have to turn them over at all .
We used some pretty green or red gingham ribbon and we used some vintage cookie cutters and they came out looking so sweet ~ so thank you so much !!
🌲 Love and Happiness,
~ Emily
Can you make them without glue ?
No…the glue is what holds the cinnamon and applesauce together!
I made these 25 years ago and they’ve not only lasted, they still smell amazing (a little less so every year, store them in an airtight container). I’m very excited to find the recipe again!
Christmas gifts anyone?
One word…….AWESOME 😊
Can this dough be made in advance and refrigerated overnight? This will be a craft in school and I would like to make the dough ahead of time. Thanks so much for your help.
Hi Jaime! I have not done it, but I don’t see why it wouldn’t work. You may have to let the dough sit out for a bit and soften before you roll it out. If you try it, let us know!
I could not get these rolled or cut out they were so sticky. What am I doing wrong?
Hi Meagan…I’m sorry you are having trouble! I’m not exactly sure what’s going on…but if the dough is sticky, add more cinnamon. Make sure to dust your rolling area with cinnamon before you roll out. Use as much cinnamon as you need to get the dough to work. I hope this helps!
I made these many years ago with my children. So happy I found the recipe again so now I can make them with my grandchildren. They smell wonderful and lasted quite awhile.
Thanks for tip about using sprinkling some cinnamon when rolling out the dough!
This is exactly what I was looking for! Thank you so much!
Love this recipe! Thanks so much for sharing :)
I can attest to how easy these cinnamon, applesauce ornaments are to do. For years, I made them with 25 third graders. I used it as a lesson on reading and following directions. (I was always trying to figure out fun projects that could meet a curriculum objective! For a few years we made sock snowman, filled with rice. That was more involved, but fun, too.) I love the smell of these ornaments. I’m thinking of putting them on my “to do” list for next year and hanging them on the garland across my kitchen sliding glass door. Thanks for the reminder and have a wonderful holiday with friends and family!
No don’t toss them! I don’t know how long they will last but they should be good for at least a few years if they are stored properly. Enjoy!
These gingerbread cookie ornaments sound and look yummy,( but not eatable) What a unique idea, and project. Thank you for sharing.
I have also used that recipe and made ornaments for the tree. They are fun to make and smell wonderful.
I have always loved these ornaments. My daughter is now thirty-six and I made these when she was two, so I can tell you the scent will last for many years!
Once they are dried, can you paint on them? I would like to make and embellish them with paint. Thank you.
Hi Tonya…I am not sure. The ornaments are a little porous after they dry, and I’m not sure how smoothly the paint would go on. My only advice would be to make one batch and give it a try. Another idea would be to spray them with a matte sealer before you paint. I’m not sure if that would work, but it might be worth a try. Let us know if you have good luck!
I made these one year, with amusing results. Back story: I try out a lot of new recipes, some of them good and some not so much. My husband will eat even the worst experiments, the ones I turn up my nose at myself, telling me “Oh, you’re just too fussy.” I had these cinnamon ornaments drying on the kitchen island when he came in and started to nibble on one. When I told him to stop, those were inedible, his response: “Oh, you’re just too fussy. What’s wrong with them?” So I told him.
I have made these with my special education class and they turned out great. After several days we tied a blue ribbon to them.
I made these with my step-daughters nearly 25 years ago & I STILL have the ornaments. We actually painted ours with craft paints, but I love these unpainted with a cute ribbon.
I have been wanting to do this but didn’t have the recipe! Very sweet!
What a great craft to do with the grandchildren; just printed your recipe Ann. Thanks so much.
These are adorable and I love no bake !
I may just be able to handle these. I have an idea who would like them but they would be nice to keep close for an unexpected gift!
And I can’t wait for the cranberry crumble. I dearly love cranberries!
Absolutely Precious – Must try !!
Merry Christmas, Ann !!
Thanks, Ann! Making these for grandbabies today.
Merry Christmas to you and your family!
This is one of the best Christmas crafts I have done. Makes a great addition to a gift bag.
Smells delightful… and I have hung these on my knobs on my kitchen cabinets….
Easy easy..
Thank you, Ann, for the recipe with additional tips. FYI, one year I received one of these as a gift, and LOVED the smell of cinnamon, so after the tree came down, I kept the ornament hanging out all year.
I can confirm that a these are easy and smell wonderful! I have made them to decorate a small tree by my kitchen sink, to cheer my view while doing kitchen chores. I used ribbon hangers, but the baker’s twine is just darling.
I love this idea! I’m going to try this recipe with a snowflake cookie cutter and that way be able to enjoy them for a longer time.
Oh how adorable these ornaments are and thank you for sharing them and the diy