This small primary bathroom remodel completely changed how the space feels and functions. The biggest transformation was removing a full shower wall and replacing it with a pony wall, which instantly made the room look larger and brighter. If you are considering a pony wall shower in a small bathroom, this guide walks through the entire renovation from planning to final cost.
Author’s Note: This bathroom remodel took place at our former home on Sutton Place in 2020. This post has been fully updated to combine all the planning, progress, and reveal details into one complete guide.


This post may contain affiliate links. See my disclosure statement.
Why We Renovated This Bathroom
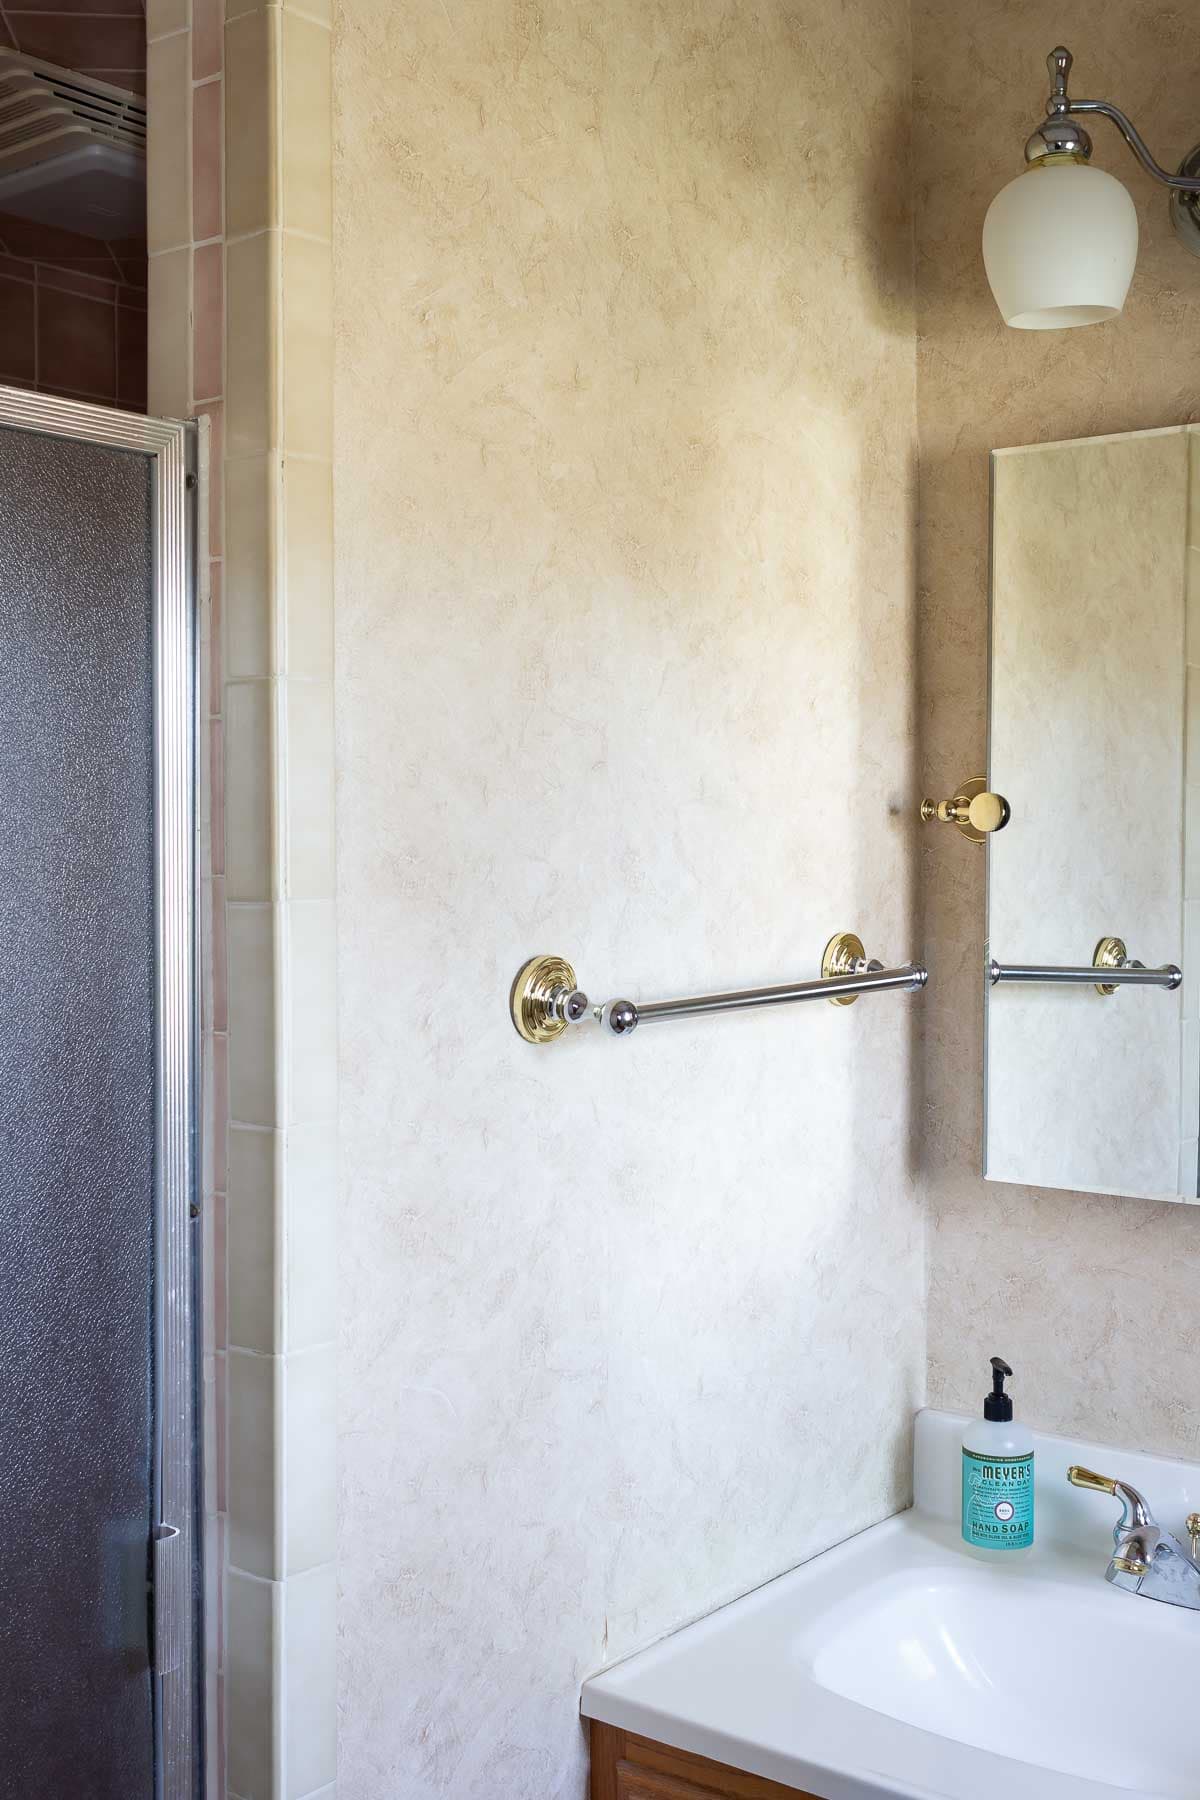
This was our tiny primary bathroom. There was barely room for one person at a time. Over the years we made it work, but it was dated and overdue for improvement. The toilet was newer, so we kept it. Everything else was removed. Because we had just completed our hallway bathroom renovation, I reused many of the same finishes. That decision simplified the process and reduced design fatigue. Here’s what needed updating:
- Oak cabinetry
- Mismatched fixtures and lighting
- Pink ceramic shower tile
- Leaking shower door
- Laminate flooring
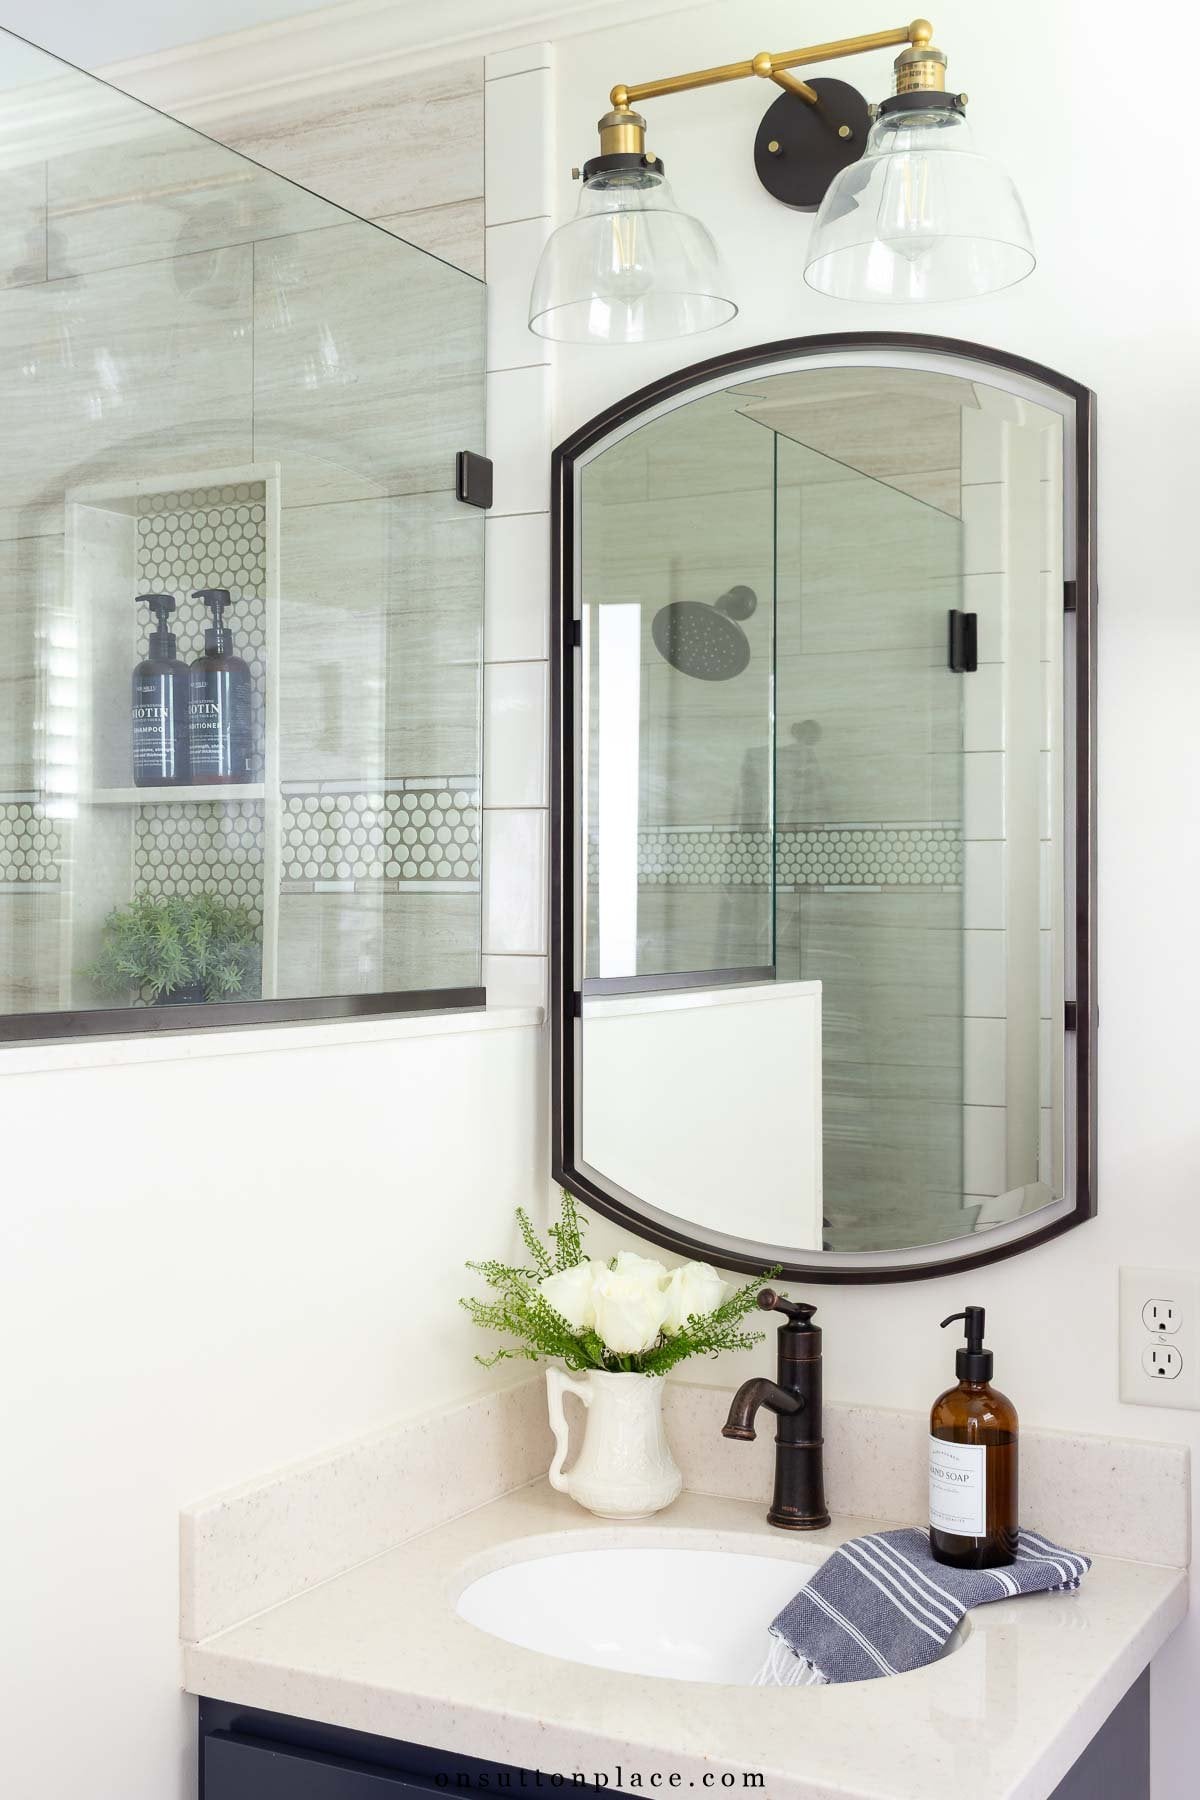
The Biggest Change: Installing a Pony Wall
The most dramatic improvement in this small primary bathroom was removing the full shower wall and bulkhead and replacing it with a pony wall.
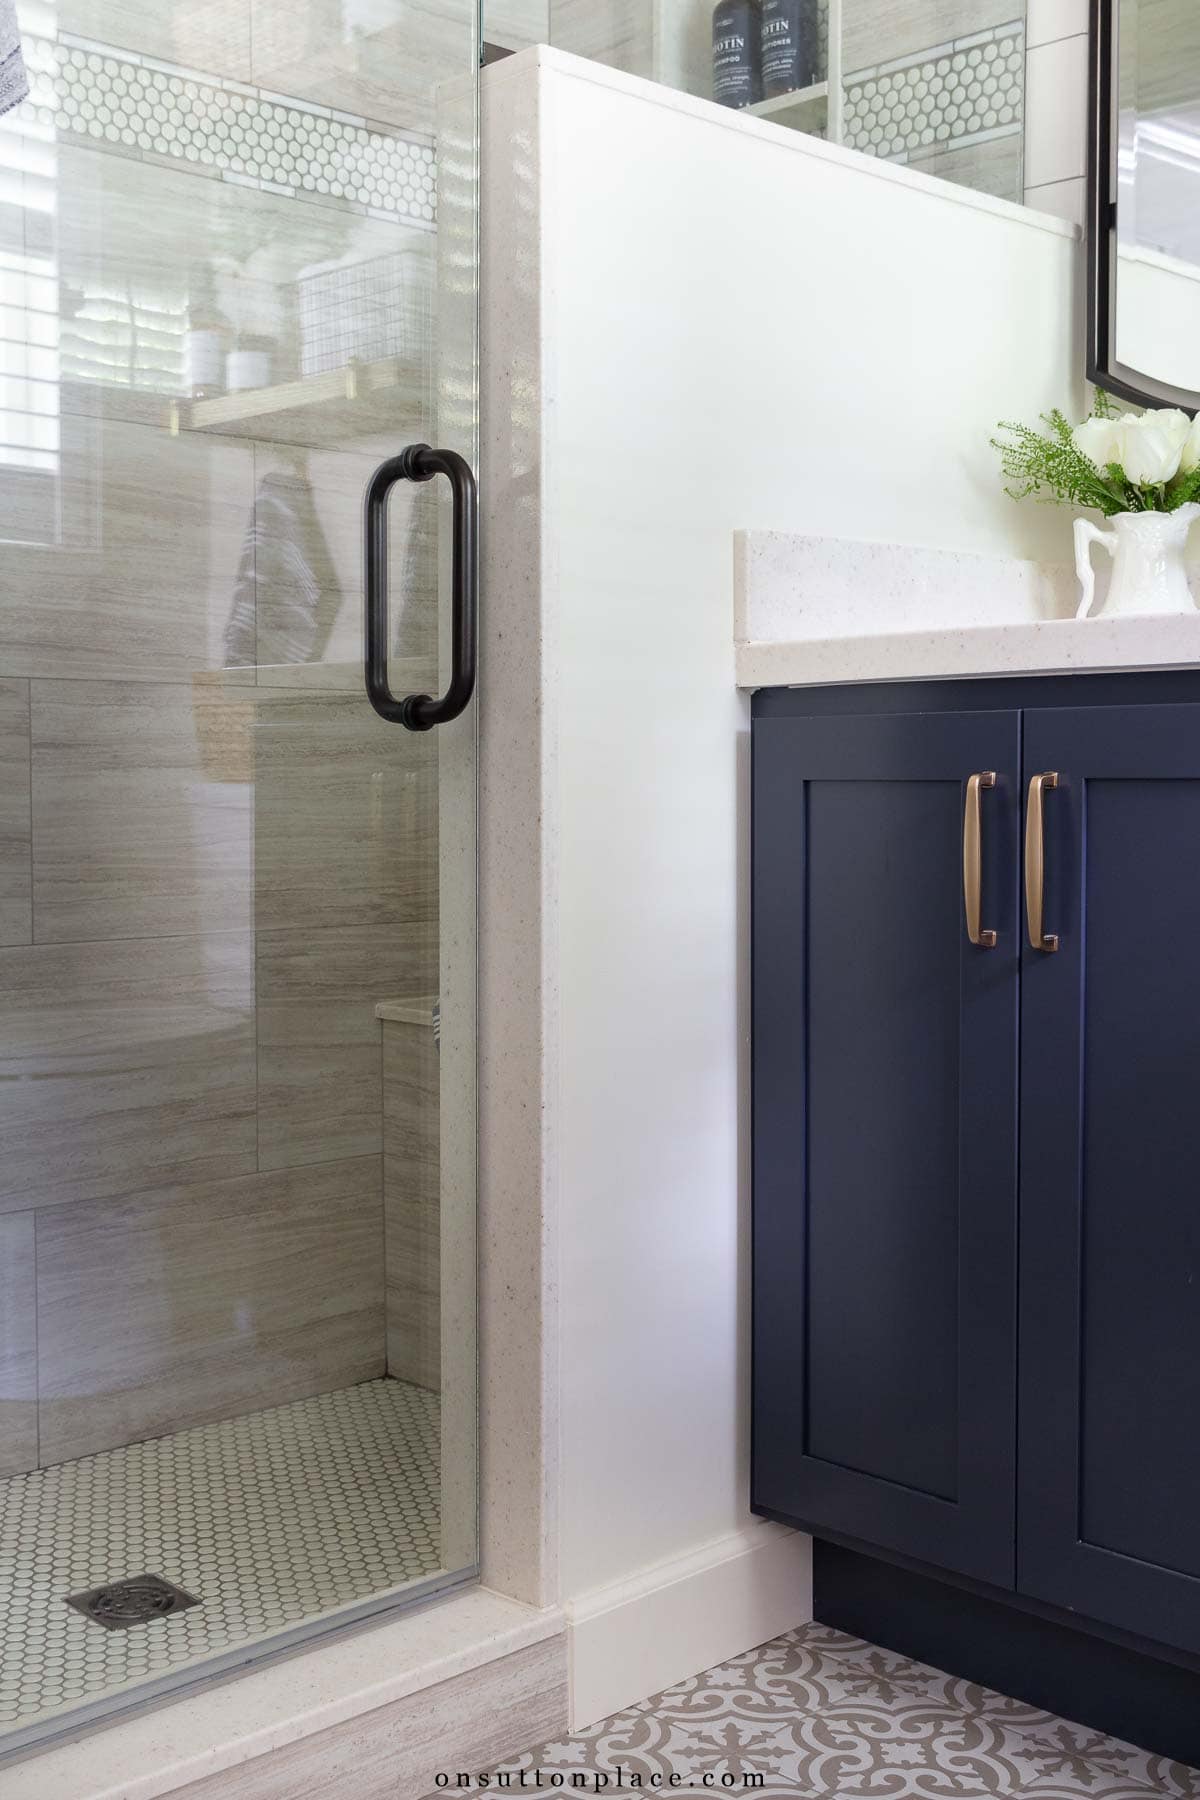
What Is a Pony Wall?
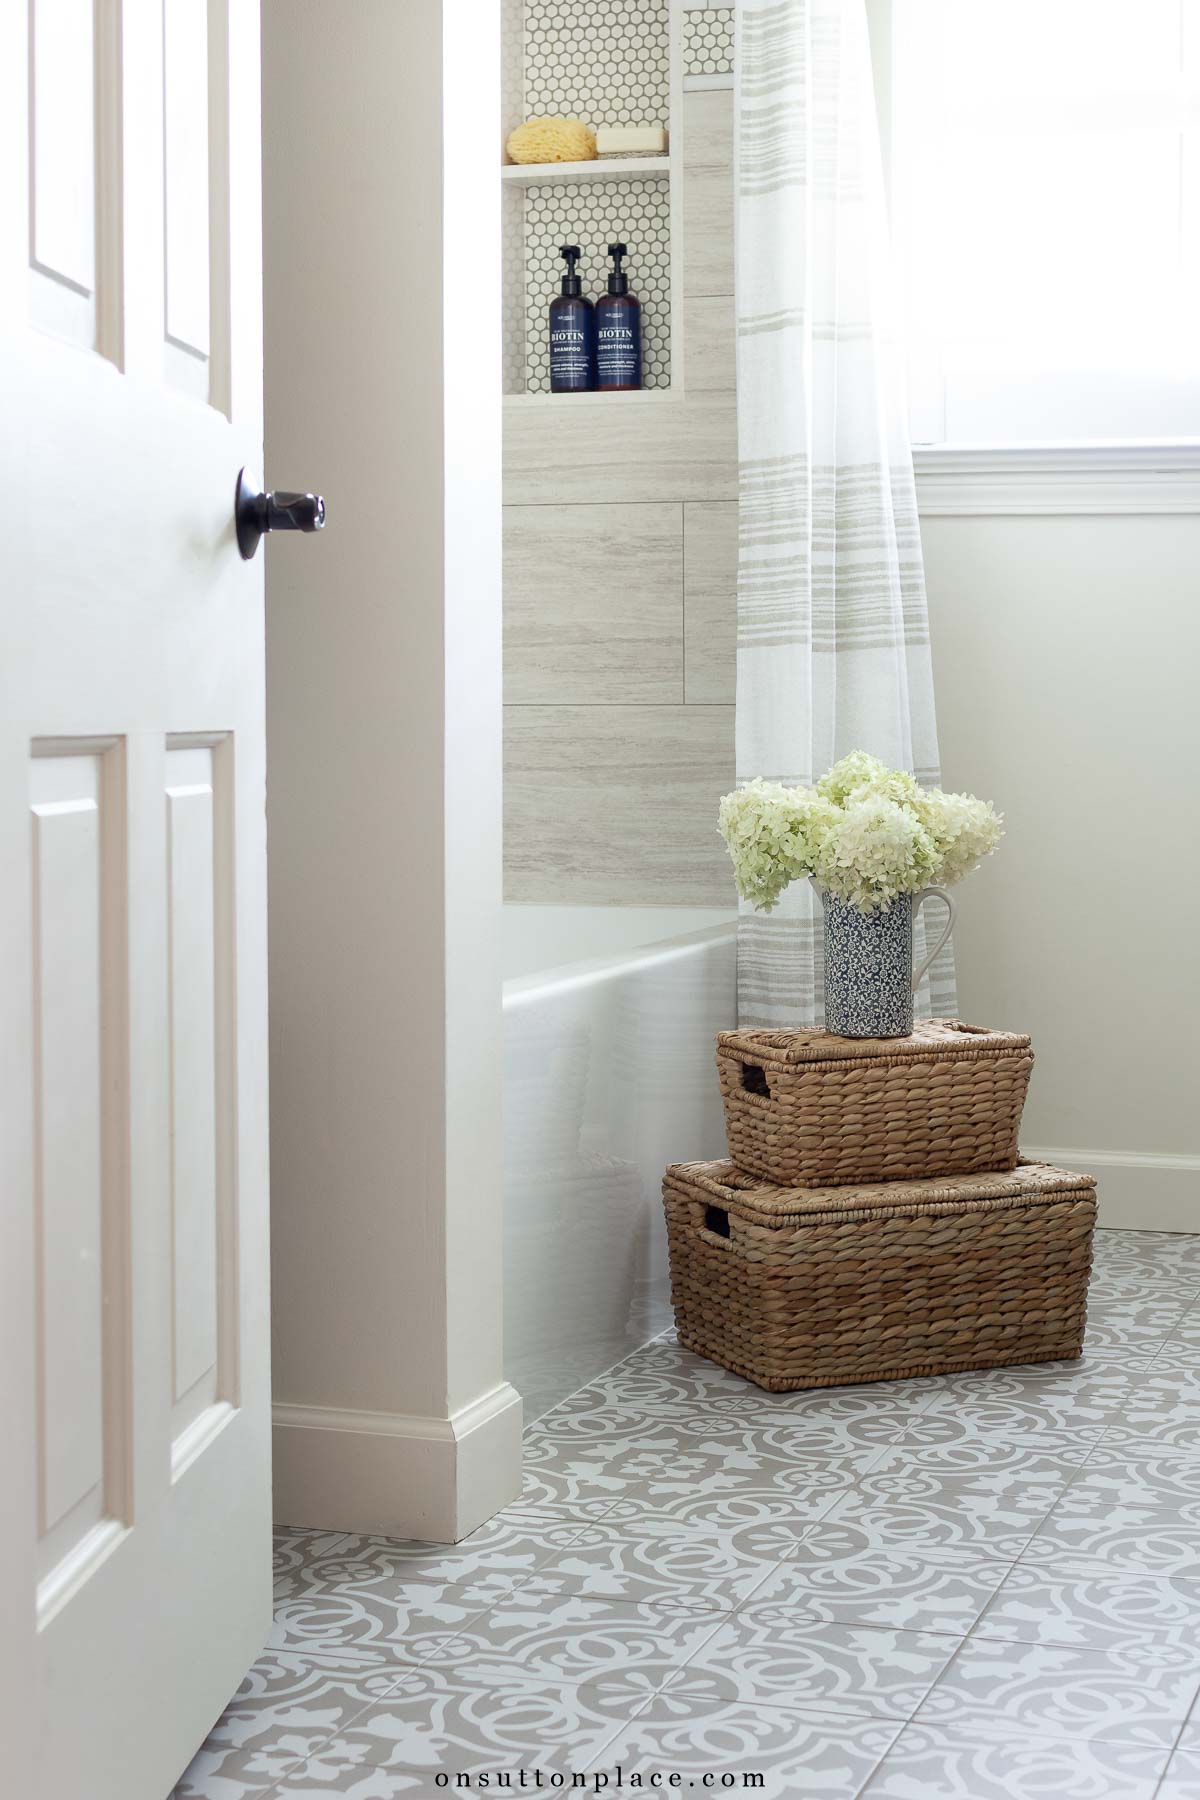
A pony wall is a half wall that extends partway from floor to ceiling. It provides separation and structure without fully closing off the space. In our bathroom, the pony wall separates the shower from the vanity but keeps the ceiling line open. That visual openness is what makes the room feel significantly larger. If you are remodeling a small bathroom, this is one layout change that can completely alter the perception of size.
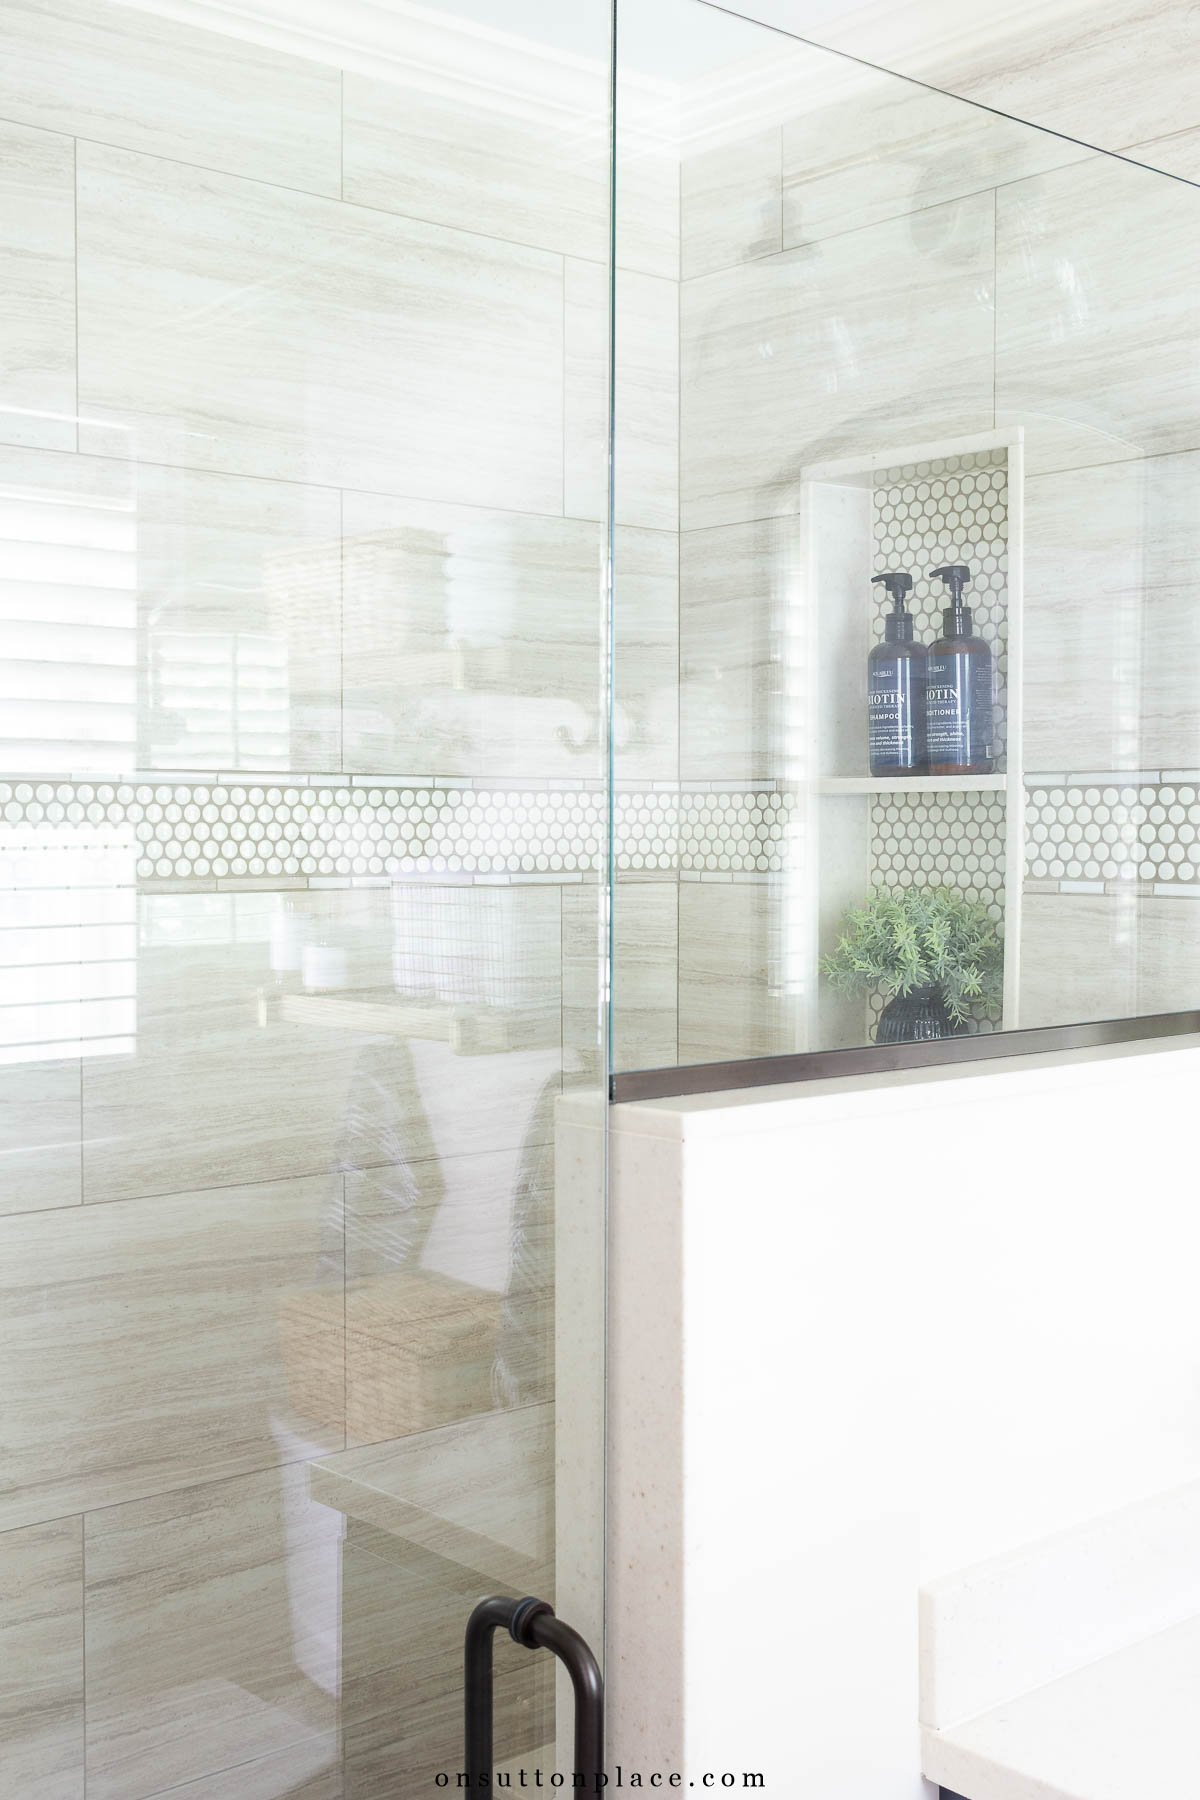
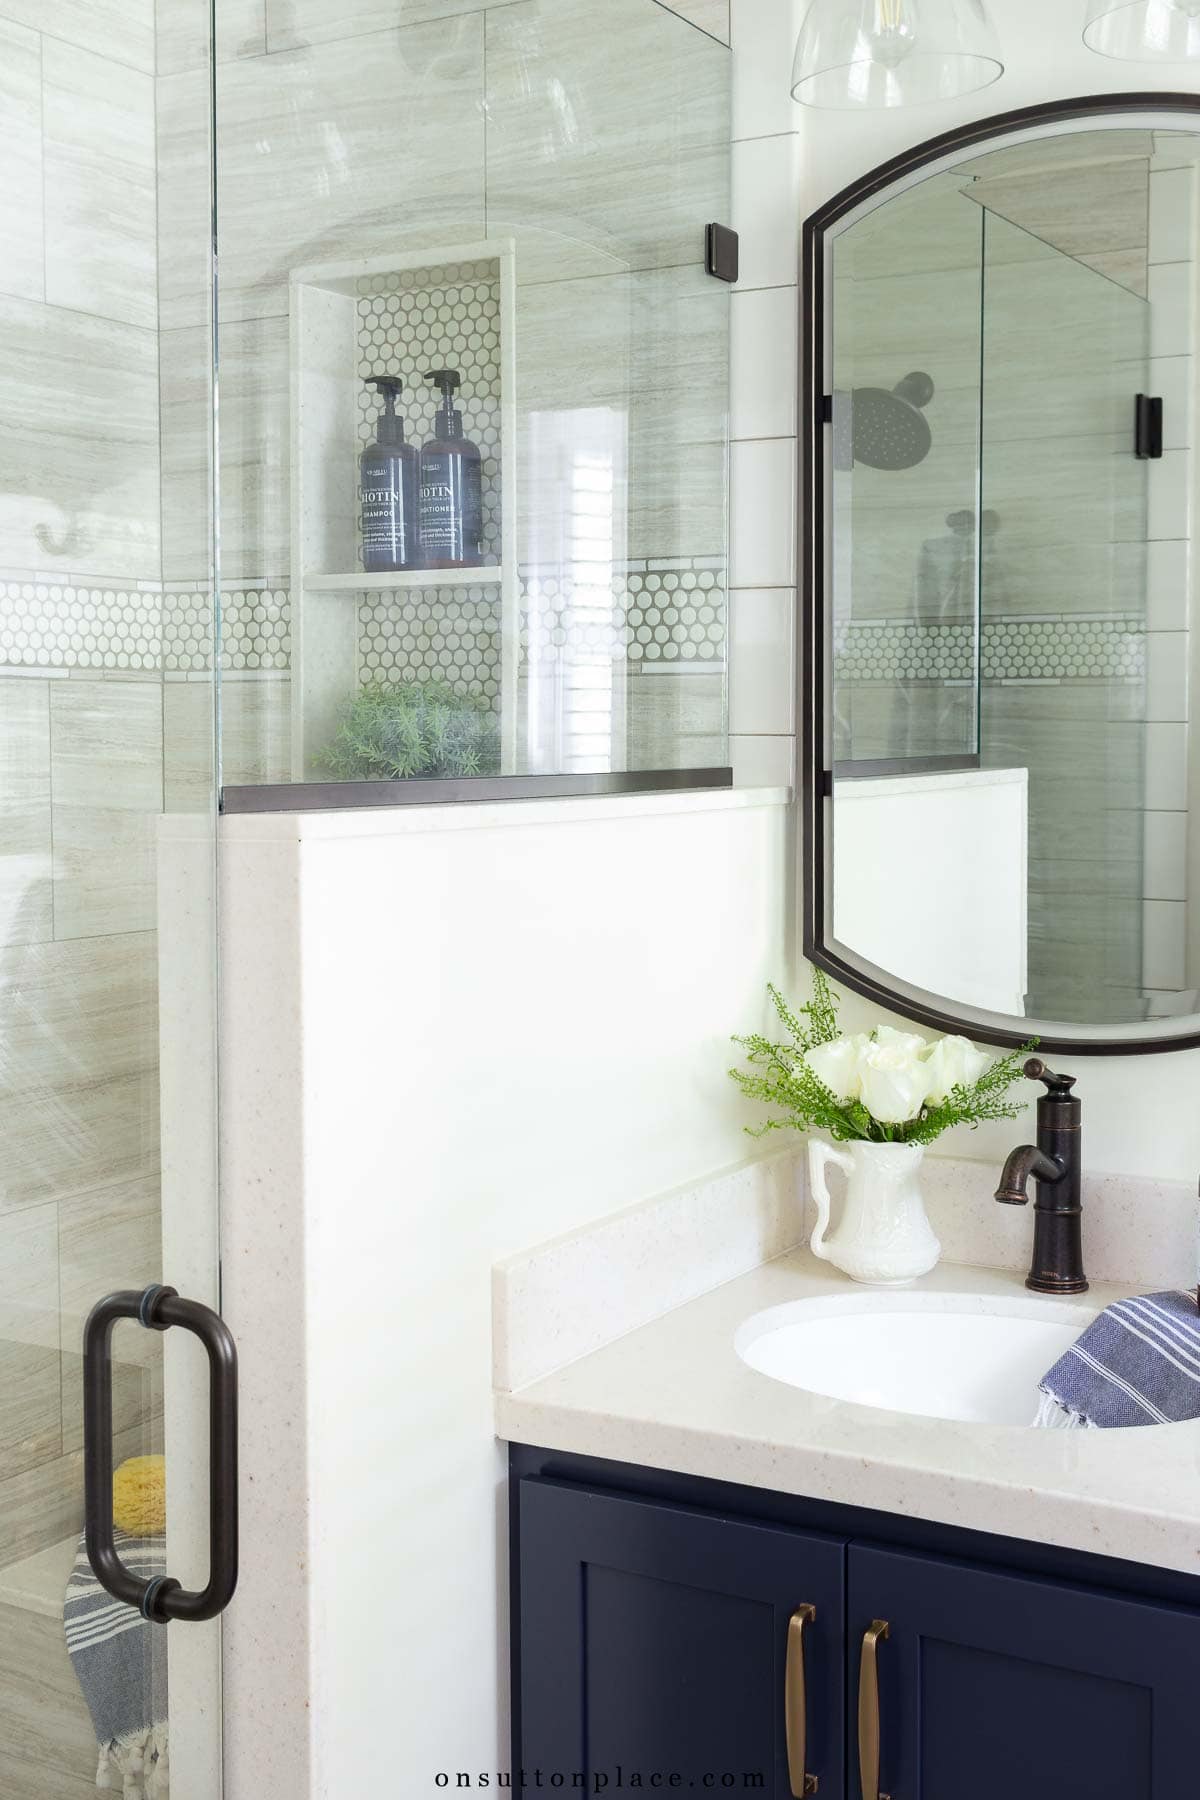
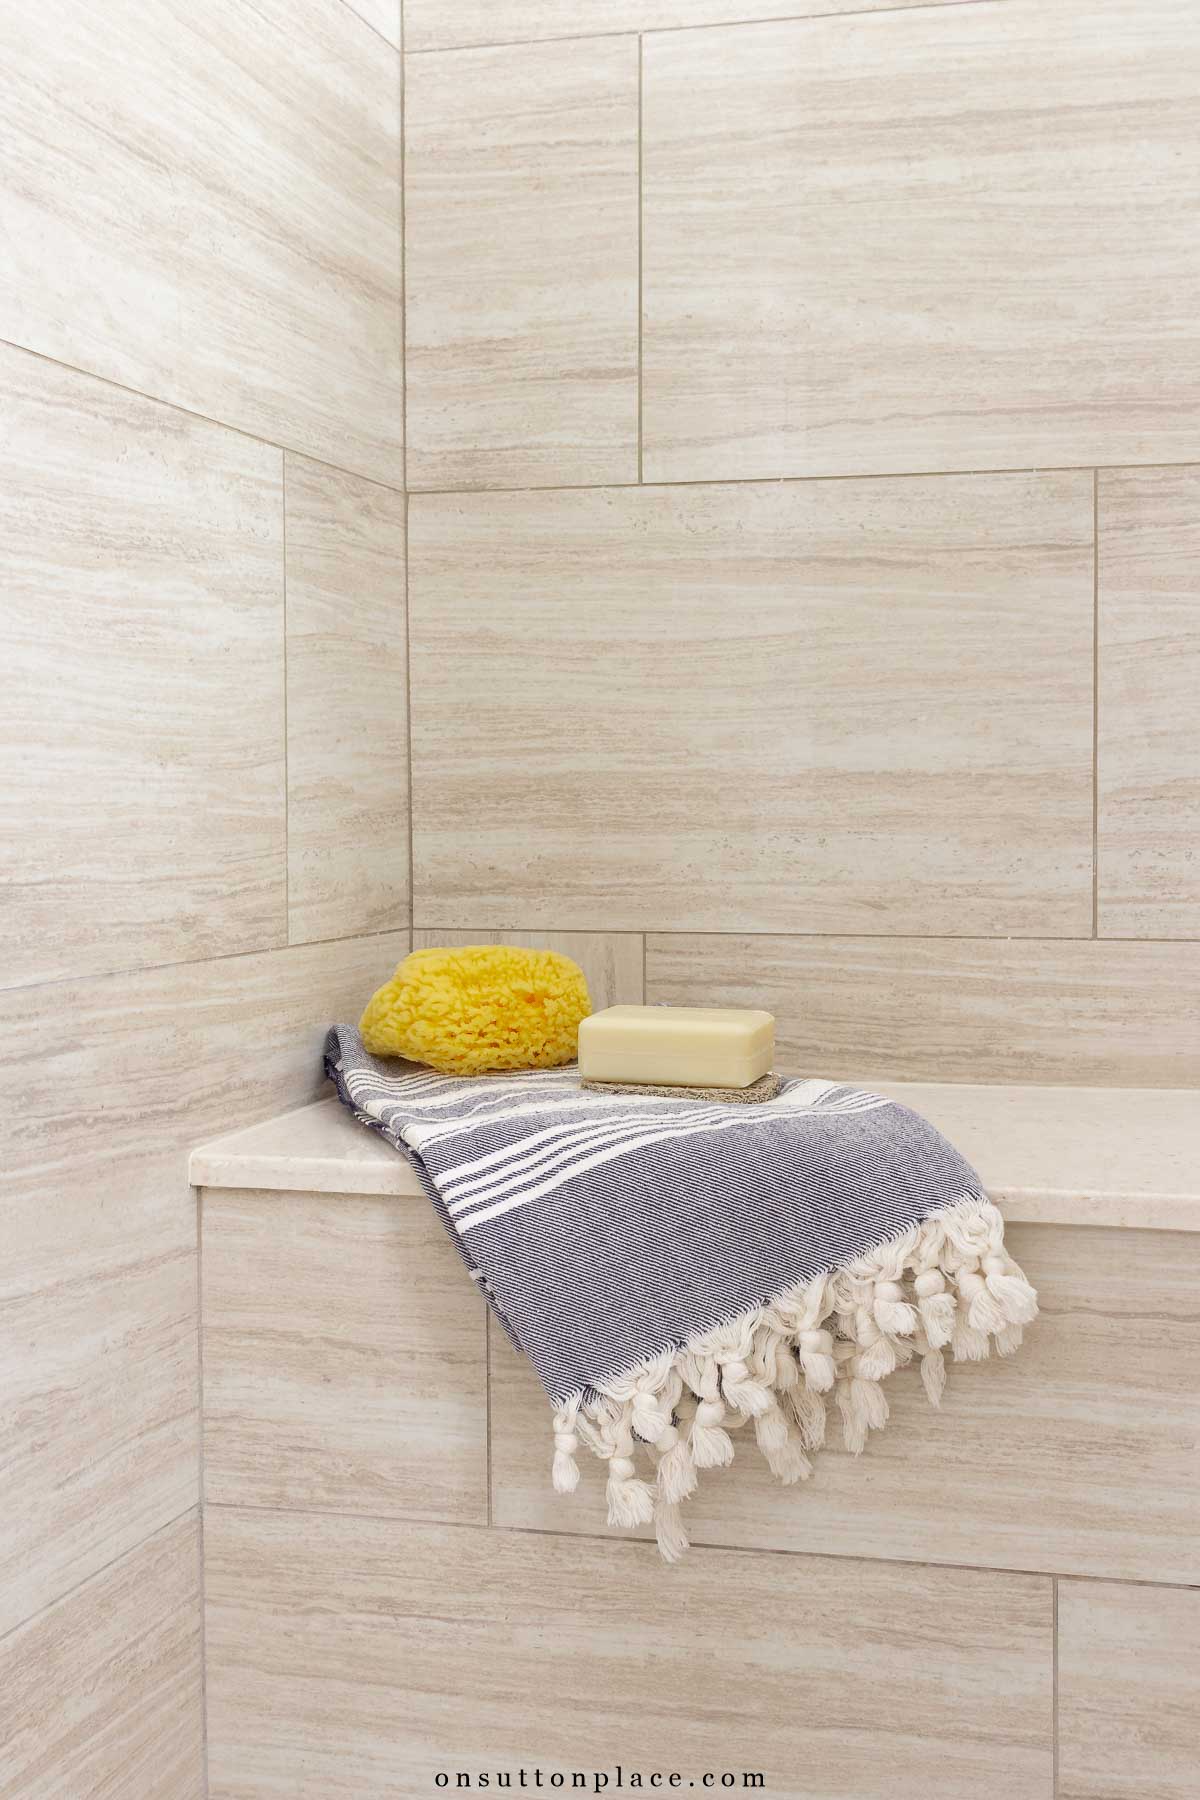
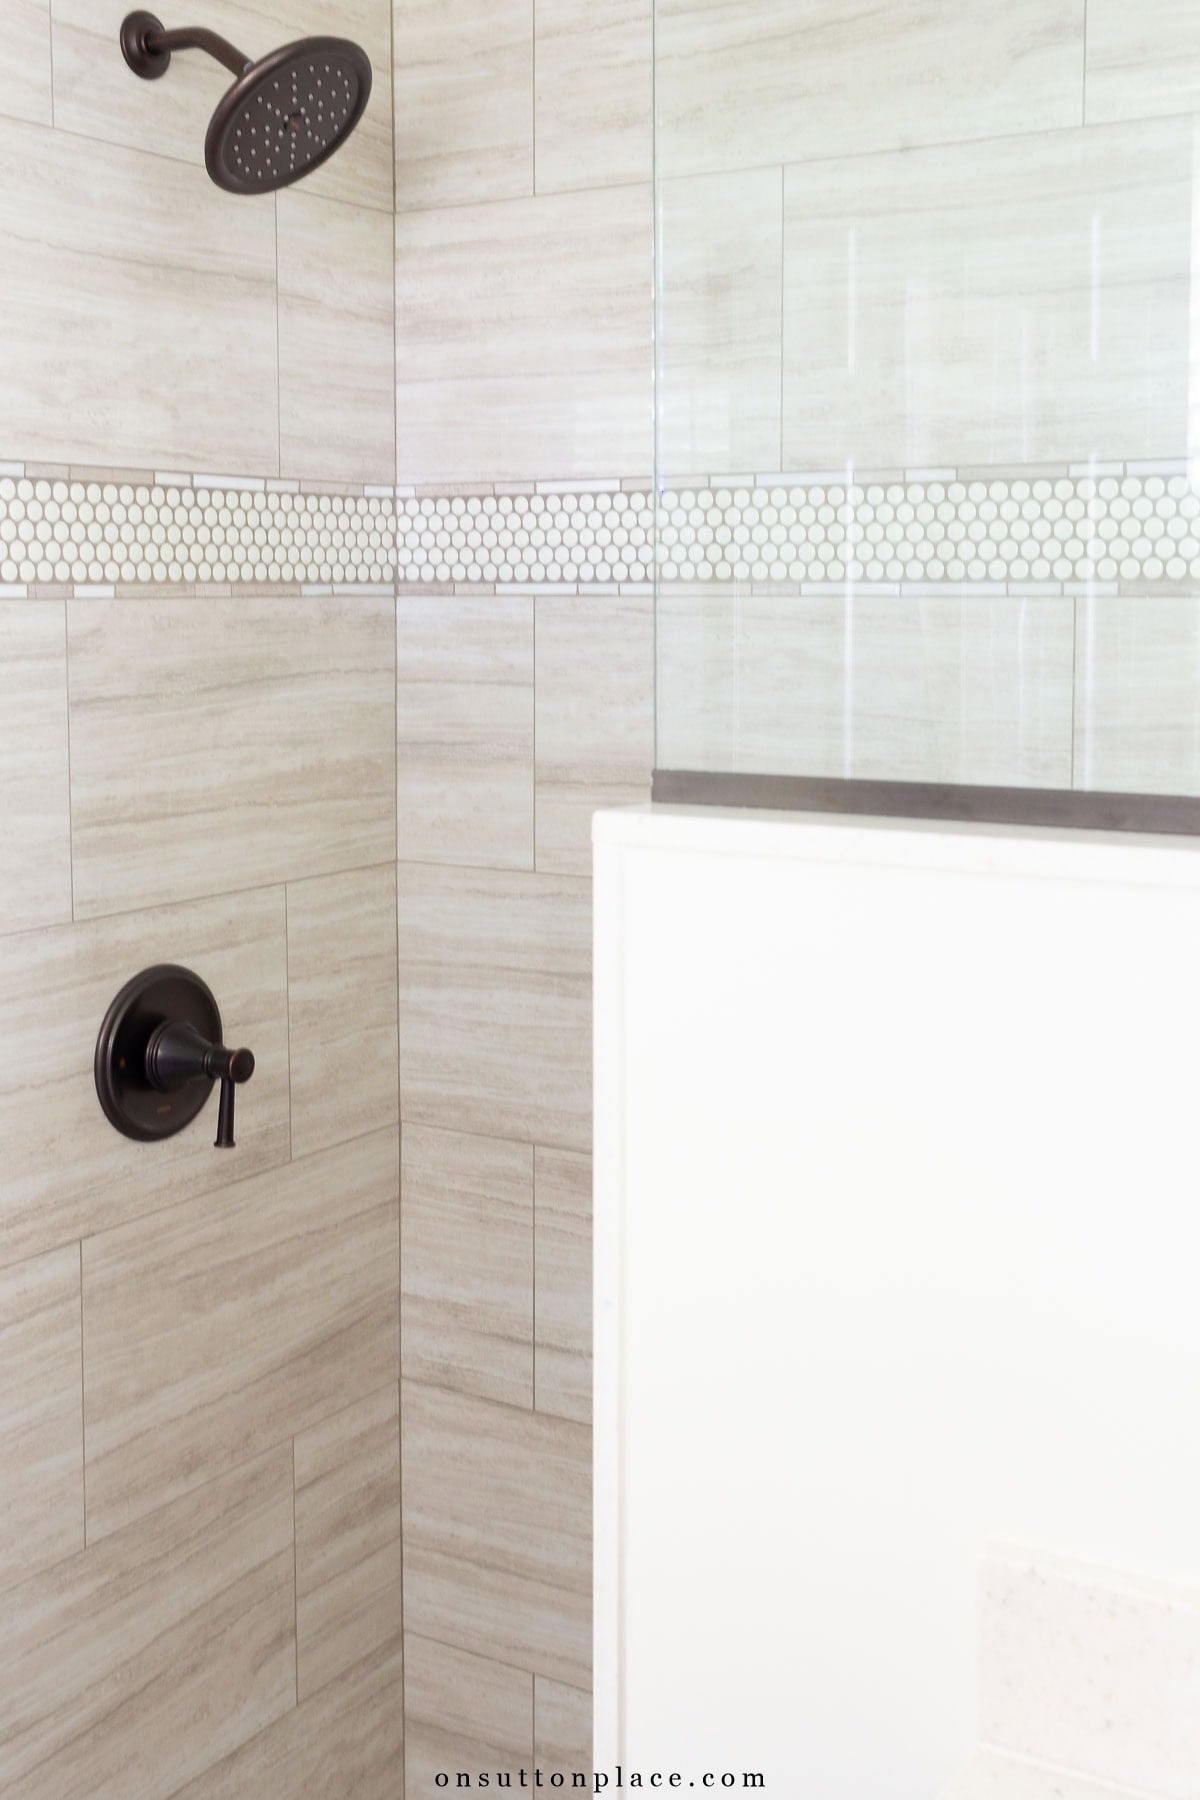
Pony Wall Shower Details
Finishing the pony wall correctly was important. We used cultured granite slabs to cap the shower curb, the top of the pony wall, and the vertical end of the pony wall. The granite provides a stable base for the frameless glass enclosure and creates a seamless look with the countertop. Using the same tile family as the hallway bathroom created consistency without making the rooms identical. The shower includes:
- A built-in seat
- A recessed niche above the seat
- Neutral 12 x 24 porcelain tile
- Ivory penny tile detail
- Mosaic trim border
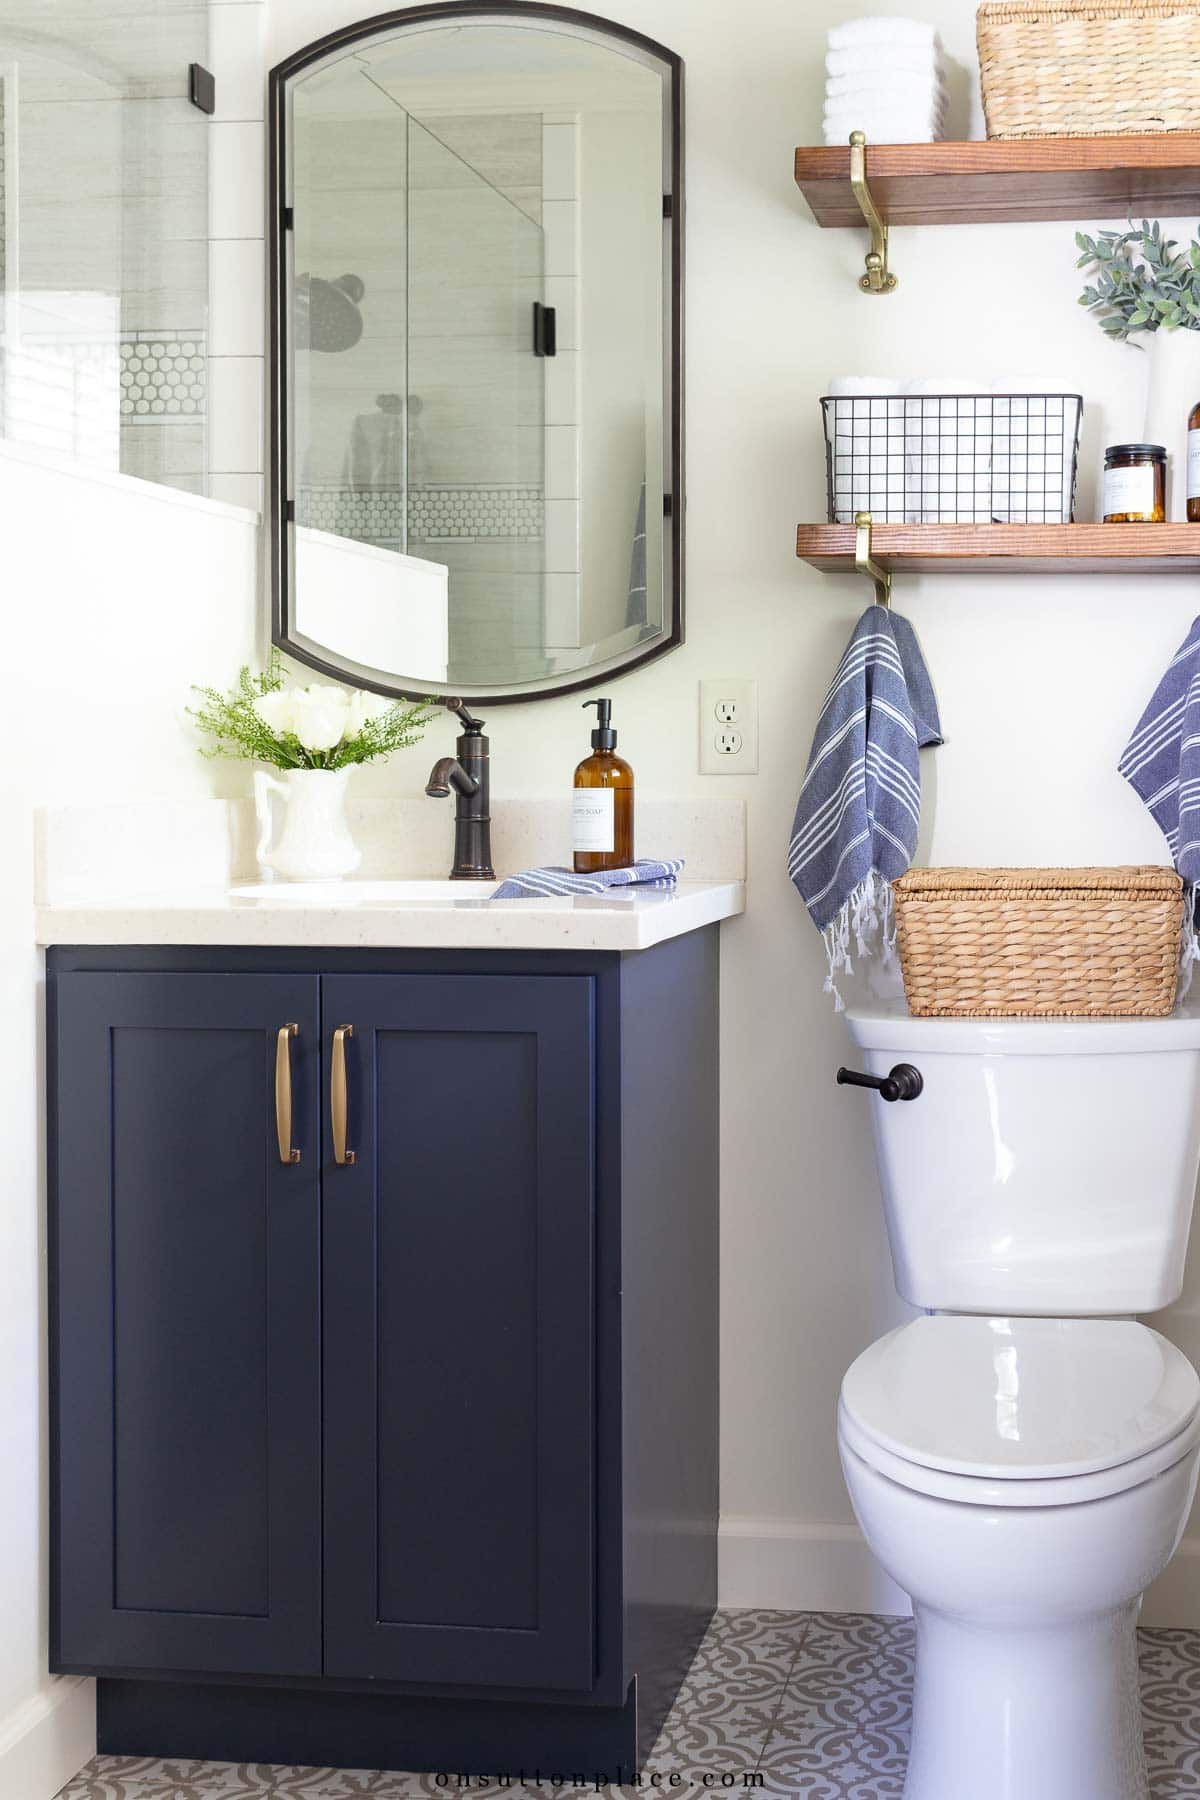
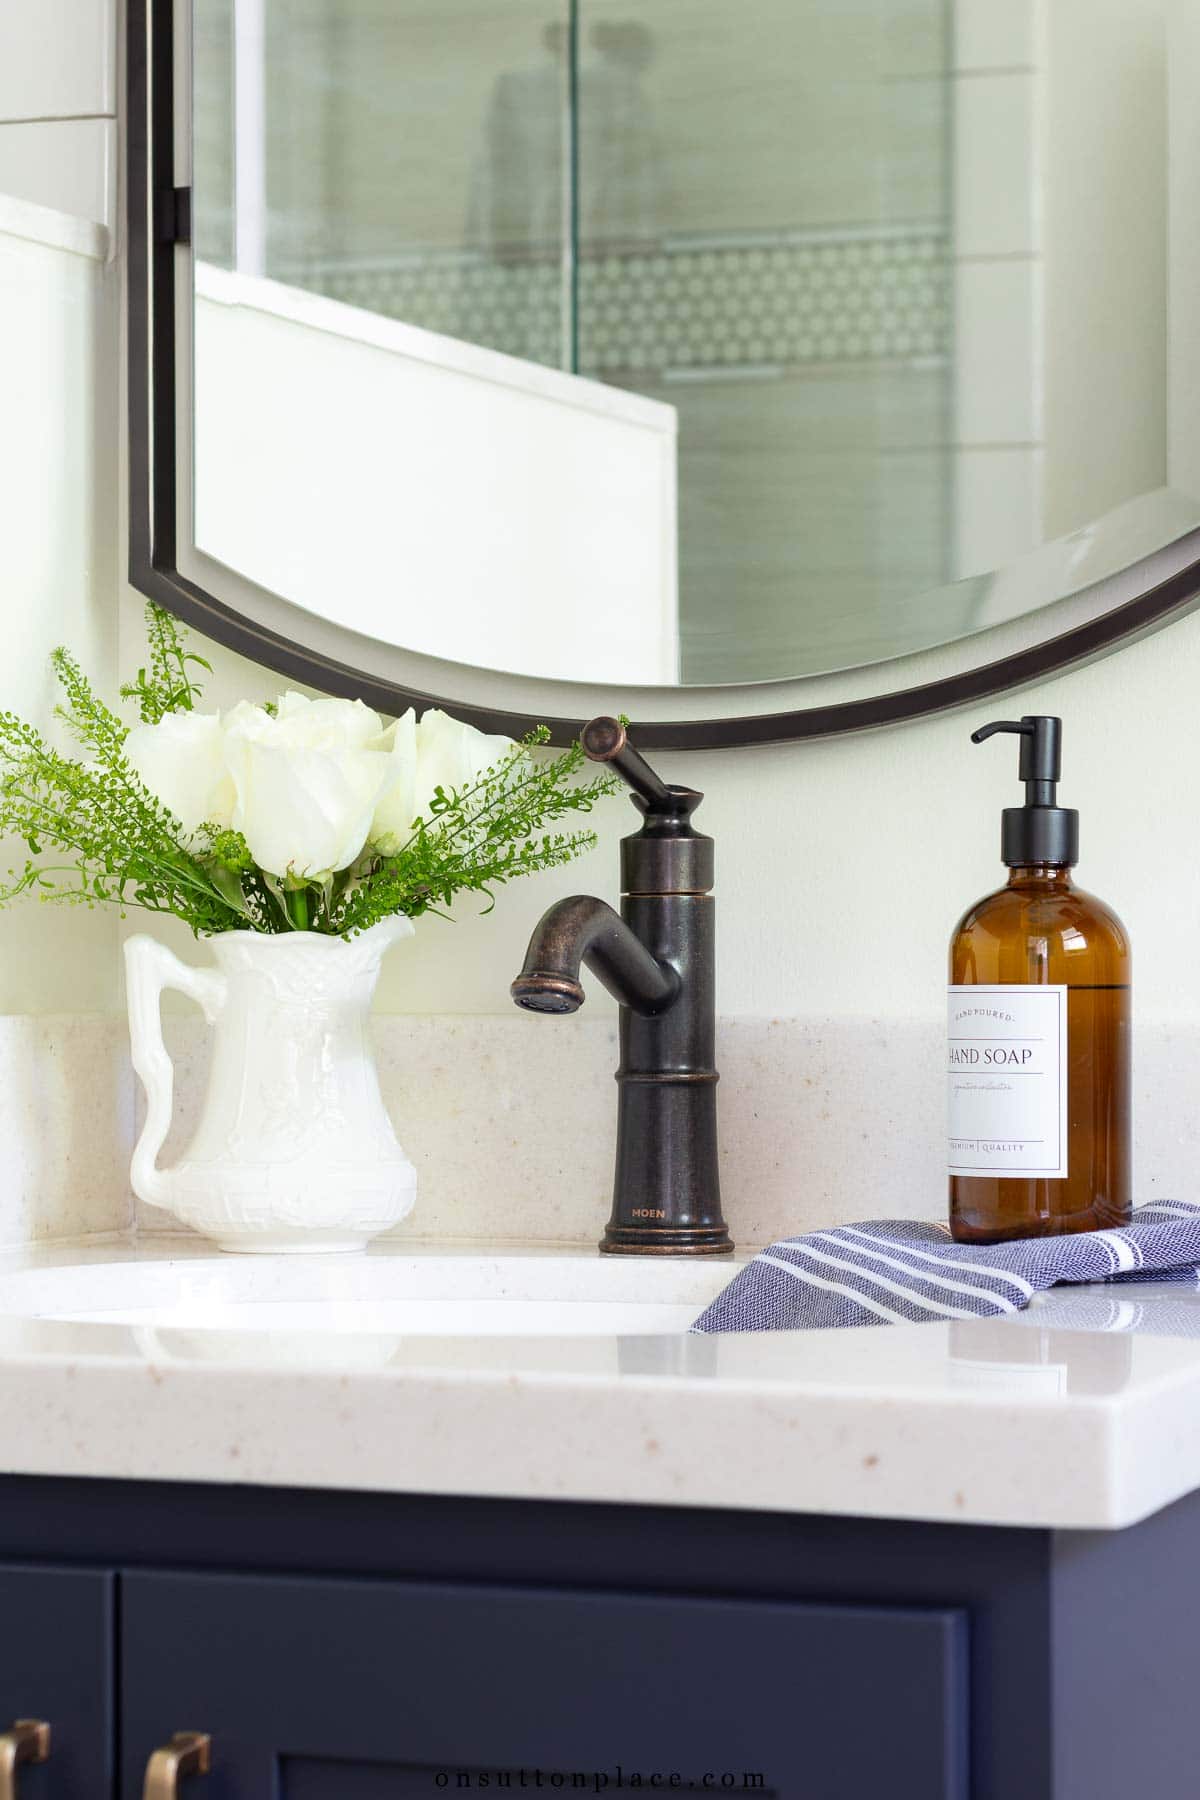
The Navy Vanity
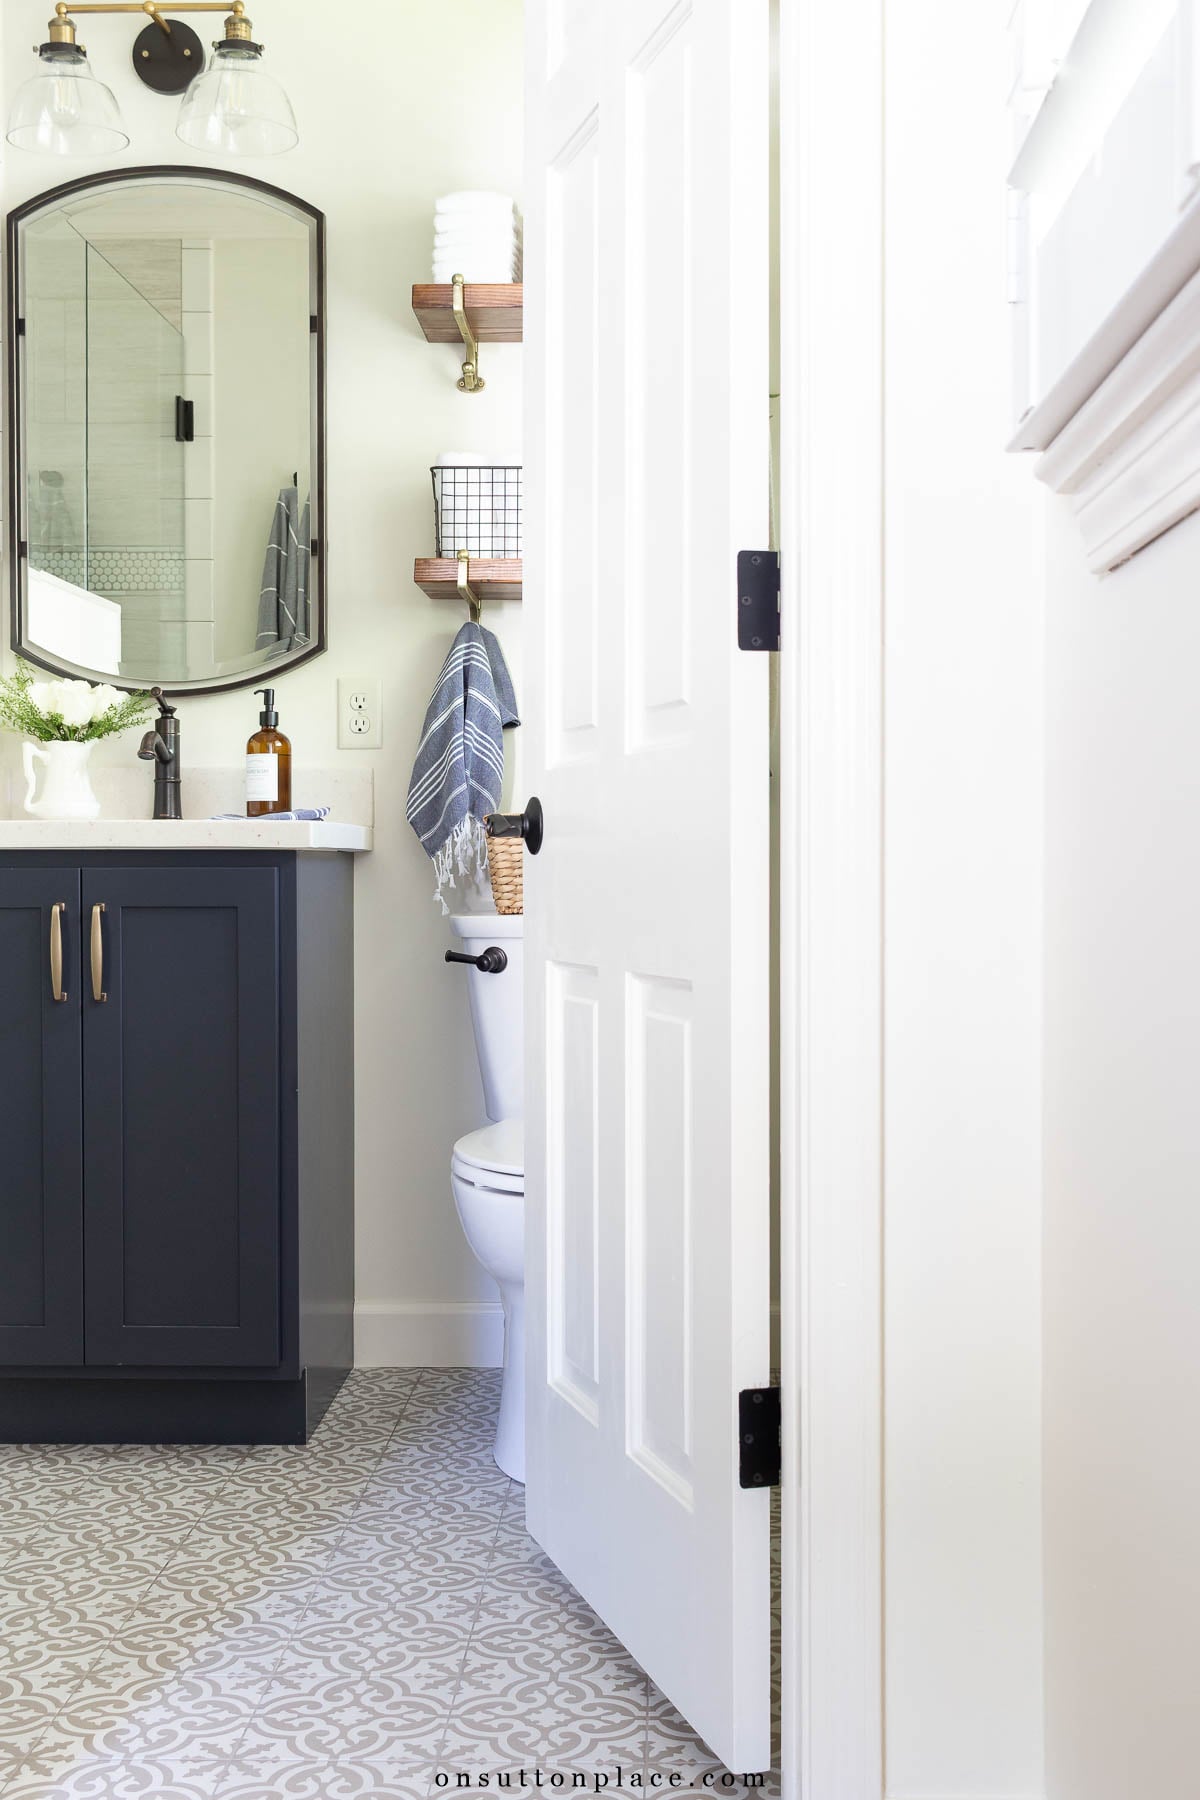
Just like the hallway bathroom, I used KraftMaid Lyndale cabinetry in Midnight. In this smaller layout, the vanity is scaled down but still makes an impact. To maximize counter space, I chose a single lever oil rubbed bronze faucet from the Moen Belfield line. The tall faucet draws the eye upward, and the double light fixture above the mirror helps elongate the wall visually. When working with small spaces, vertical emphasis matters.
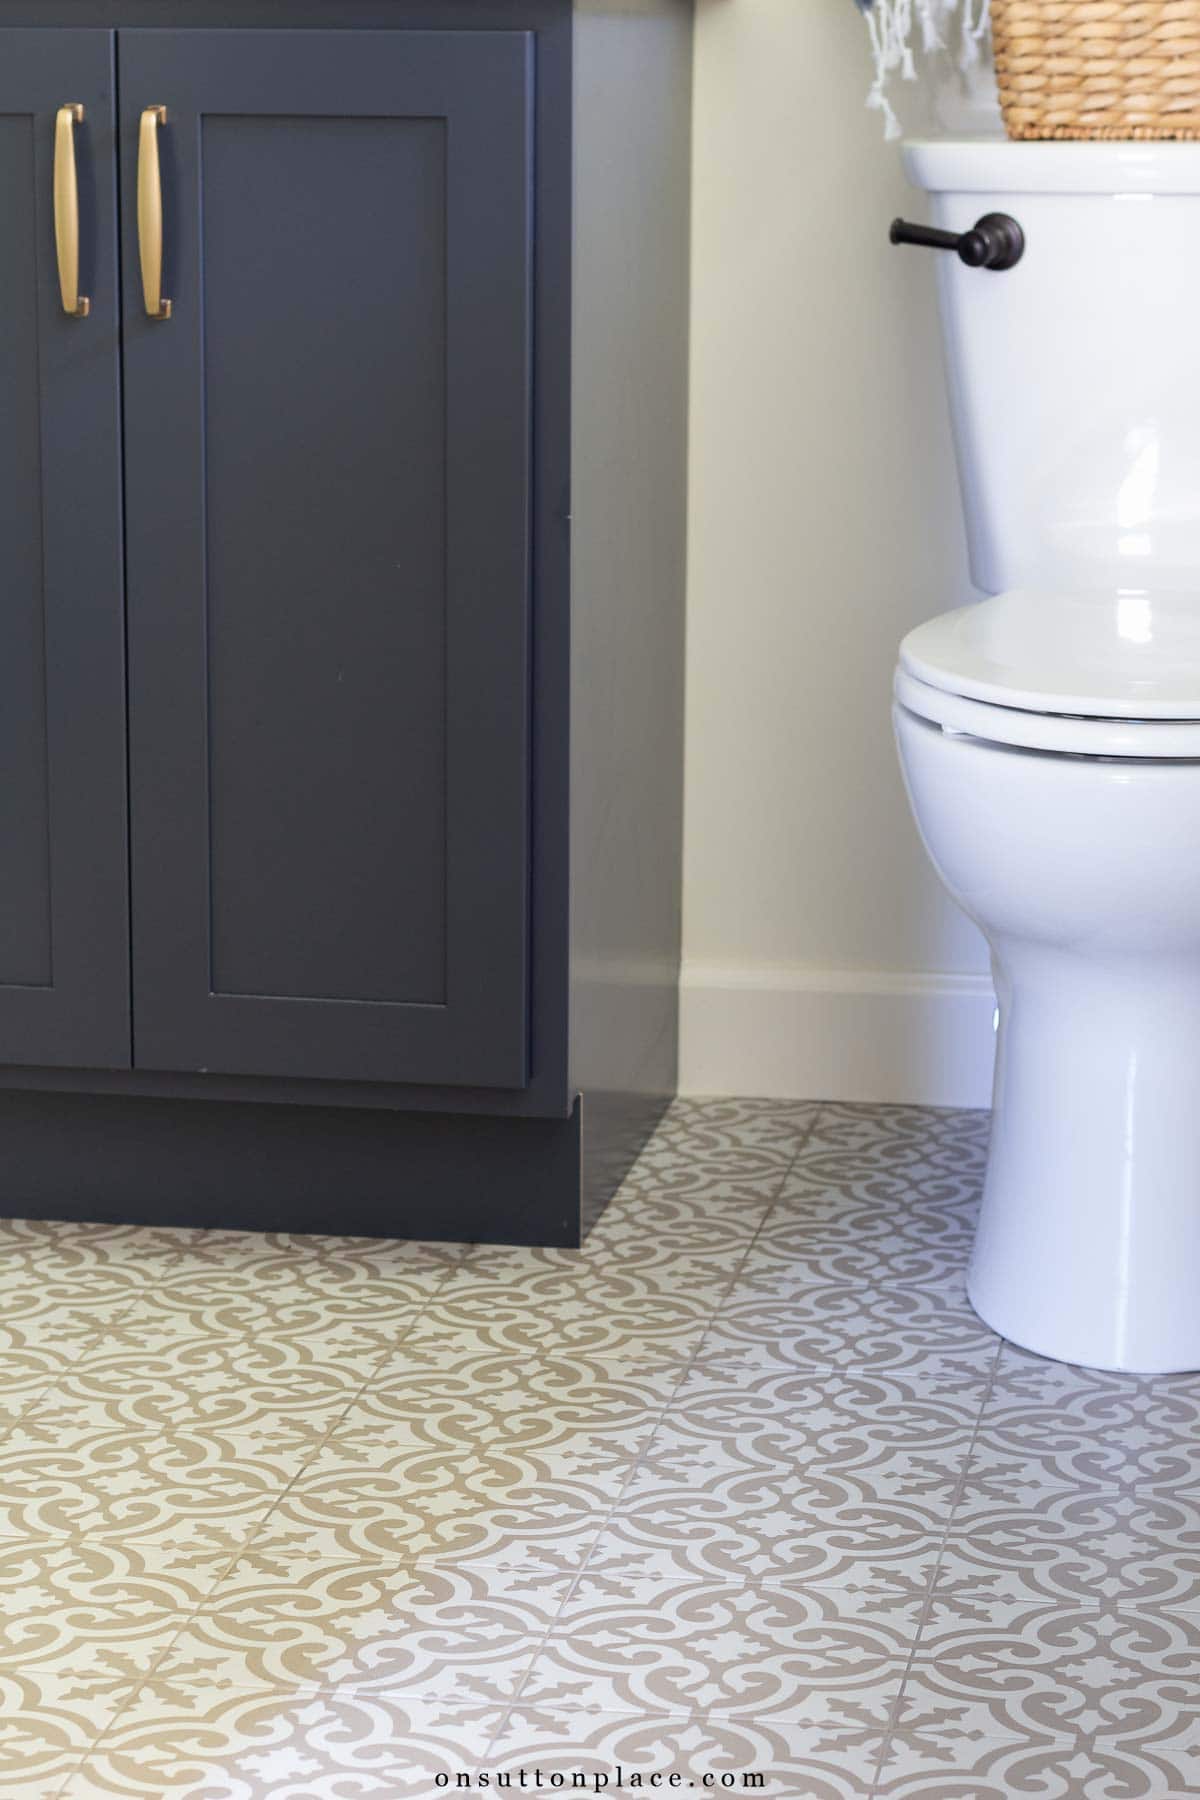
Ceramic Tile Floor
The ceramic floor tile is the same size, color, and brand as the hallway bathroom, but in a different pattern. This was intentional. The coordinating tile keeps the two bathrooms connected while still allowing each to feel unique. The grout color is MAPEI Driftwood, which defines the pattern and hides wear well.
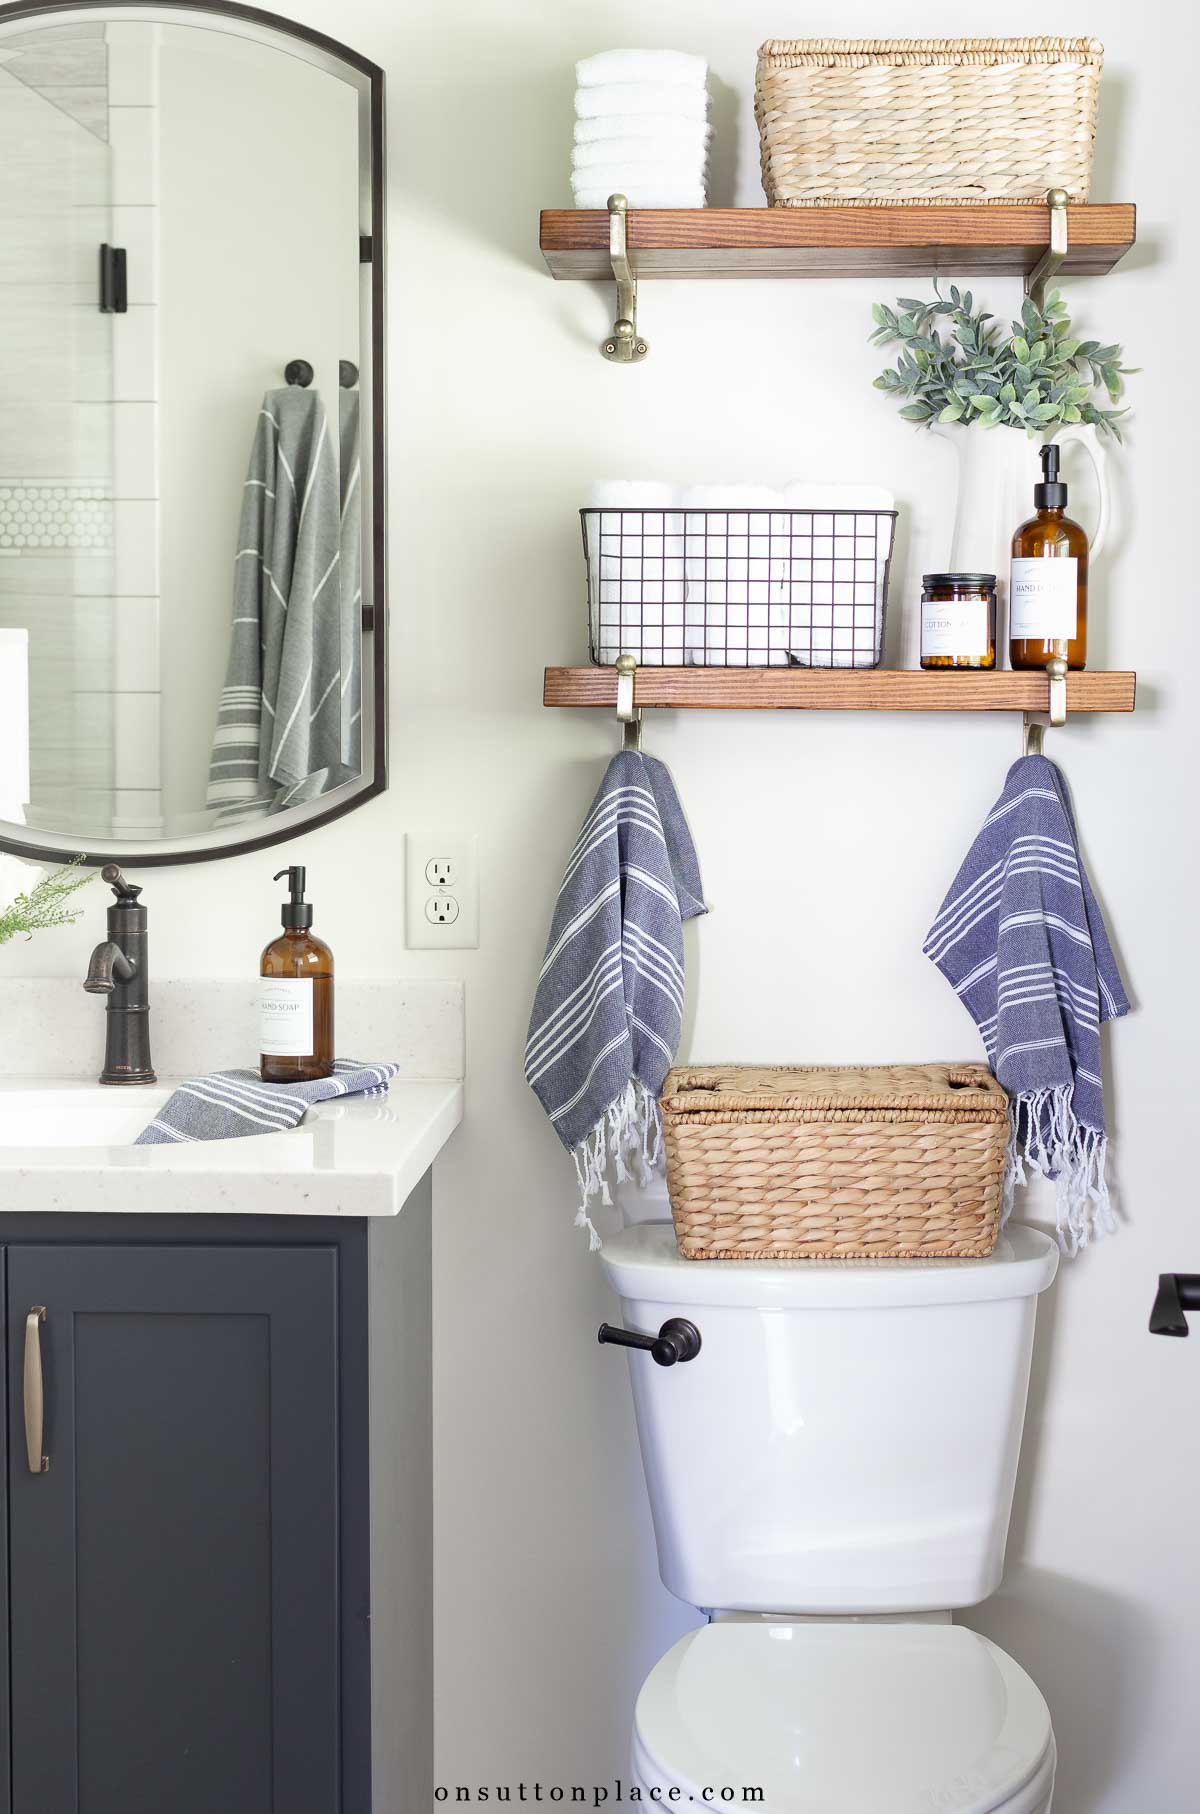
Storage in a Small Primary Bathroom
Storage was the one area where I had to compromise. Previously, I had a large over-the-toilet cabinet. Daily essentials fit easily, but bulk storage moved to the hallway bathroom. One of my favorite upgrades is the electrical outlet installed under the sink. It keeps my electric toothbrush off the counter and out of sight. Small improvements like that make everyday routines easier. In the new layout, storage is divided between under-sink cabinets, open shelving, and baskets.
How Much Did This Small Bathroom Remodel Cost?
Our primary bathroom remodel came in at approximately $15,000, including labor and materials. Bathroom remodel costs vary widely by region, labor rates, and material choices. In our case, the pony wall and custom granite details added to the investment, but they w ere worth it.Major cost categories included:
- Custom cabinetry
- Shower tile and installation
- Floor tile
- Cultured granite countertop and slabs
- Waterproofing system
- Custom frameless shower door (Brand name Basco. Purchased locally)
- Plumbing fixtures
- Lighting
- Shower fan
- Paint: Sherwin Williams Alabaster
Unexpected Expenses
- Granite slabs for the pony wall and seat
- Waterproofing systems
- Organizational items
- New shower fan
Is a Pony Wall a Good Idea in a Small Bathroom?
Yes, if your layout allows it, a pony wall can be a wonderful choice in a small bathroom. It opens sight lines, preserves the feeling of ceiling height, and allows natural light to flow more freely through the space. It also creates a custom look that feels intentional and thoughtfully designed. That said, it must be installed correctly and paired with proper waterproofing and a stable cap material if it will support glass. For us, it became the defining feature of this renovation and completely changed how the room feels.
Lessons Learned From Remodeling Two Bathrooms
We waited many years before taking on these renovations. We focused on raising our children and planning for retirement first. When the time came to renovate, I did not want to compromise on quality. Would I do it again? Yes. The pony wall alone changed the entire feel of the space. Because we renovated both bathrooms back to back, I learned a few important things:
- Reusing finishes reduces decision fatigue. (Which is a real thing!)
- Budget for at least 20 percent overages.
- Waterproofing systems are not optional.
- Small layout changes can have the biggest impact.
- Do not underestimate the cost of finishing details.
Coordinating Hallway Bathroom
If you’re planning multiple bathroom renovations, you may want to see our coordinating hallway small bathroom remodel. It uses many of the same finishes but in a slightly larger guest bath layout. Keeping materials consistent across rooms helped create a cohesive look throughout the upstairs of our home.

JOIN THE OSP COMMUNITY
Sign up to get uncomplicated recipes, unlimited seasonal decor, and
understated ways to refresh your home sent straight to your email inbox!


amazon storefront
Discover simple and affordable
ways to refresh your home.
Follow my Amazon Storefront
for all my favorite finds!
How tall is your pony wall? We are about to start our renovation and I don’t want something too tall. I like this height! And love the overall bathroom, as well!
Hi Amber…thank you! We don’t live in that home anymore, so I can’t measure the wall. To the best of my recollection, it was between 4 and 5 feet tall. My advice would be to go a bit shorter if you are unsure, because it just makes for a more open shower.
Not sure you will see this 4 years later, but since you have an outlet inside your cabinet, just attach a spiral blow dryer holder to the inside of your cabinet door. Your blow dryer will be at your fingertips when needed and doesn’t take up cabinet floor space.
It looks great, what a difference!
I had to wait 25 years to get a new bathroom so I can understand you oh so good!
Now when the kids have left I got the bathroom I ever wanted for my family…
Hello Ann,
I love your painted cabinets in the bathroom. That blue is gorgeous. I want to do this, but I am so worried about chipped paint. What is your suggestion on securing a good coat of paint that won’t chip?
Hi Deborah…the cabinets in that bathroom weren’t painted. That’s a factory finish that was applied to the sink base. I’m not much of a painter…I wish I could be more helpful!
You could hang your hair dryer on the inside of your cabinet door. They sell holders for them. I love the electrical outlet inside the cabinet. Very clever. They also sell shelving units that go around the plumbing inside the cabinet but gives you a shelf inside the cabinet. No wasted space.
Looks great. I especially like the clean lines. We are framing our bathroom today so seeing this post is timely. Can you share the height of your pony wall please? So many photos I’ve looked at show short pony walls, less than a foot taller than the vanity. We are looking at a 4.4″ to 4.6″ pony wall. Seems like your wall is similar height to what our plans are. Love to get your take on a taller wall. Thanks.
I love everything you chose, especially the blue vanity!
Ann,
I just found your blog post and so glad I did!!! I was reading your 2 bathroom remoldels and I want you to know i love both of them. The FLOORS are beautiful, just beautiful.. I love how you changed the linen closet with shelving and the pony wall for the master bath. You pat yourself and your husband’s backs for all the initial groundwork you have to put into a remoldel. It’s a nightmare and fun at the same time. Your choices are beautiful, the tile in the showers, ORB fixtures, brass hardware, mirrors are so nice, Everything. I just love everything you did. I sure hope you get to read this even thou it’s been a year and half since you did your remoldel; I’m glad I found you while I was on Pinterest, best place in the world to find anything. Again, give yourself a big hug for all the beautiful work ya’ll did. God Bless,
jean
Where does the toilet paper go? I see what looks likes extras under the sink.
When you are looking into the bathroom, the toilet paper holder is on the right. I don’t think it’s visible in any of the pictures. Thank you!
I know it’s the hardest thing to place in a bathroom and this is a beautiful bathroom. I just hate destroying a cabinet with a toilet paper roller.
Very Well Done !! & the electric outlet is genius
So pretty. I just love the look of blue and white. So happy that you were finally able to get these done. I know that the pandemic delayed projects for a lot of people.
For others looking to save money, you can use the same tile for the curb and the top of the shower bench. You don’t need to use granite slabs. I placed a 3M hook on the side of my vanity and hang my hair dryer there.
I love how bright and open your en suite is now.
It turned out beautiful ! I had the same issue with my blowdryer and found a hanger for it on amazon and mounted to the side of the cabinet. Your home is so pretty 😍
I love your site! I must’ve spent over an hour going through all the photos on your fb page!
Great job! You made wonderful decisions! Always so hard to decide ….so many options and it is a lot of money so you want to be smart about it. You nailed it!
I am very attracted to your shelves and brackets above the toilet….found the link for the brackets but what about the shelves? We’re they purchased or custom made?
Oh Ann, your bathroom is very cute! That pony wall is a very good idea. I like it. I love the navy vanity cabinet and cannot get over how much just removing the cabinet over the sink opened everything up. Looks great. Good idea on the outlet in the cabinet. In Canada, (or at least Ontario), that is a no no and against code. No outlets can be placed in a cupboard. Nonetheless, your bathroom is lovely!
Thank you for sharing your beautiful updates! It really motivates me to see the before and after pictures. Thanks for your honesty about price and what things took you off the budget course. I’ve learned something new!
J’ADORE… i love!…
Wow! Congratulations on your well-deserved reno. It looks fantastic. That shower is to die for.
Somehow I missed the reveal of the hallway bathroom so I got to see both of them today. Wow! No wonder you are happy with the results. Both are beautiful. I love everything about them.
The bathrooms look great!!!
The bathroom is absolutely gorgeous! So happy and proud for you.
Ann, it is beautiful! Great job! I love your planning and the way you can make sensible, beautiful. I had an electrical outlet put into our medicine cabinet when we remodeled our bathroom – super idea for sure! Was thinking…what about one of your great hooks in your under sink cabinet to hang your hair dryer and keep it plugged in and ready to go?
Jackie
I see an outlet by the sink, for your safety it really should be a GFCI grounded outlet. The update is fantastic and I love the color of the vanity! Blue…swoon!
Wow!!! LOVE it!!!!
I love both your bathrooms! Remodeling doesn’t come cheap! Thank you for sharing!
Beautiful job Ann! We too have a very small bathroom. You accomplished so much! Enjoy!
Ann, both bathrooms are stunning!
Just beautiful! Thank you for taking us along.
Ann, I love the remodel of your bathrooms! I saved your photos since you are the inspiration for my master bath remodel. Thanks for sharing the cost too. It sure gives me a savings goal. We know there will always be overages so we plan on that. You don’t know what you’ll get into until you start ripping out! Hugs, Carol
It looks amazing…the pony wall made all the difference. Love the blue vanity !
Your master bedroom bath is lovely. I know you are pleased to have all your bathrooms finished. They all turned out lovely. I especially like the faucets you chose.
Lovely! I’m sure just stepping in the door will make you happy for a long time!
Thank you for sharing both bath remodels! I love your choices of flooring and other finishes, especially the neutral and navy combination. I appreciate the costs too. It helps to know what a general outlay might be. The electrical outlet inside of the cabinet is genius!
Ann, thank u sooooo much for sharing the cost. I know that is hard to do sometimes but I am considering renovating and I had no idea what the cost might be. Its is very helpful. The finished project is beautiful. Can’t wait to see the same on your kitchen that I believe u said is on the list!…….Marjorie
Love it!! You did a LOT with that small space!
It’s beautiful! My husband and I just finished remodeling our guest bath and we had a pony wall installed, too. It’s a nice separation between the new shower and the toilet. I love how you styled your bath, too. As usual, your style has inspired mine. Thank you always for sharing.
Ann…great use of space…love all the colors and special touches. I too have a 3/4 master that we want to freshen up. You have given me some great ideas to consider. Love the shelves above the toliet.
Oh, Anne! Just so beautifully and tastefully done! You have impeccable taste in pulling all the perfect elements together to create a timeless space. I love the idea of the outlet in your cabinet! Genius!
Love it! Great job! Enjoy…enjoy! 😄
Very pretty! Love all the finishes. I think our “master” bath Istanbul the same size as yours. 😀
I do not know why my iPad typed Istanbul!
Good grief that made me laugh out loud! Istanbul!!
Perfect!
Ann—I LOVE this!! So beautiful, great solutions that are functional and stylish! Classic and non-trendy!! Will look beautiful for years to come! Enjoy!
Oh gosh, this is beautiful, Ann! And what you did with that small space is genius – the difference in the open feeling is amazing. Even though hard to photo, it comes through perfectly. 😍
Hopefully our main bath will be done soon, too – I can only wish it turns out as great as both yours did!
I love the way both bathrooms turned out. I appreciate your honesty about the cost and also about forgetting to include things in your initial estimate of the cost. I love that you are so open and real. It makes your blog my favorite.
Morning Ann~ Remember the saying ‘good things come to those who wait.” You and your hubby have waited a long time for this day, and yet, as you say, you would do it again! One small suggestion, if you haven’t given thought, re the under cabinet in your master bath – my 2.5 baths all have a shelf built in the middle under the cabinet. Don’t believe your electric tooth brush would be impacted? What do you think? =) Meanwhile, I’m sure these newly renovated rooms are your favorite rooms in the house right now! haha May longtime enjoyment be yours!!
Ann, I just love both of your bathrooms. We just renovated our kitchen but now my husband wants to move. It cost about $20K. We now live in a 3 bedroom townhouse with 3 sets of stairs. We are now looking for a 3 bedroom patio home. Our kitchen took 4 months because of Covid. I will be happy when I’m in my forever home!
I really love the pony wall idea!! And…the outlet inside the vanity is genius. The whole space turned out so nice!!
Your bathroom remodeling turned out beautiful. So many features that I love . You and your husband did an amazing job of picking everything out. Love both bathrooms very much . Enjoy your weekend.
Ann, As always thank you for your honest and open approach to your renovations. Both bathrooms came out beautifully. Did you shop online for everything? Or did you shop before Covid? I am amazed with all that is going in that you were able to have it all come together. Thank you for sharing.
Ann, what an absolutely gorgeous job you did on this bath! The transformation is amazing!! I didn’t think the before was so bad, but WOW, what a difference the makeover made! I also love that you kept a cohesive feel between the two baths that fits with your home, and yet they still maintain a distinct identity from each other. Love the shelves in this bath especially!!
Wow, this bathroom turned out so beautiful also!! I love both of them! I think I have a solution for you and your hairdryer. My hair dryer has a loop that you can attached the loop to a hook to hang it by. If yours does then just put a command hook inside the cupboard up high enough that it is of the way of your storage in there. Simple and easy. I think my favorite thing of the bathroom is also the plug inside the cabinet, that is AWESOME!!! Good job in picking just beautiful finishes, you have the most amazing taste and style! Thanks for sharing both with us, my mind is going wild with trying to figure out when I can do my bathroom remodel. My bathroom wants to grow up and be just like yours!!
I used a Command hook under my side of the vanity in our master bath for my blow dryer. A lot of newer dryers has a loop that’s intended for hanging. Both bathrooms are beautiful!
Congratulations! Two big, long-awaited, projects completed. They are both lovely. I abhor the construction process, the disruption, the dust. I did my master bath a few years ago and will hopefully not have to do it again! I have two more to do, a small 1/2 bath and another larger one just off my studio. I have stalled and stalled, I hope you have motivated me! Have a Happy Labor Day weekend
Absolutely beautiful!
Dear Ann, it is simply wonderful. We had an almost duplicate of the original in one of our homes of the past. I would have LOVED to have that bathroom as you remodeled it. As always, your choices are so well thought out and lovely. Like many others, I appreciate your real world approach to costs and overall family finances. I can only wish you lived down the street and not a state away. Thanks so much for sharing…and the photos are excellent. Do not worry about not being able to do an overall photo.
I love both bathrooms. So clean and crisp. Your taste is impeccable and will serve you for a long time. Enjoy !! Thank you for being so honest about the cost of both projects. Your contractors did a marvelous job. Now onto saving for your kitchen. 😚Been a long time fan of your blog and always love your decorating.😍
WOW! Everything looks so beautiful! You have excellent taste and your contractor did a fabulous job…I absolutely love it all!
Beautiful! Love it all! I have one question about your Turkish towels. Just bought my first one, love the look but I have to say it isn’t exactly very absorbent. Is there a trick tearing for them that will help?
Thanks and again BEAUTIFUL!!!!!
I think it turned out beautiful! Love how the pony wall opens it up. I like the open shelves and getting rid of the cabinet over the toilet. You might look for a hair dryer holder that you can install on the inside of the vanity door. Also, only suggestion I would make is to hang the hand towel to the left of the vanity and away from over the toilet. More convenient and sanitary. Other than that it’s perfect.
Your bathrooms are beautiful! I love where you put the outlet for you toothbrush.
I have put a hanging wire rack/basket on the inside of my cabinet door to hold my hairdryer and brushes. I bought it in the kitchen accessories. I think it was meant to hold foil, plastic wrap, etc.
Ann, both bathrooms came out perfect! They are lovely. Good for you. It’s sometimes hard to justify spending that kind of money but, at this stage of our lives, it feels so good to be able to (finally.) You are the first to count your blessings, and you will appreciate and enjoy those bathrooms for years.
Thanks for sharing your lovely remodeling results! We live in a 50s ranch and have only a very small hallway bathroom and a powder room off the kitchen. We had the hall bath redone a few years ago and are happy with the results. Your photos have given me some ideas for efficiently using the even smaller space on the powder room.
Your bathroom is lovely ! This pony wall made all the difference. Enjoy it ..
Great job. I especially like that you stayed within the original footprint of your master bath and made it work. It’s real design for real people. So many blogs and designers – like on Houzz – show these over the top renos that cost a small fortune and not within reach of us average people. We redid both bathrooms in our home when it was 18 years old. The main bathroom was actually done in stages – new tub, tiles, shower door, flooring and lighting done in year one. The next year we had a new granite countertop, under mount sink and faucet installed on the original 5 foot vanity. We have a large linen closet that I organized with all matching bins and baskets, and I purchased 12 new sets of towels. By doing this over a 10 month period I found it to be less stressful and I enjoyed “curating” every item.