A small bathroom remodel can completely change the way your home feels. This navy and neutral hallway bathroom renovation began as a practical decision and ended up being one of my favorite transformations. If you are planning a small guest bathroom remodel, I hope walking through this process from start to finish helps you feel more prepared and confident.
Author’s Note: This bathroom remodel took place at our former home on Sutton Place in 2020. This post has been fully updated and reorganized to combine all planning, progress, and reveal details into one complete guide.
This post may contain affiliate links. See my disclosure statement.
Why We Renovated This Bathroom
This hallway bathroom was original to our 1960s home. The tile, vanity, tub, and fixtures had all seen better days. While the kitchen renovation I had dreamed about was still waiting, it became clear that these bathrooms needed attention first. The space was small, outdated, and not very functional. Since everything was staying in its original location, we were able to focus on finishes and layout improvements instead of moving plumbing, which helped keep the project manageable. The only thing staying was the newer toilet. Everything else was removed down to the studs.


Small Bathroom Before
- Original 1960s tile
- Original vanity and sinks
- Cast iron tub
- Laminate flooring installed over tile
- Outdated shower fixture
- Original mirror
- An awkward linen closet with bi-fold doors
The Design Plan
When remodeling a small bathroom, restraint matters. I wanted this space to feel open and classic, not trendy. Because the room was small, I kept most surfaces neutral and allowed the vanity and floor tile to make the statement. The overall direction was navy and neutral:
- Navy vanity for depth and contrast
- Warm ivory and beige tile
- Oil rubbed bronze fixtures
- Subtle gold accents
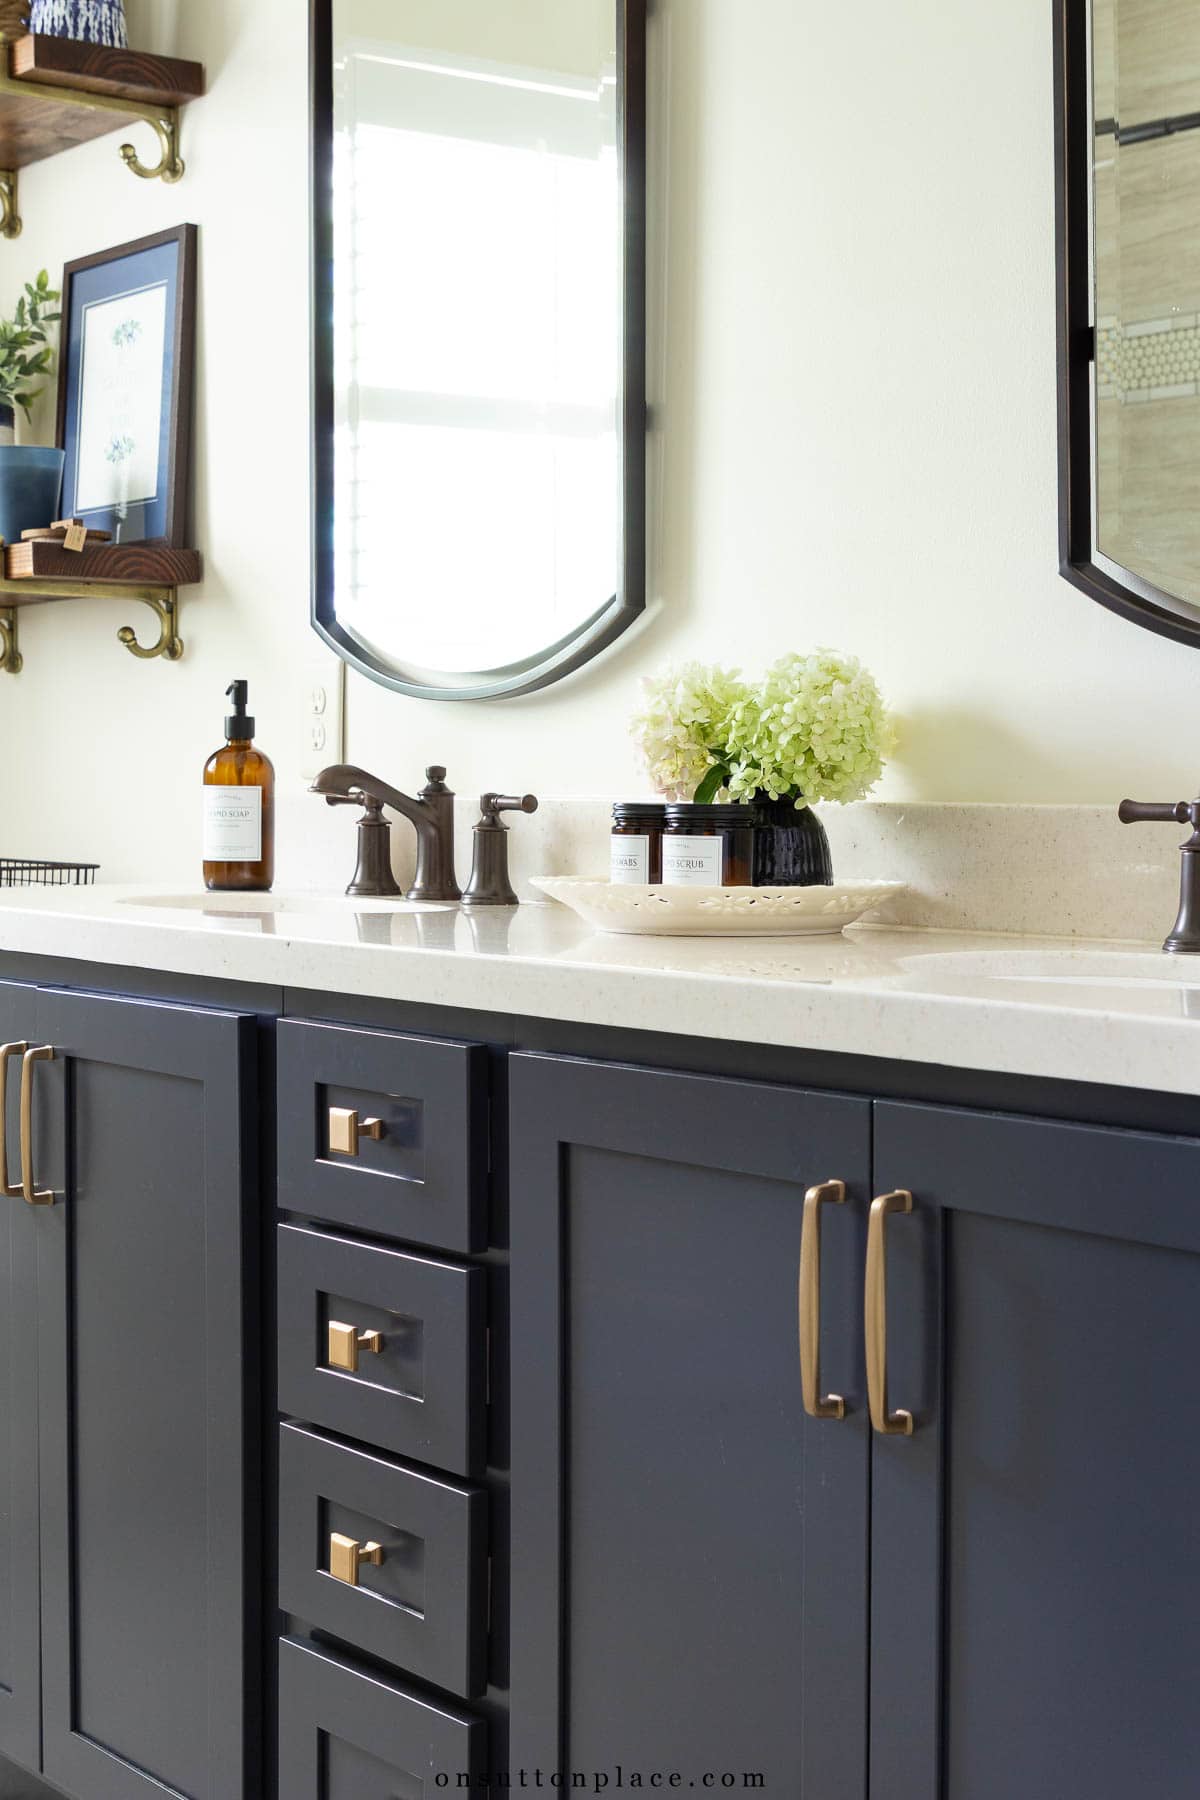
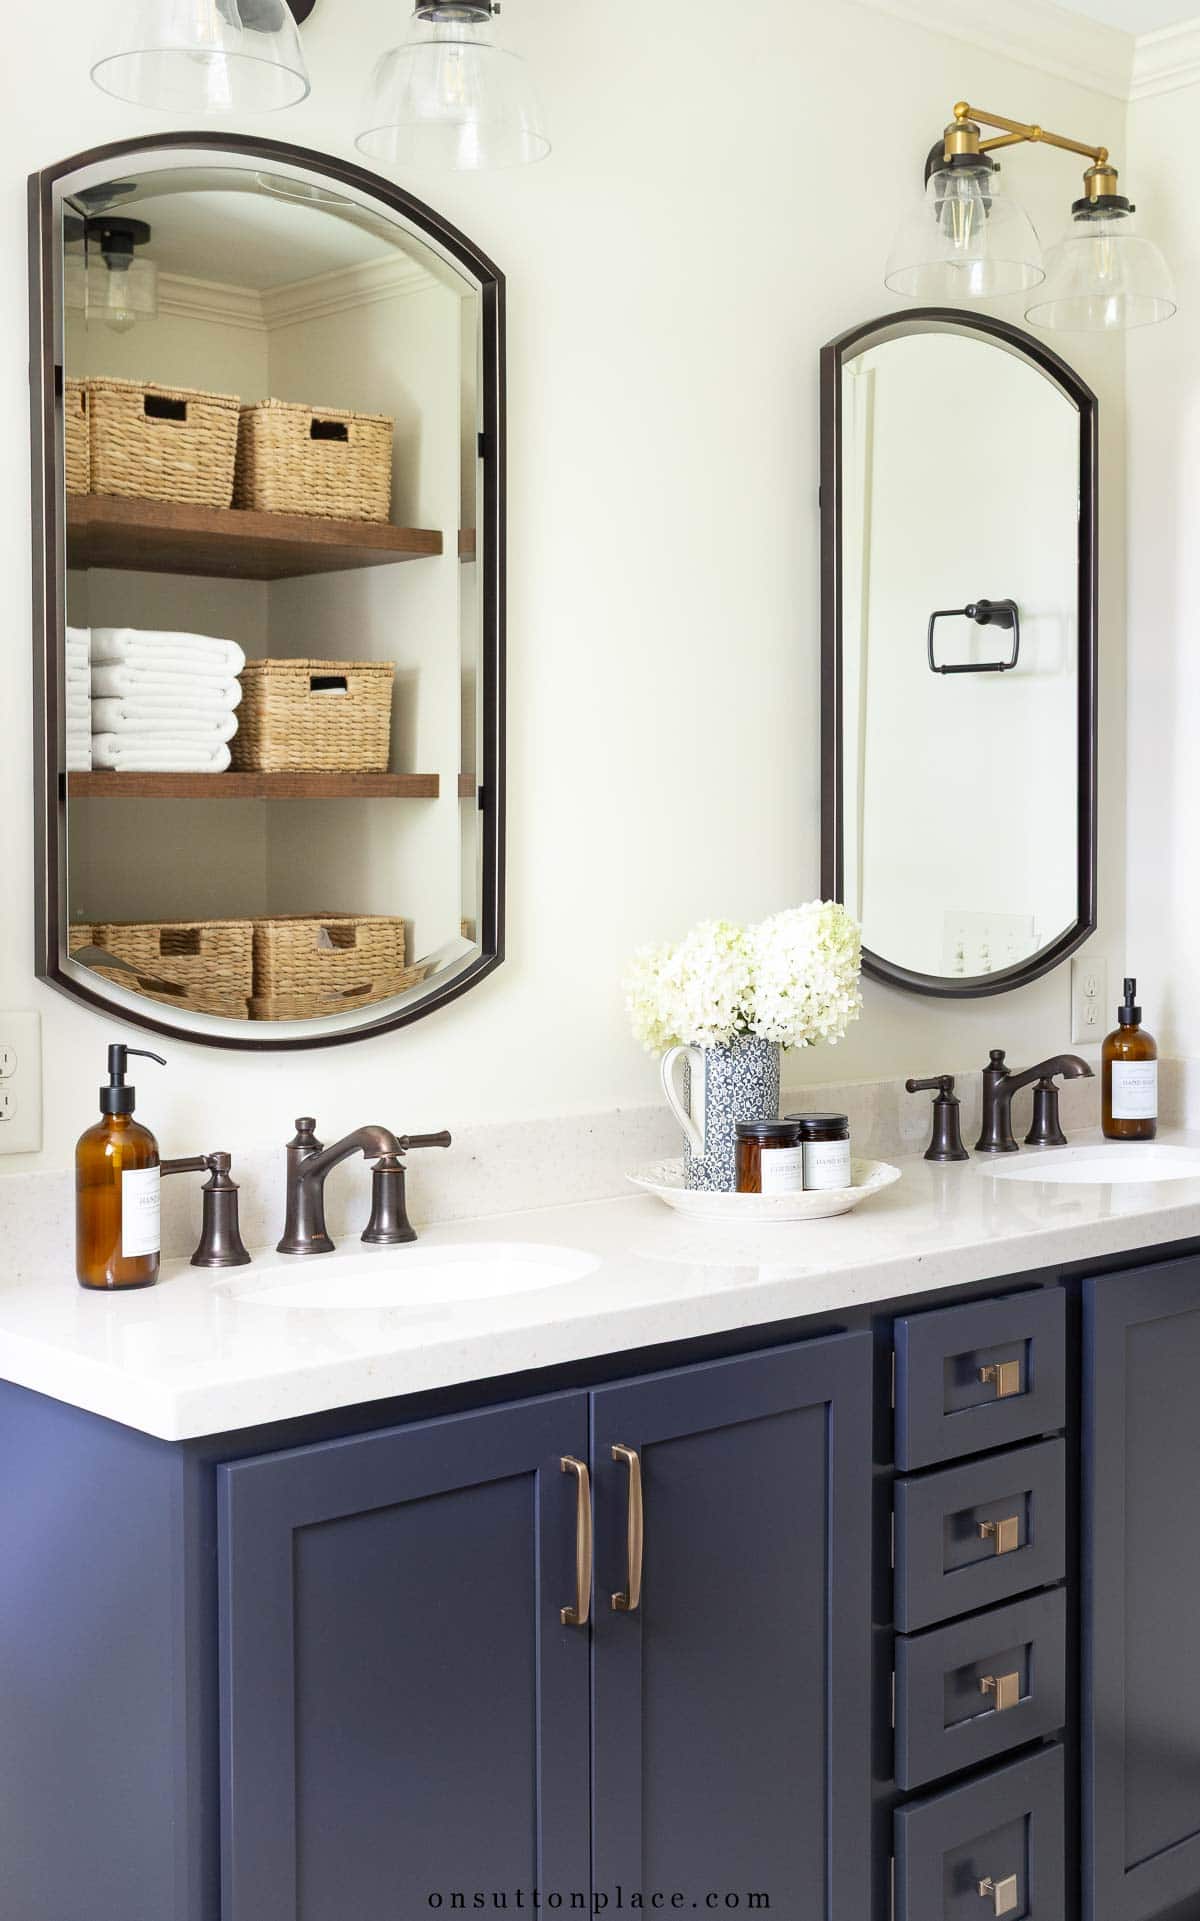
The Navy Vanity
After searching for a ready-made option, I chose a custom navy KraftMaid vanity with Shaker doors. The color is Midnight, and it brought instant character to the space. Originally, I hoped for undermount sinks, but the depth of the room didn’t allow it. Even so, the final layout provides much more usable counter space than before. The cultured granite countertop in Sandstar has been incredibly easy to maintain. That low maintenance factor mattered to me.
Tile Selections
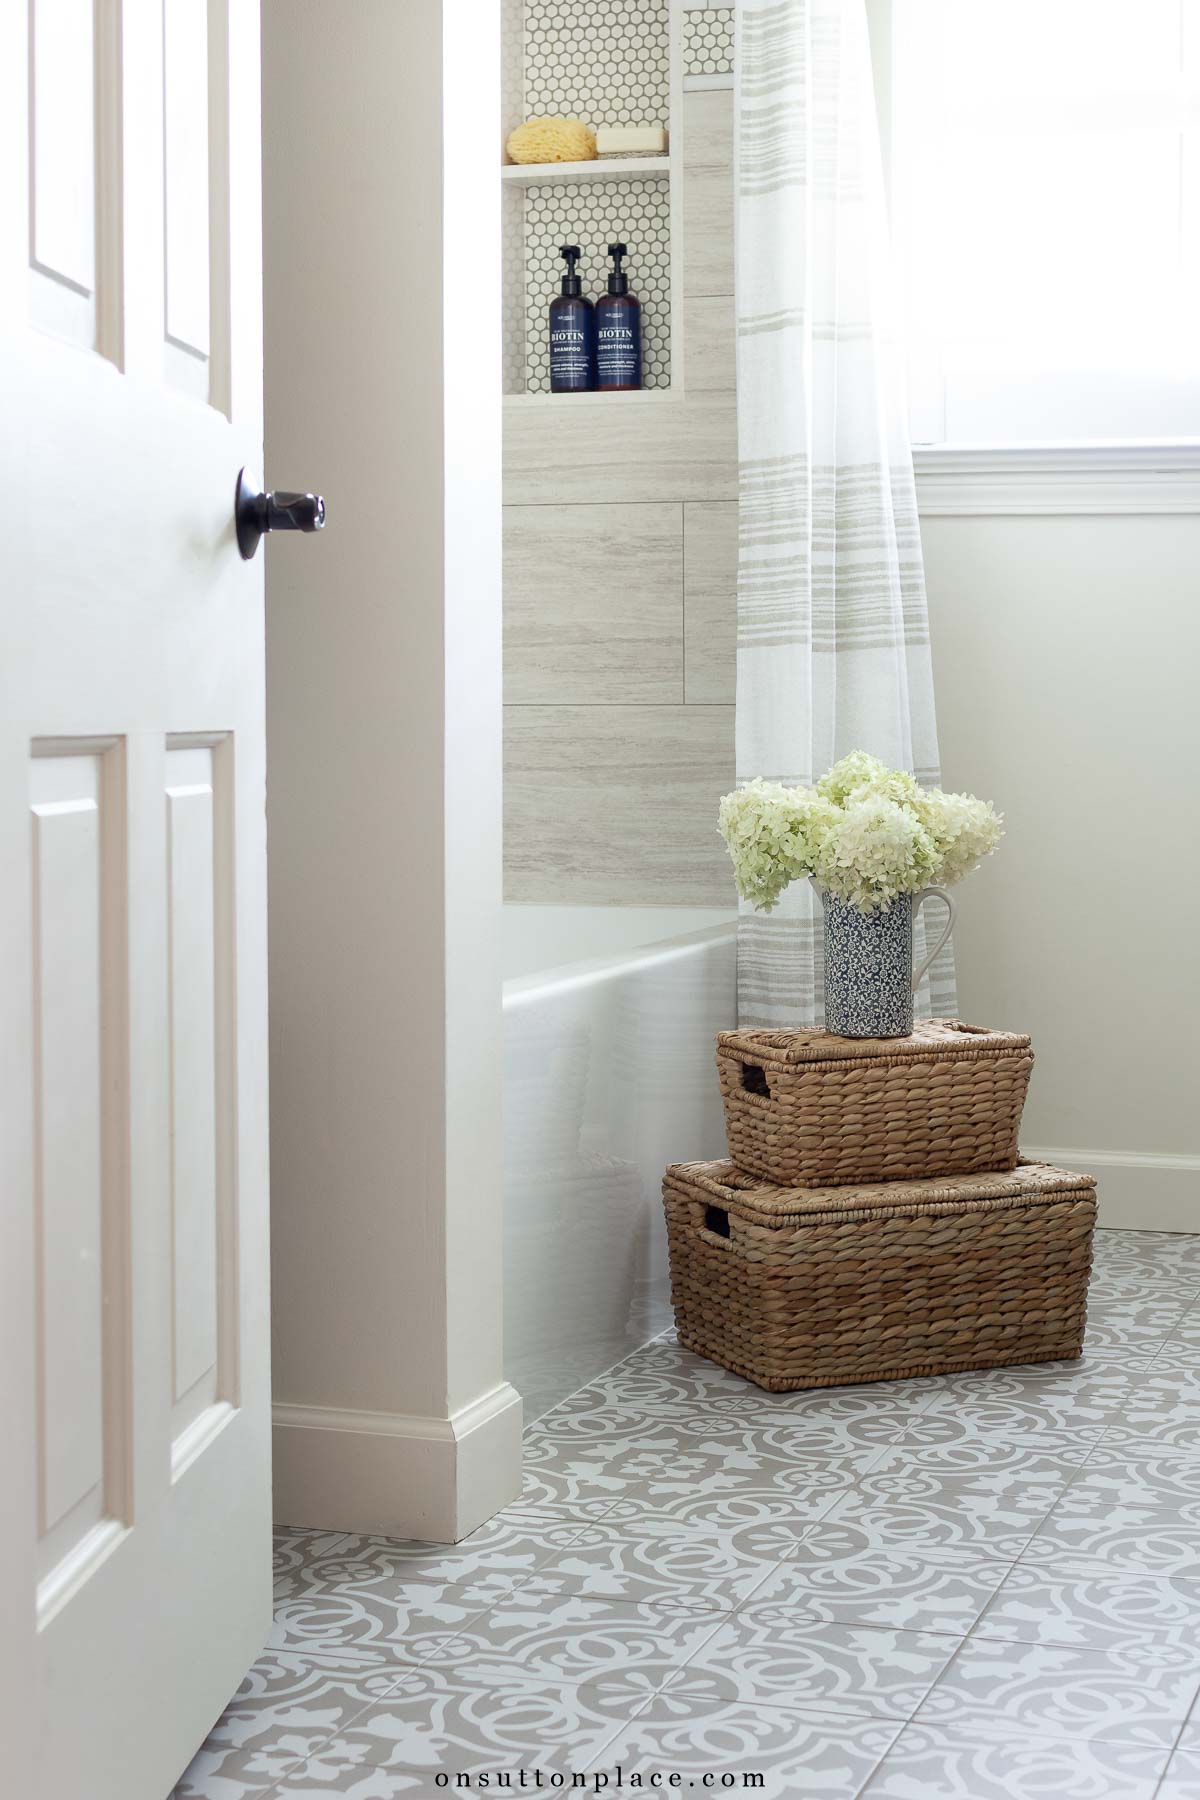
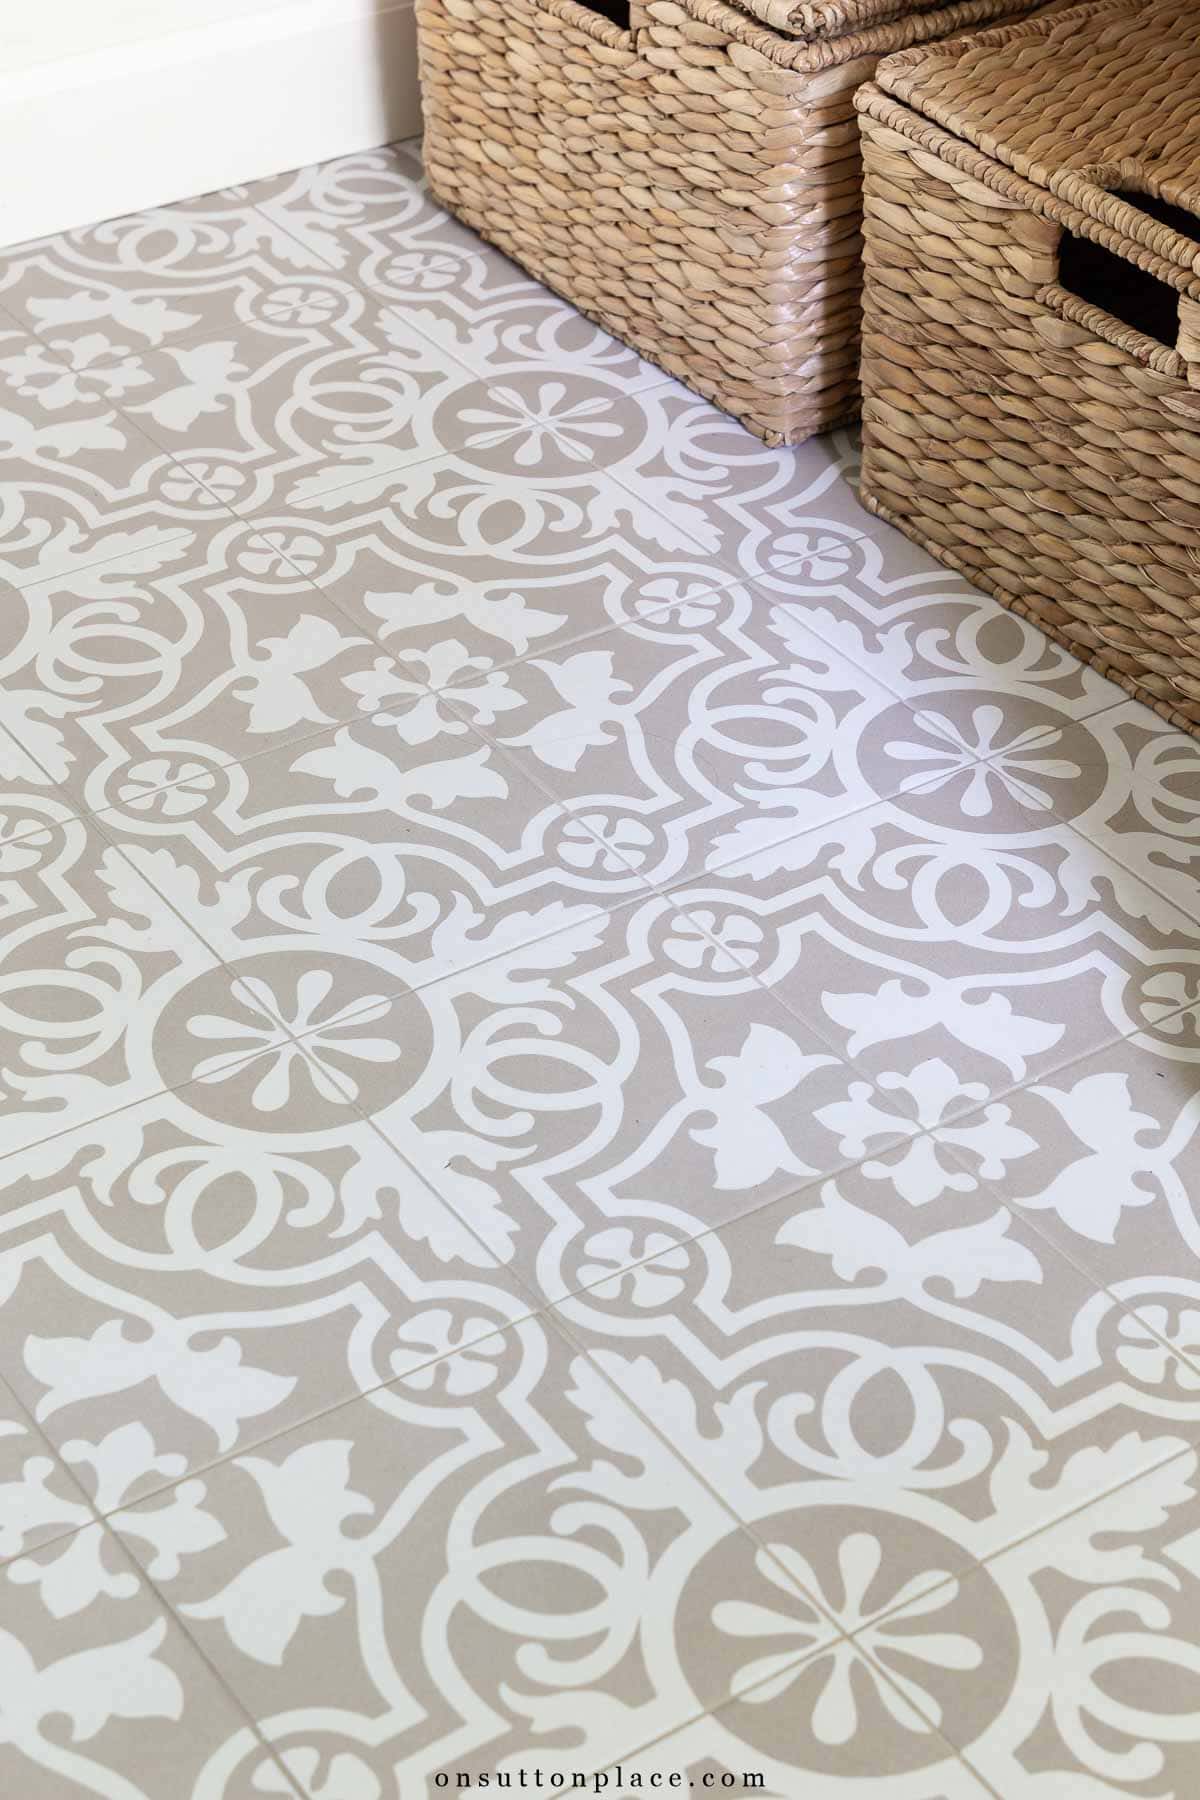
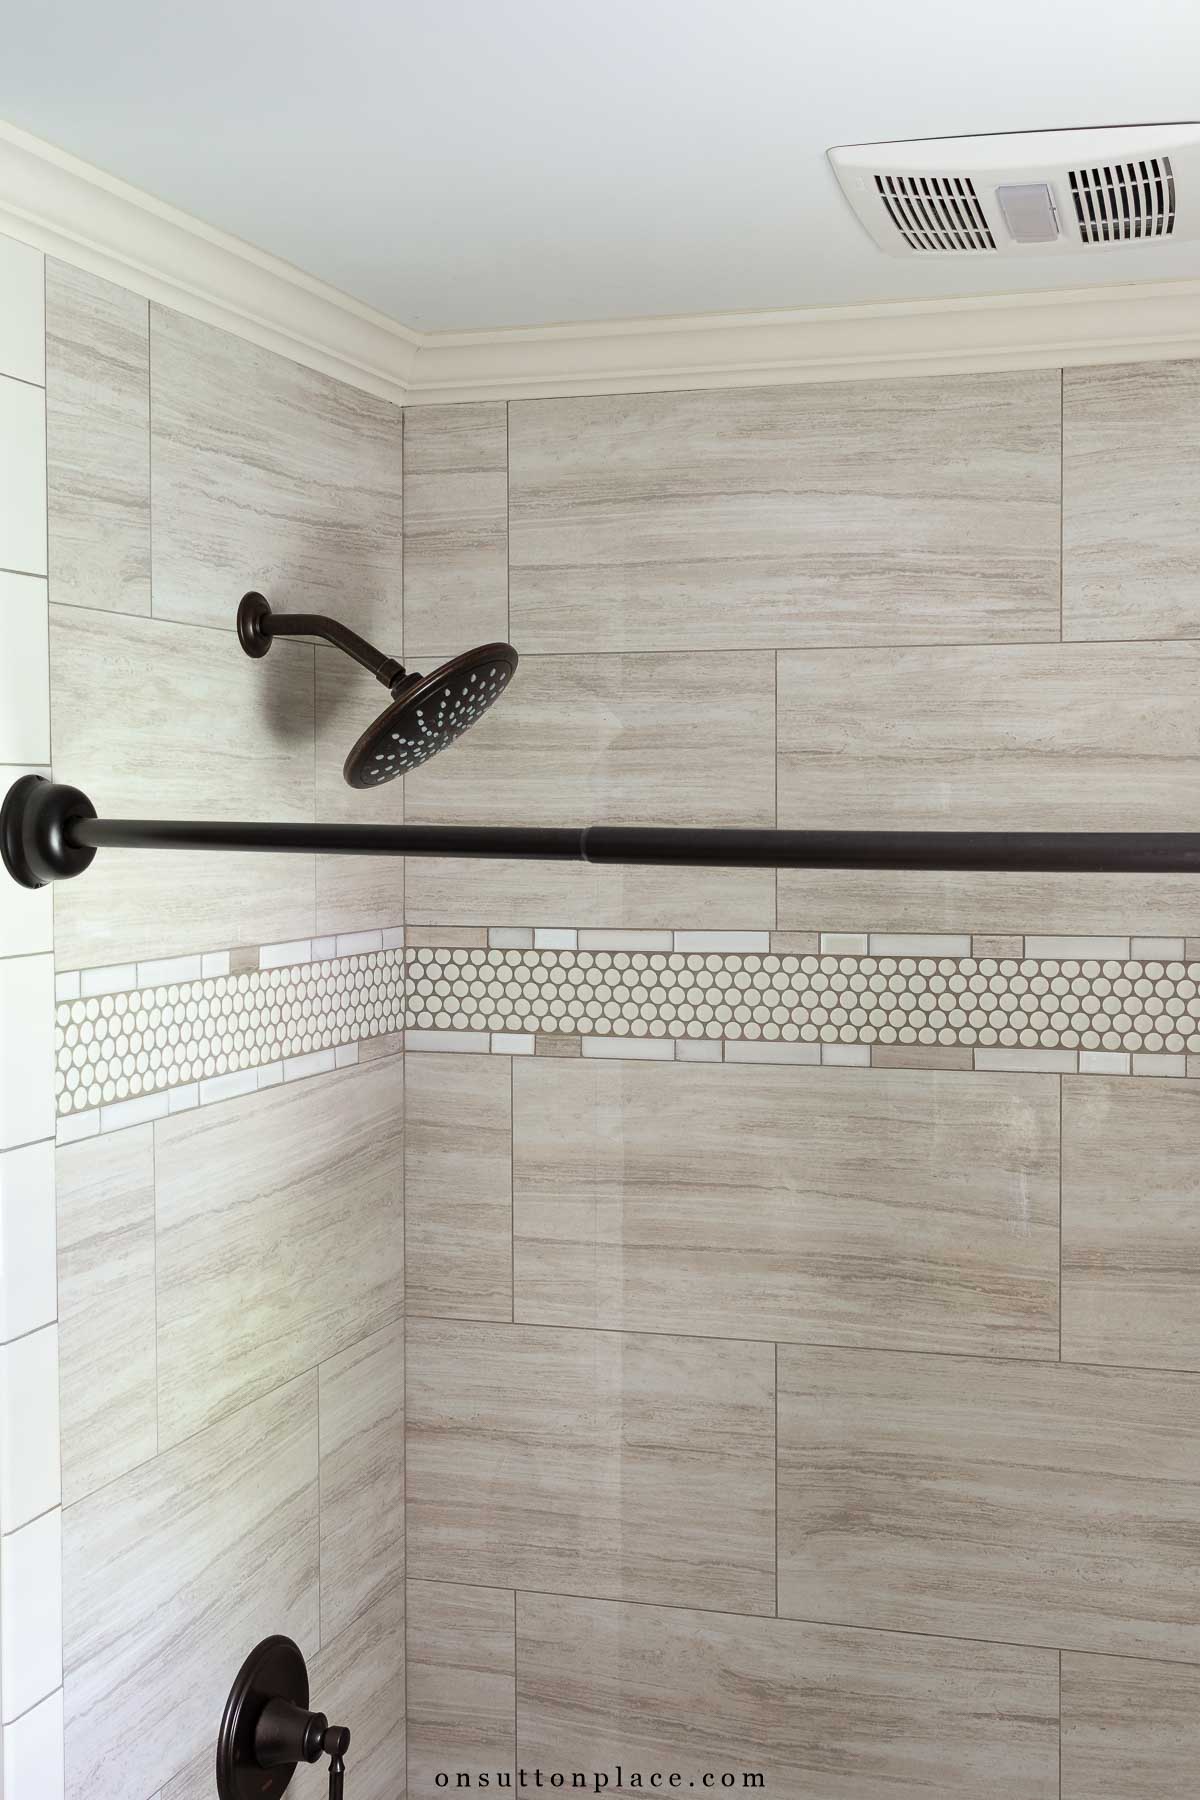
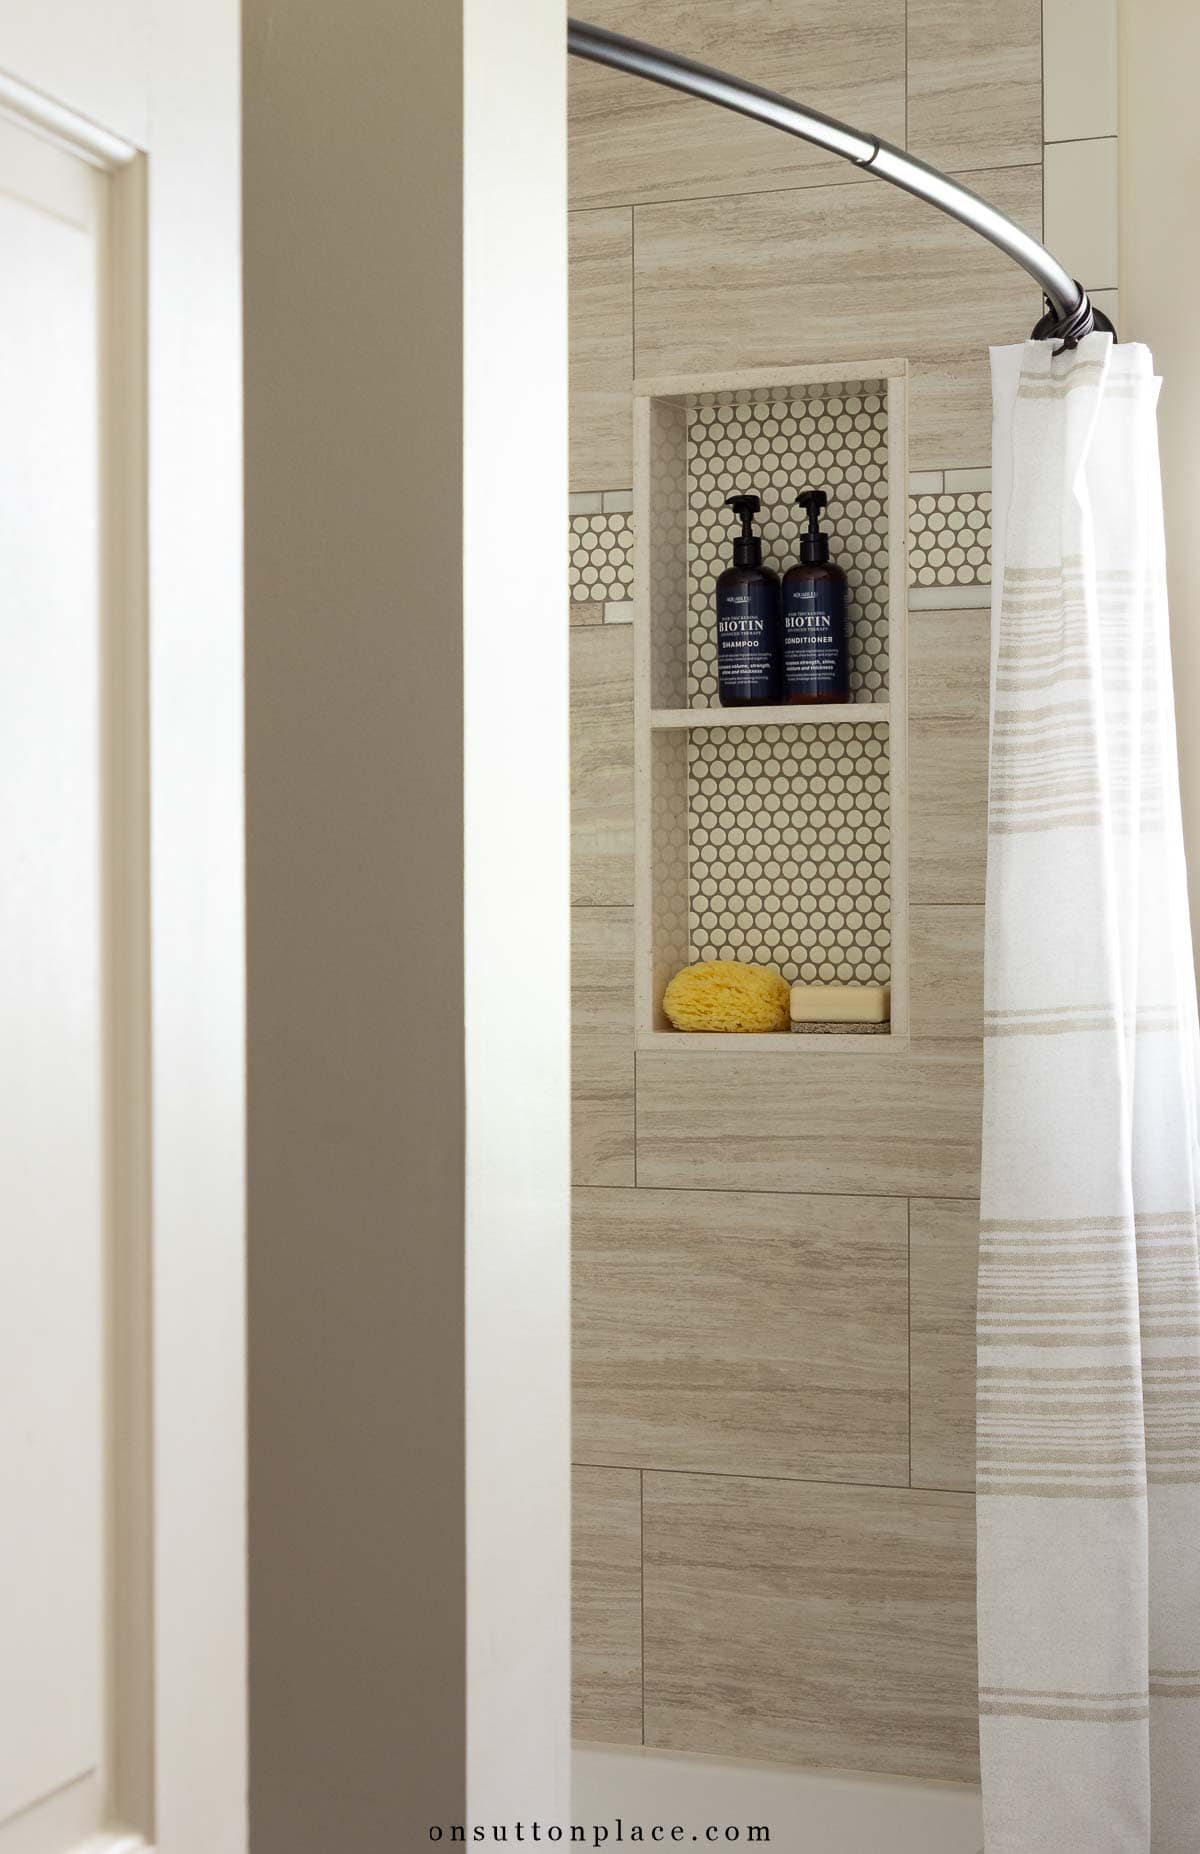
Choosing tile for a small bathroom remodel can feel overwhelming. I ordered multiple samples before deciding. The floor tile adds personality without overwhelming the room. I chose a darker grout color, MAPEI Driftwood, which helps hide wear and defines the pattern cleanly. Keeping the shower walls simple allowed the patterned floor to stand out in a balanced way. Here’s how the tile plan came together:
- 12 x 24 neutral porcelain tile for the shower walls
- Ivory penny tile detail
- Mosaic trim border
- Patterned 8 x 8 porcelain tile on the floor
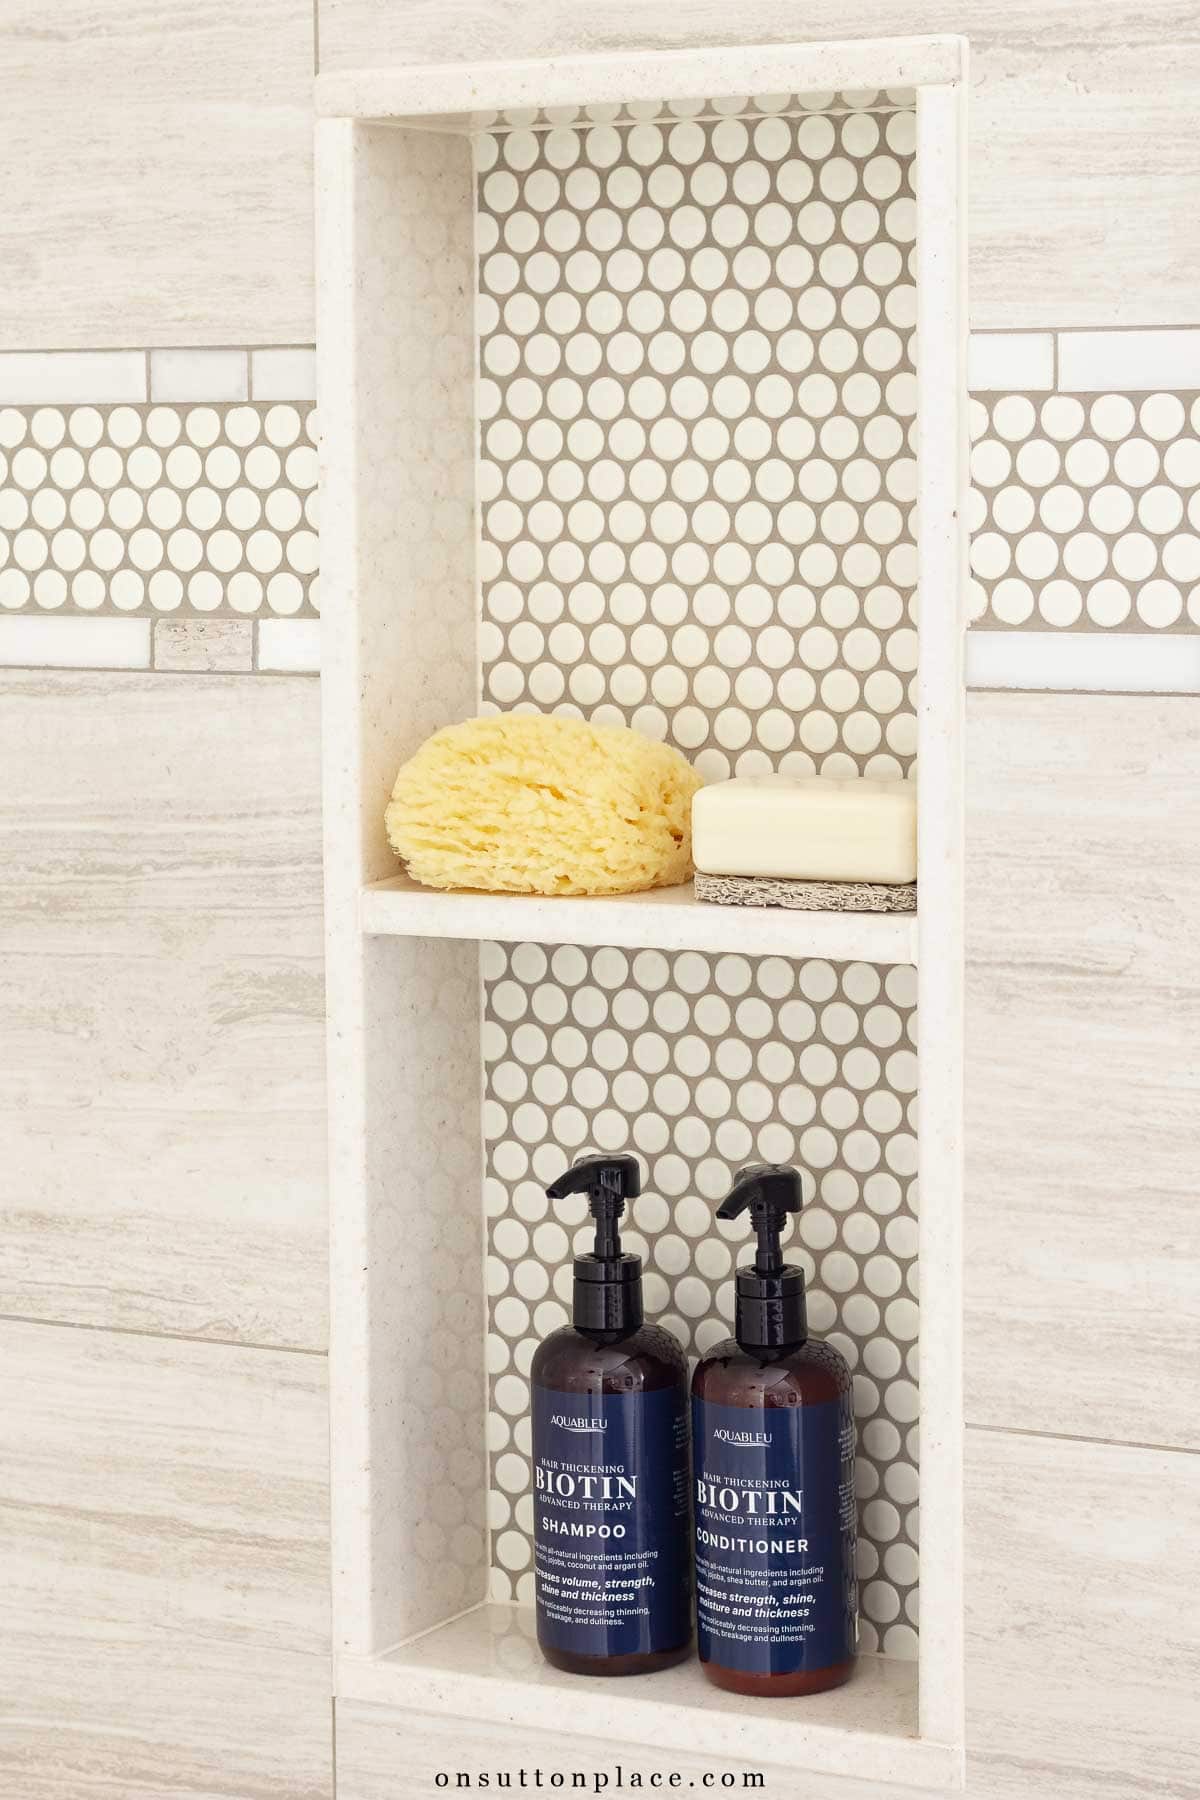
Tub Surround & Waterproofing
One thing I learned during this remodel is how important proper waterproofing is. We used a Schluter waterproofing system behind the tile. It creates a fully sealed base for the shower and niche. This was not an area where I wanted to cut corners. We also had matching cultured granite slabs poured for the shower niche surround and the niche shelf. That detail gives the shower a finished look and ties everything back to the countertop.
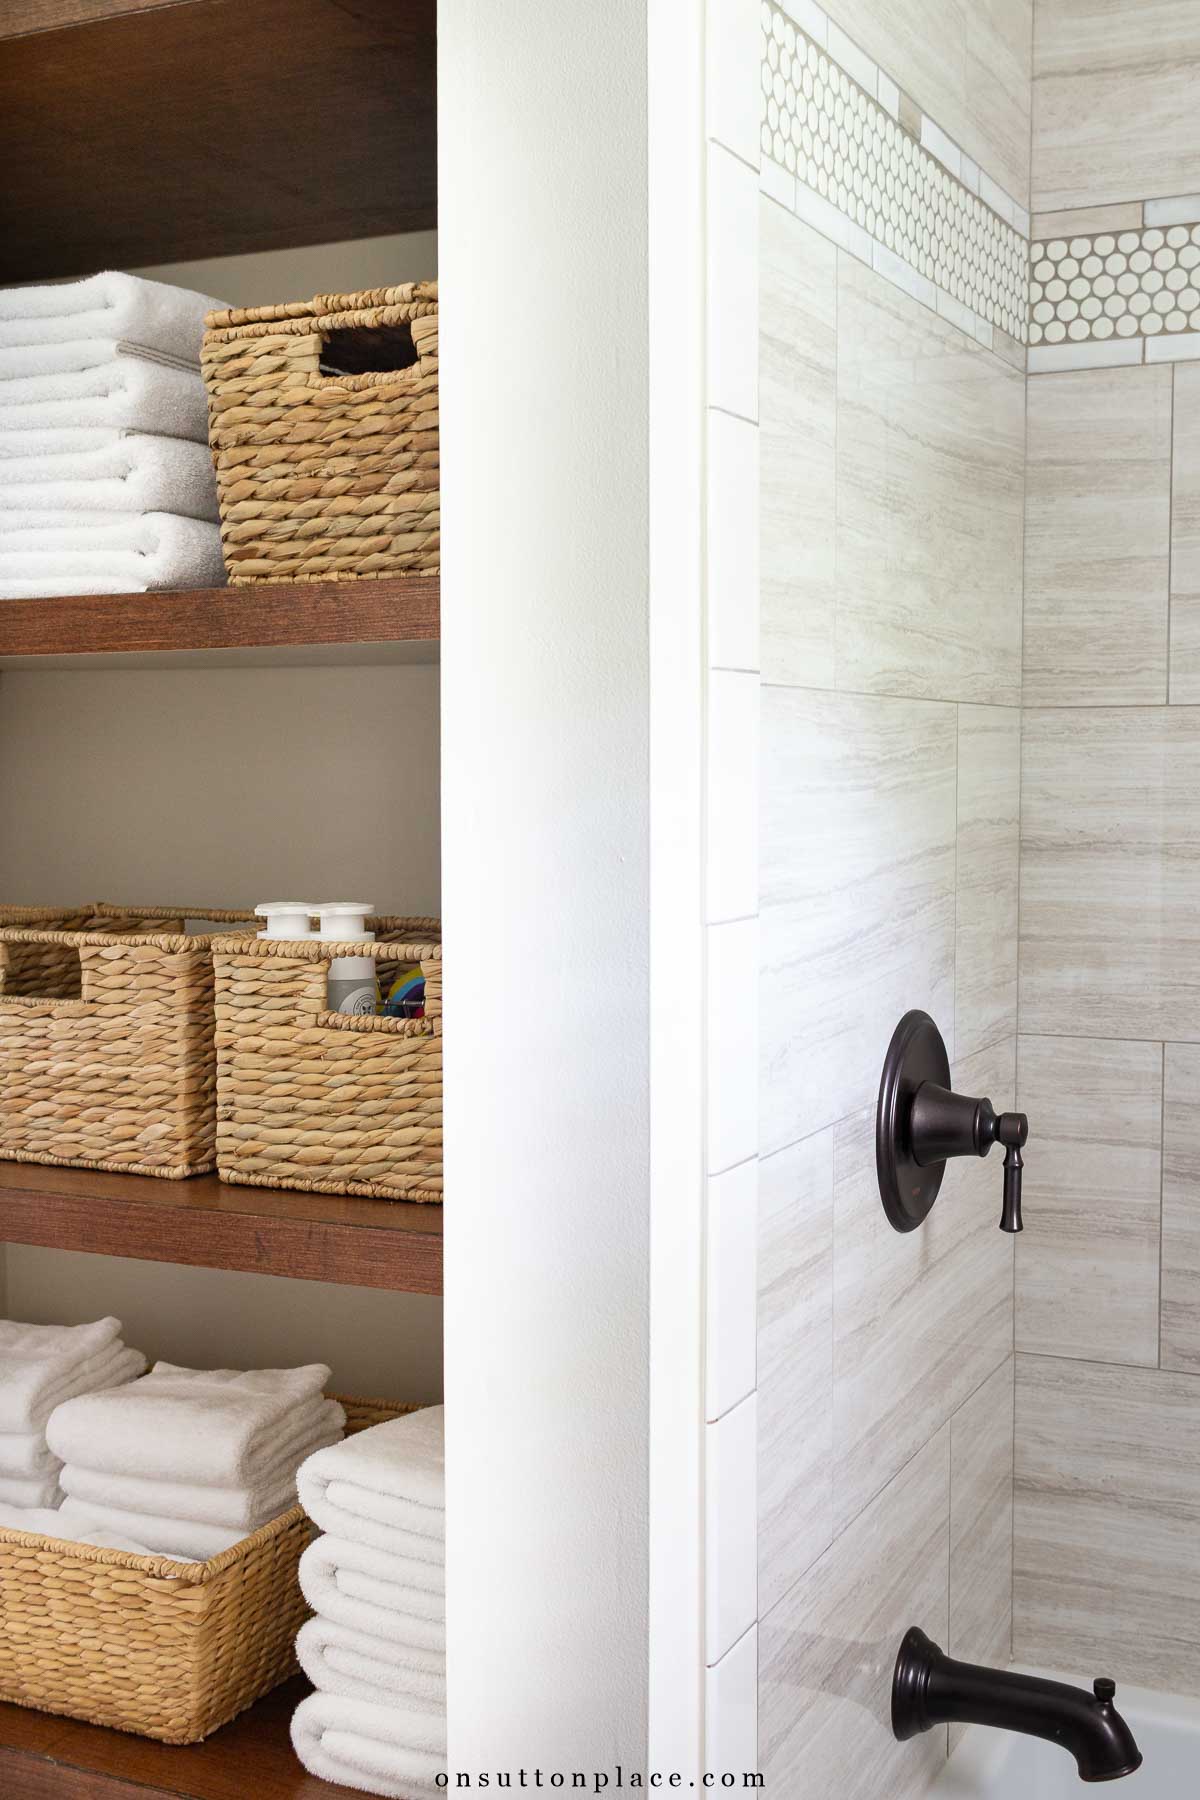
The Linen Closet Transformation
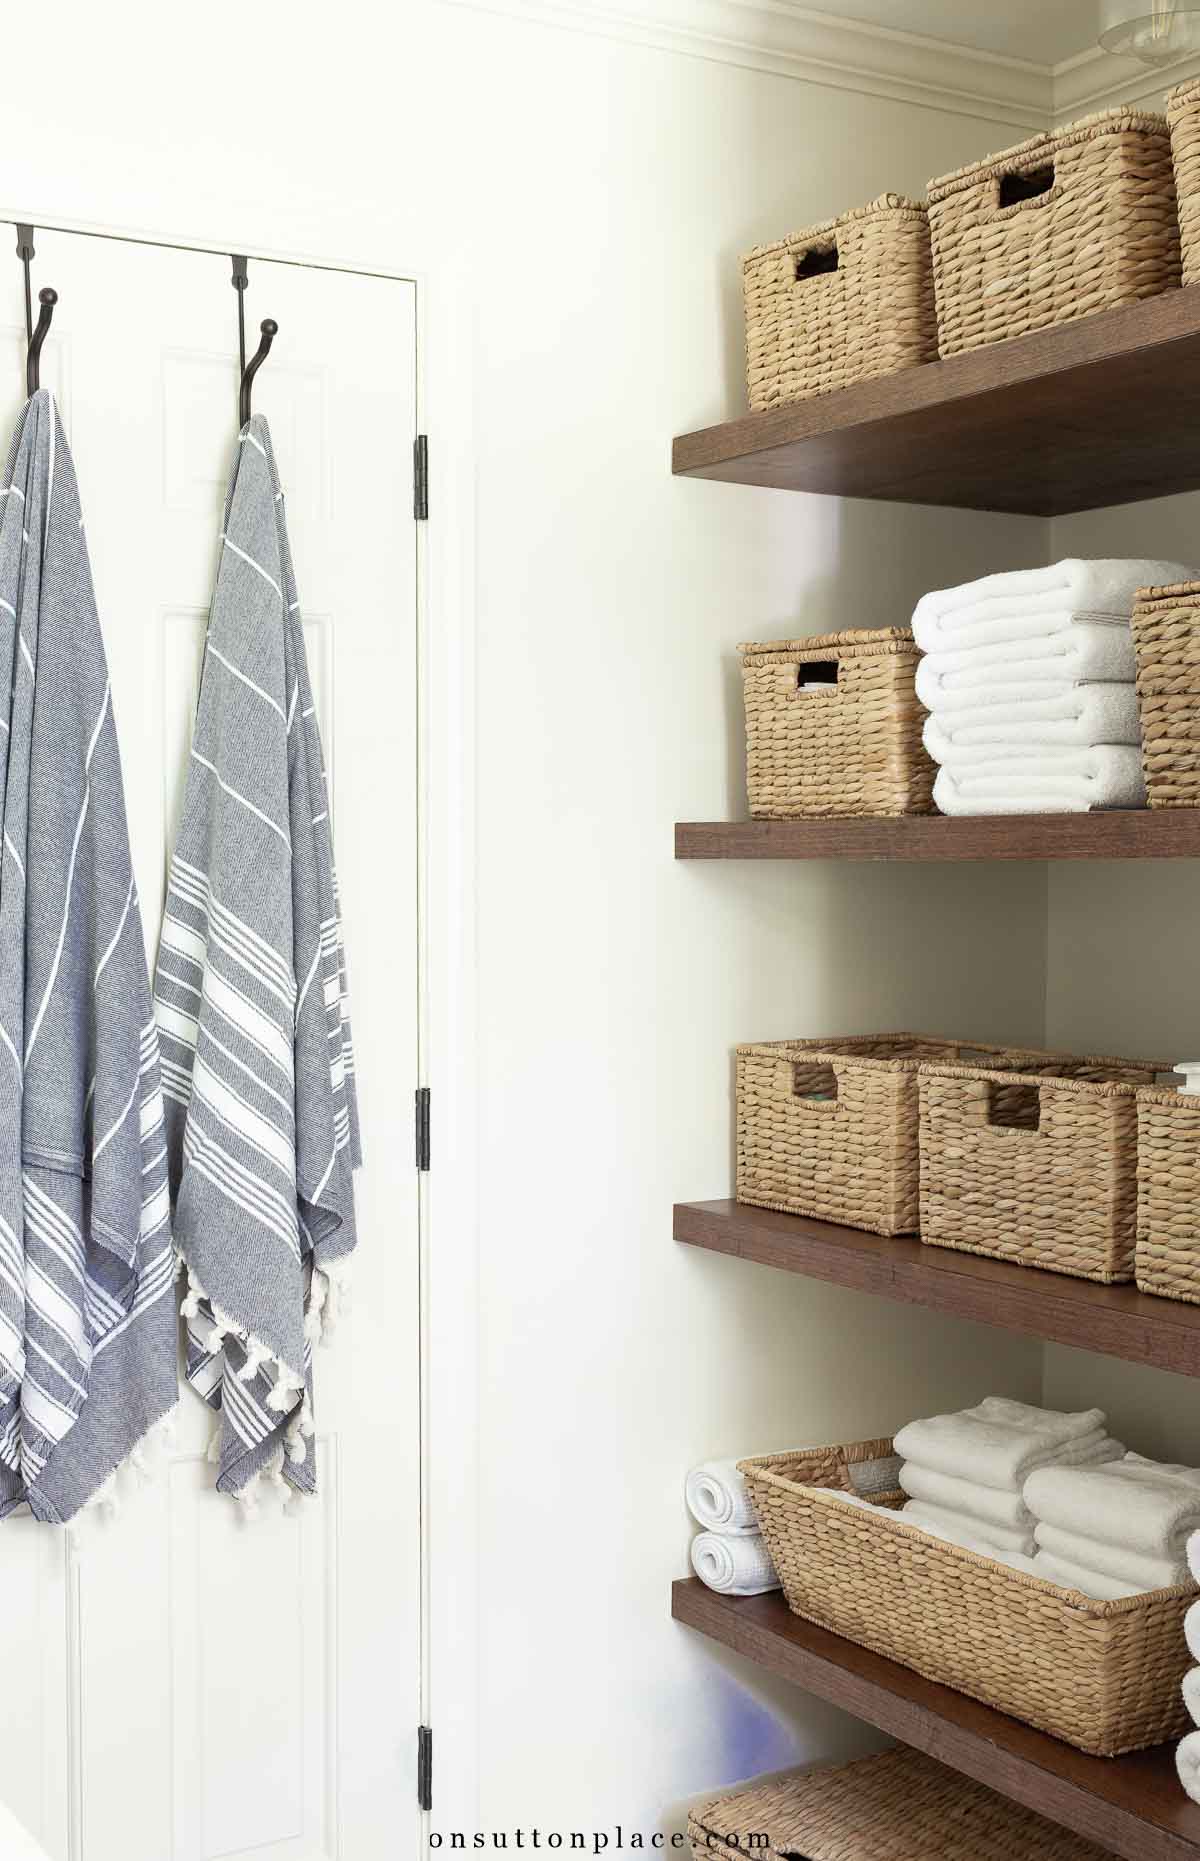
The original linen closet had bi-fold doors and was nearly impossible to access. We removed the doors and installed open shelving instead. The shelves are generous in size and much easier to use. Sometimes functionality is the biggest upgrade of all.
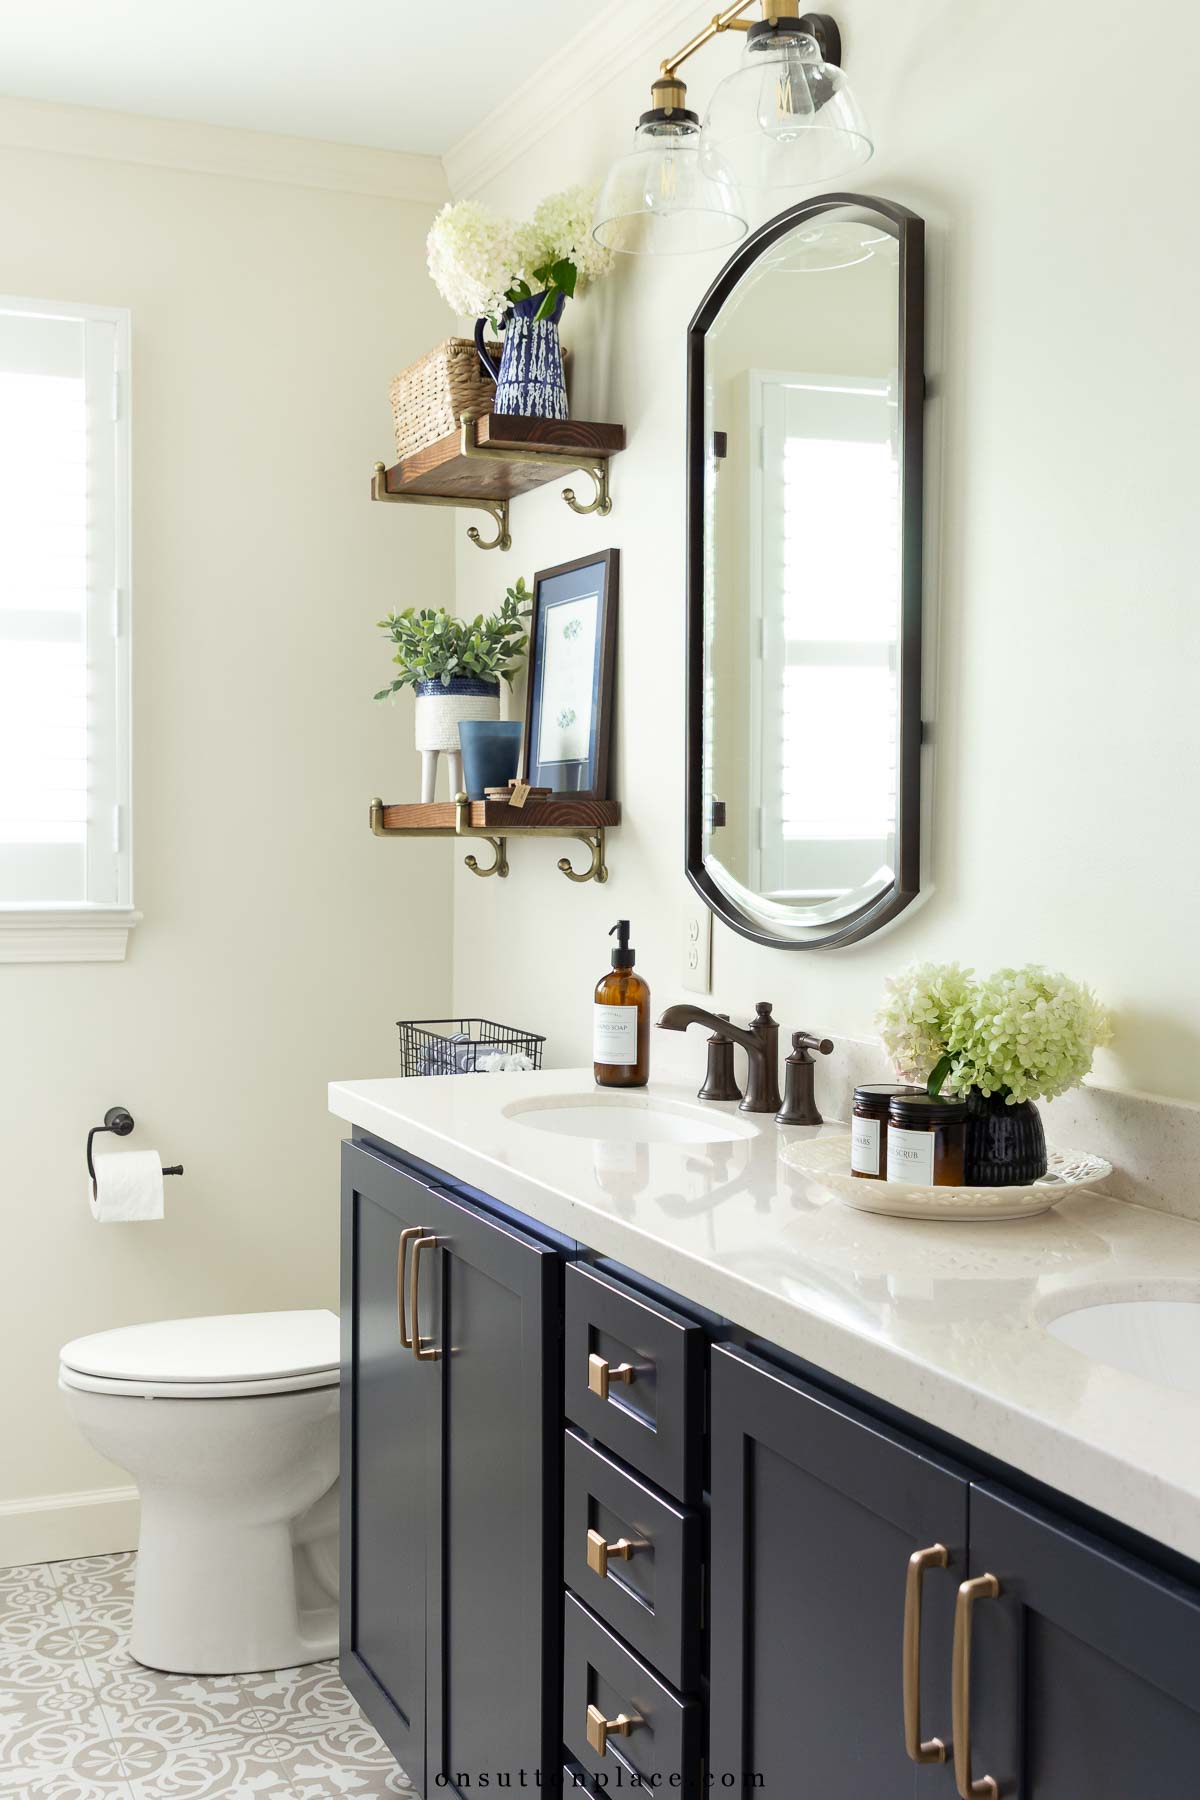
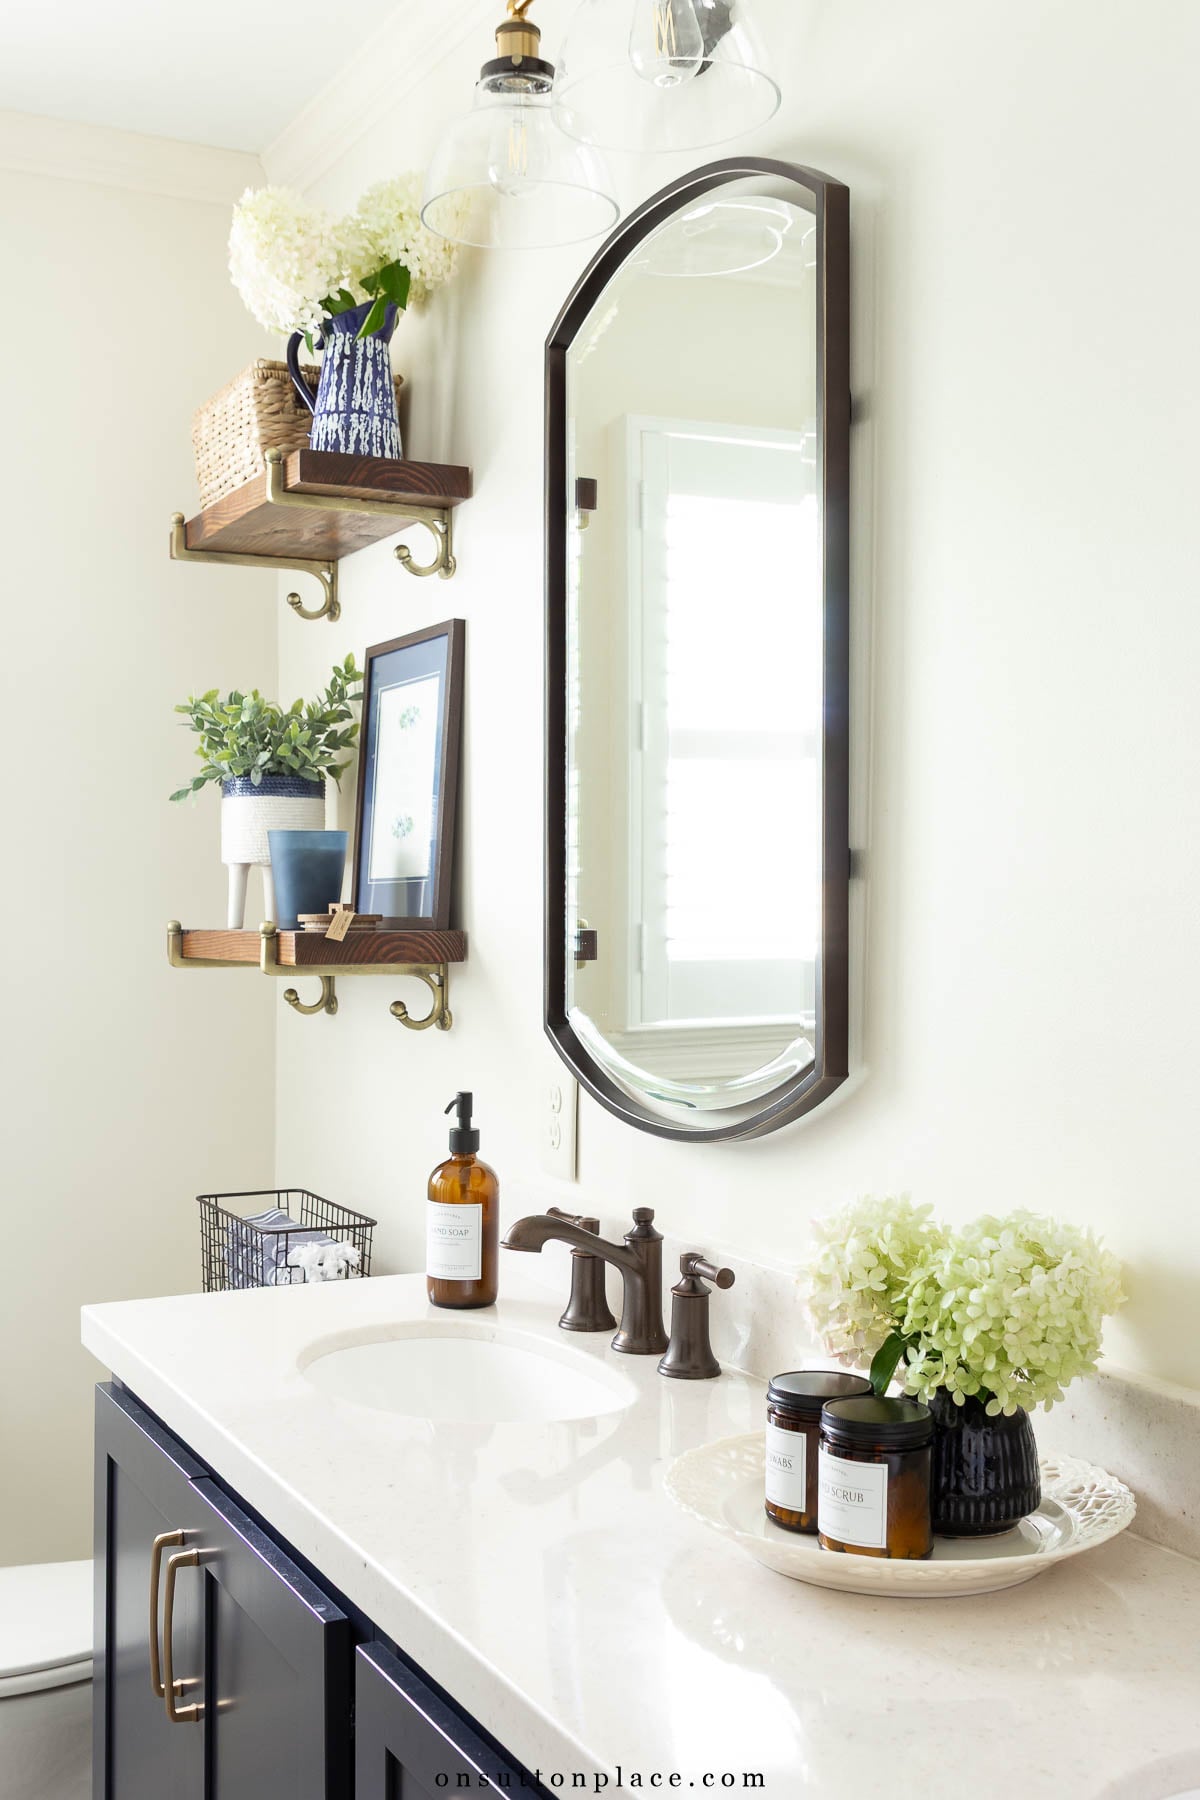
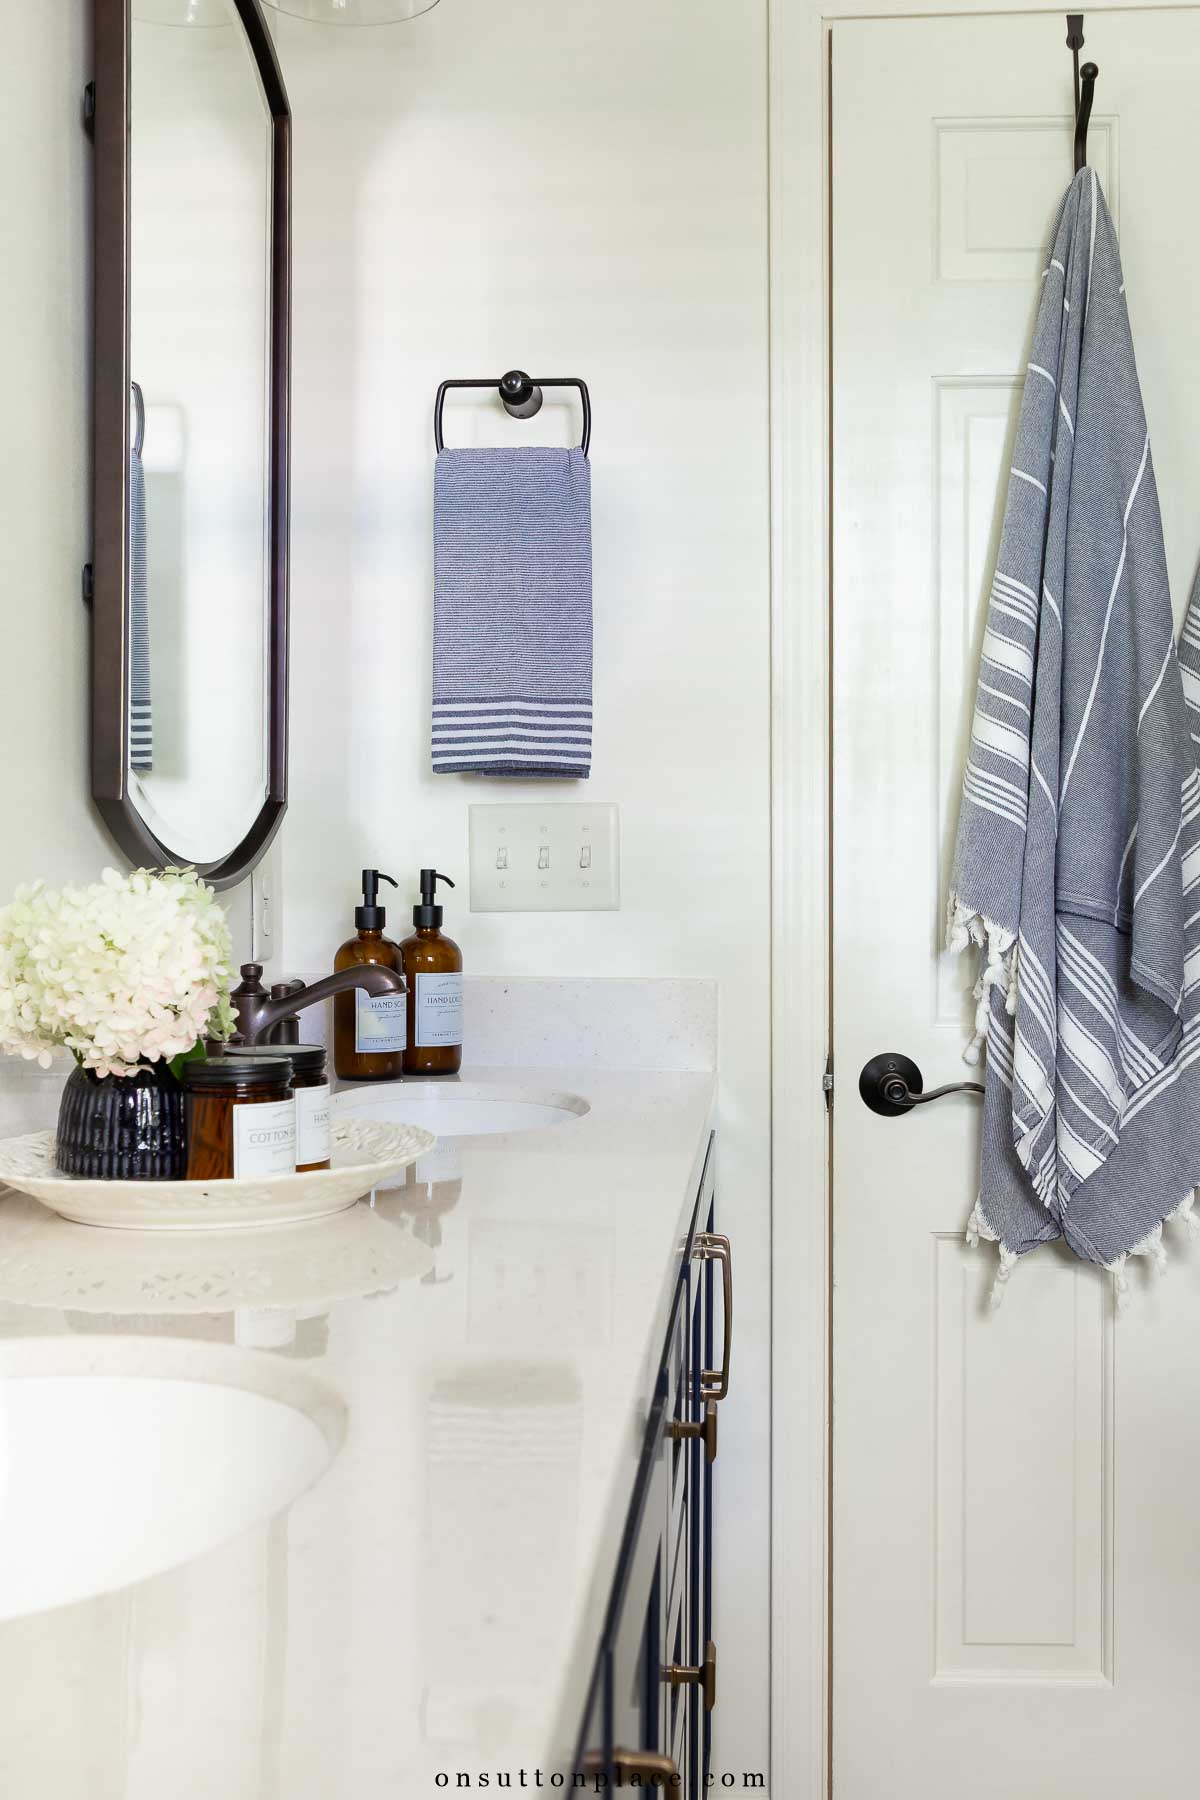
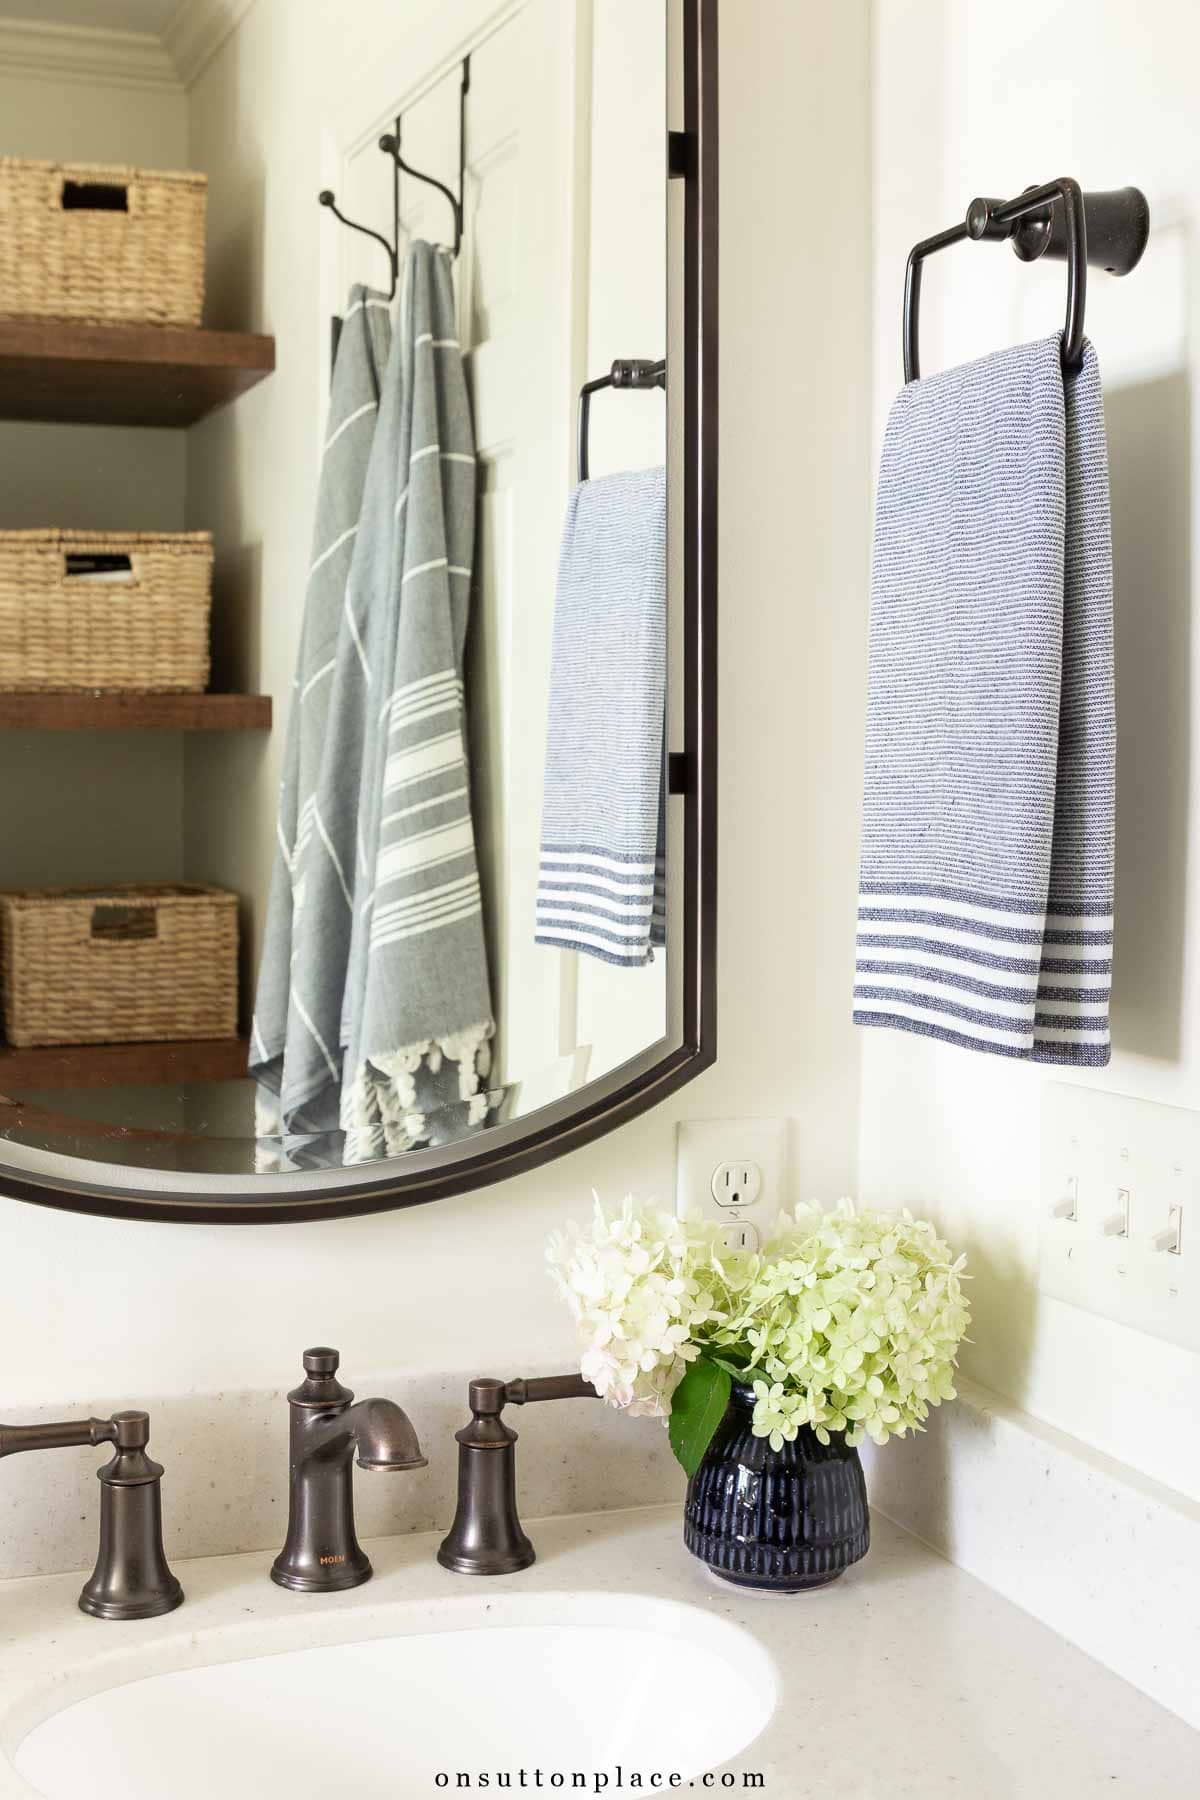
Lighting & Finishing Details
Lighting makes a dramatic difference in a small bathroom. The double light fixtures above the mirrors draw the eye upward and help the room feel taller. Oil rubbed bronze fixtures keep the look grounded, while champagne bronze cabinet hardware adds warmth and contrast. One design decision I wish I had made differently was adding wall treatment behind the vanity. Shiplap or board and batten would have added subtle texture. Even so, the room feels calm and cohesive.
What Colors Make a Small Bathroom Look Bigger?
Light colors reflect more light and make a room feel larger. In this bathroom, I used neutral ivory tones on the walls and tile to keep the space open. Darker colors work best as accents in small spaces. The navy vanity provides contrast without shrinking the room because it’s balanced by light surfaces.
What Is the Average Cost of a Small Bathroom Remodel?
Bathroom remodel costs vary widely depending on materials and labor. Our hallway bathroom remodel came in at just under $15,000, including labor and all materials. Costs included:
- Custom cabinetry
- Tile and installation
- Waterproofing system
- Cultured granite countertop + slabs
- Plumbing fixtures
- Lighting
- New exhaust fan
- Organizational accessories: utility baskets | lidded baskets
- Paint: Sherwin Williams Alabaster
There were a few items that pushed us over budget:
- Cultured granite slabs for niches
- Waterproofing systems
- Baskets and storage solutions
- New shower fan
Lessons Learned From This Remodel
- Plan your budget carefully and add at least 20 percent for overages.
- Keep bold elements limited in small spaces.
- Waterproofing is not optional.
- Storage solutions should be part of the design, not an afterthought.
- If you love a design element, do it. I should have added a wall treatment.
Final Thoughts
We waited many years before renovating this bathroom. We raised our children, paid for college, and made sure our retirement was secure before taking on projects like this. When we were finally ready, I didn’t want to cut corners.
Would I do it again? Absolutely. The process was a learning experience, and the finished result made daily life better in ways I didn’t expect. If you’re planning a renovation, you may also want to see our coordinating small primary bathroom remodel, where we installed a pony wall shower and used many of the same finishes for continuity.

JOIN THE OSP COMMUNITY
Sign up to get uncomplicated recipes, unlimited seasonal decor, and
understated ways to refresh your home sent straight to your email inbox!


amazon storefront
Discover simple and affordable
ways to refresh your home.
Follow my Amazon Storefront
for all my favorite finds!
Just beautiful, I love it. This bath looks sooo much like my hall bath 1964. But everything is in such good shape when we remodeled the house, I did not do this bath, it’s in great shape but oh soooo dated, same mauve detail just like yours was with beige tile everywhere so wished I did it back then.
It looks gorgeous!
But I was surprised that the old style was nearly 60 years old. It could have been worse. I was expecting a really awful design. In Germany you can see bathrooms of that period in brown or green color. Booh!!
I like your new floor very much. You’ve done a great job.
Hi Ann,
Love your remodel. Your bathroom layout looks exactly like ours minus maybe 12″ between the tub and toilet and vanity. Can you please send along your dimensions? Thanks so much.
Doreen
I’m happy to take some measurements, but can you tell me what dimensions you want?
Ann, I love the small bathroom renovation! I just ordered a navy vanity from Wayfair and was looking for ideas to decorate the bathroom. We are moving a doorway to create a master bathroom and it is a small bathroom similar to the one you showed. We will have a tub/shower, but I really like the combination of grey and navy that you chose. Thanks for sharing!
Amazing. Everything looks great.
I love your bathroom without the shiplap because it stays timeless with what you have done. You could always try the new wallpapers that are removable if you want a change later.
It looks perfect! Great job!
Thank you for the inspiration! I was beginning a master bath remodel when covid hit and it stopped me in my tracks. I had chosen some items but was second guessing myself so much that when things opened back up I put the project on the back burner. I’m so overwhelmed as this is my first major remodel to our 1992 home. Did you use a bath designer to help you chose finishes, cabinetry etc? My contractor just gave me lists of vendors. Every time I’d go out to look at items I felt I was doing it all backwards.
Hi Gina…I did not use a designer. And believe it or not, I did my shopping at the beginning of the COVID quarantine in March, so I bought everything online, except the cabinetry and the countertops. If you can find a KraftMaid dealer near you, they should be able to help figure everything out. I think Lowe’s and Home Depot carry KraftMaid, and I think they help design spaces as well. I started with the floor, then the cabinets & tops, then everything else. Have fun with your remodel!
Both bathrooms are simply lovely. So fresh and serene. I would love to have one like that in my house. Thank you for sharing your projects with us.
Looks fantastic. We have 2 bathrooms that need to be updated and you have given me inspiration. Love, love the navy vanity with brass hardware. As for the wall there are some shiplap wall papers and there is a product I have seen (not used) that is very thin called Stick
Wood that you could create a ship lap look with. But I think it looks great as it is!!
I adored the before bathroom. That pink tile was glorious.
Just Beautiful!
Your new bathroom is lovely! Everything is so blended and peaceful looking. You did a fabulous job! I think the vanity wall looks great, and hey, it’s more timeless and classic this way. 😊 Your pretty decorating keeps it from looking dull and ignored!
I love it, Ann! I sort of question the flooring choice but seeing it has inspired me to consider something like that for my laundry room. The linen storage idea is also oh-so-attractive. I think you knocked it out of the park on this one!
Hi Ann,
I sent my comment yesterday on your stunning bathroom reveal, but I forgot to ask you about your window treatment! I didn’t see a picture, but a comment was sent by someone who said you had used shutters. I LOVE shutters! They must look perfect with with your gorgeous remodel! Would you be kind enough to post a picture including your window? Thank you, Ann😊
Carol
Hi Carol…I was not able to get a picture of the window because of the light streaming through. I will try to get a picture when I shoot the master bath. I have the same shutters in there. Thank you!
Beautiful bathroom remodel. Very inviting.
I would love to redo our master bath! What was the overall cost if you don’t mind telling. I need to remove a jacuzzi tub and marble shower . Also white floor tiles that are old!!! Thank you
It is beautiful.
Ann, thanks for sharing your gorgeous bathroom with us — plus all the listings for everything.
Everything is so beautiful! You have done a fantastic job of putting everything together! Just love everything! So happy that you have all this finished. Now you can just enjoy! How great to have one more item off your list!
Fabulous job!
Your new bathroom looks fantastic! I love the neutrals with pops of your favorite blue.
Dear Ann,
I LOVE your bathroom remodel. It is gorgeous! The neutrals with the Midnight and Champagne hardware on the cabinet are stunning!
I will look forward to all of your future projects! Thank you for sharing!💕
Carol
Ann, the bathroom is absolutely stunning! The floor is spectacular!!!
I think a lot of people will be ripping out their board and batten and other trendy “farmhouse” wall treatments in a few years. I think you may be glad you didn’t do it. And I love that honeycomb tile in the shower and those niches!
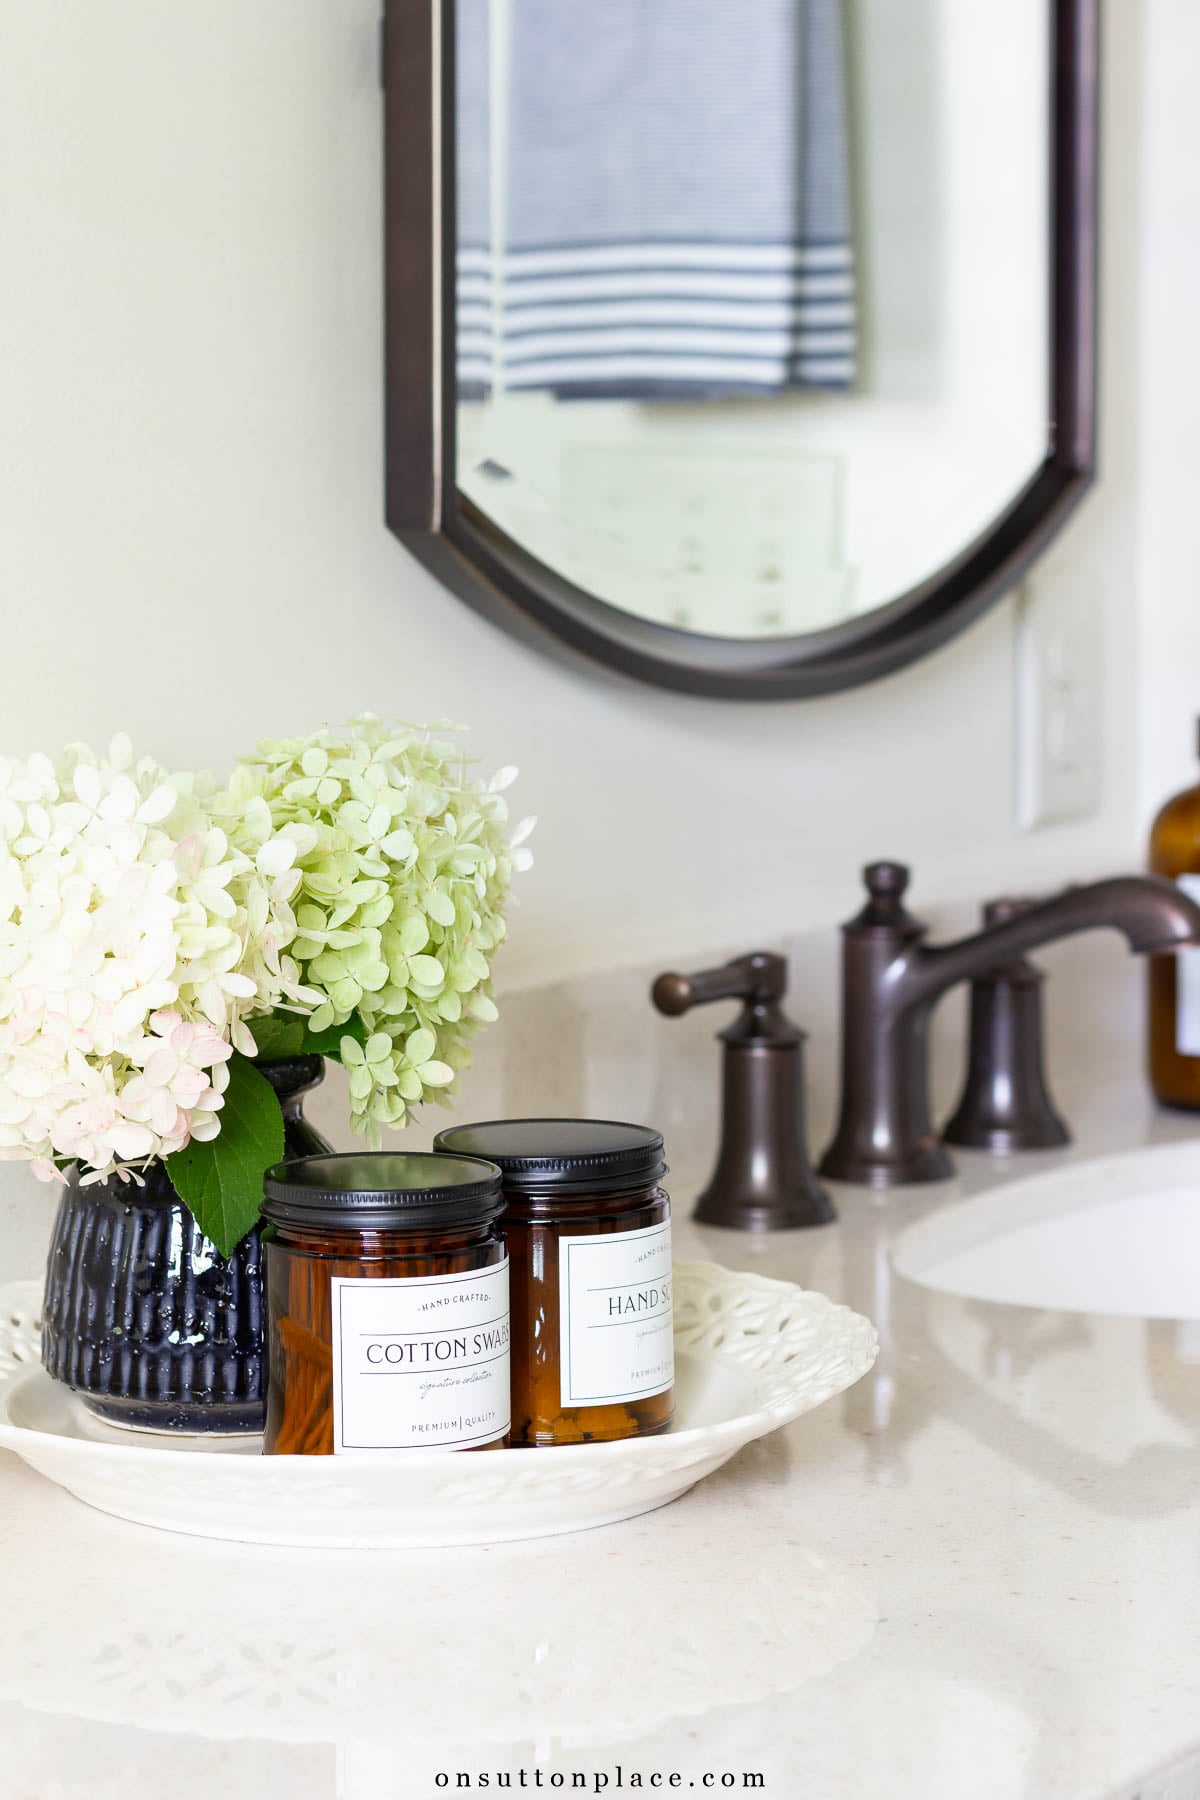
Where did you get the jars with cotton balls and hand ? On them. Are they printables from you or did you buy them already done? Love the new look it’s so clean and classic. Love you website lots of great ideas and your printables are the best. I use them to decorate every season. I put them in floating frames and just change them out.
Hi Dawn! At the end of the post I included a link to the bottles and jars. They come from a darling Etsy shop and the labels are waterproof. Thank you!
I do have a question, what and where did you get what you have under the soap bar in shower niche?
Hi Sophie! That is called a soap saver. Here is my affiliate link: https://amzn.to/32gEq0y. I will add this to the sources in the post. Thank you!
Congrats Ann! Great job! Looks beautiful! ⭐️⭐️⭐️⭐️⭐️
Your bathroom is nice but I must say, the 1960s version looked like it was immaculate shape and I found it to be a great retro room. Understand the update but I’m sad the other is gone. What a timepiece!
Your bathroom remodel is Beautiful. Clean and classy! I love the pattern in the floor tile… the neutral color will keep it versatile for years to come. Thank you for sharing your journey with us.
This bathroom makeover is amazing, Ann. The design, colours, and decor compliment the rest of your home so well now. Thanks for taking us along on the process, the early sneak peek, and gorgeous finished result.
Love it!
I absolutely love everything about it! Very nicely done!! And loving those mirrors…
Your bathroom is beautiful! Thank you for sharing. Enjoy it!
It is just beautiful, your understated taste really shines through. I can’t imagine it looking any better, even with vanity wall done differently. I would redo my bathroom EXACTLY the same.
Your bathroom looks great! Don’t worry about the vanity wall. Give it some time and later down the road you can always add a wall treatment if you’re still feeling it.
Just delightful Ann! I hoping you come into some $$ soon because I can hardly wait for the kitchen remodel!
How long did it take from start to finish please?
Hi Pat! From start to finish was 6 weeks. Most days my contractor sent 2 people…but sometimes just one since it was a small space. There were also a few days where no one came at all. So with a full crew, working 5 days a week, it would have taken about 4 weeks. Thank you!
Your bathroom looks great!!
Your bathroom is just gorgeous! Thanks for sharing it and the resources.
What a transformation. It so pretty!
Karen
Your new bathroom is so lovely. It is pretty and classy, yet practical. I especially love your choice of mixed metals. I’m seeing so many blogs today with an overabundance of everything done in gold/brass, with the explanation that it is timeless. However, I’m afraid that it’s being so over used that that will not be the case! The choices in your bathroom look far more evolved and timeless. Great job!
What type of tub did you put in? It looks deeper than the original.
Yes…the new tub is much deeper. I added a link to the tub in the source list. Thank you!
Ann when I went to the link for the shelf brackets, they look totally different from yours. Are they no longer available?
Hi Nanci…you have to scroll down the page to see all the different bracket styles. There are shelves, then the brackets. Thank you!
Lovely new bathroom. It looks like it belongs in your home. That makes it a five star winner to me. Don’t regret the ship lap. I think it has been over used. You have a classic and up to date bathroom.
Well it’s light ,lovely and peaceful. I know what you mean about regret. When I spend money now on a big project, I think about the cost over the many years I will have it. Once you amortize it out, it’s worth it. Now if you weren’t staying in the house, I wouldn’t do it. But if you are then do it and enjoy. You can’t take the money with you and the older I get the more I want to enjoy things. I didn’t get my All Clad pots until I was 64 and I LOVE them…so worth it.
As far as the ship lap, it will be a trend and I think without it, your look is timeless. You could always go back and add a wainscot or some board and batten for texture. I love all your choices. I just redid our hall bath with navy walls, white cabinetry, wainscot and trim, white subway and faux marble tile and LOVE it so. You could add texture by doing a print Roman shade instead of the more austere plantation shutters.
This bathroom is beautiful, classy and very pleasing to the eye! It gives me inspiration for my bathroom remodel. Was it hard to get used to two single mirrors instead of the large plate glass mirror? I struggle with not wanting to loose the light and spaciousness the plate glass mirror provides.
Hi Toni! I didn’t have any trouble switching to the double mirrors. Having the lights over the mirrors really helps brighten everything and adds a nice glow. Thank you!
I love everything you did. It is beautiful. Don’t regret the shiplap. I read recently that it is going out. Don’t know if that’s true but it will eventually.
Absolutely love your bathroom! Beautifully done!
Beautiful! I love everything! So happy for you.
Not enough words in our vocabulary to describe it all…so I will stick with absolutely gorgeous. Love it all. Redid a bathroom a few years ago…wish I would have gone with a tile like yours. I think you changed your tub…that is my biggest regret…wish I would have gone deeper.
Love the mix of metals…I have been doing the same in my home and love the visual break but also the warmth it gives.
I bet your DH is thrilled with the results! So lovely and what a wonderful way to start out each day!
What a beautiful room & such a transformation! You have made excellent choices & everything works together, beautifully!! The navy & natural colours work so well & the finish of the entire room is amazing. Thank you for sharing your ideas & project with us all.
Ann, beautiful update to the bathroom! One question- is the crown molding over the shower file basic paint grade wood or some type of water resistant manufactured finish?
Thnx!
Hi Marilyn…it’s just basic wood crown molding. I know that the paint may peel at some point, but we’ll just sand and re-paint. I love the way the molding finishes off the top of the tile. Thank you!
Ann, your remodels are my favorites…always beautiful, practical, and mostly within reach of the average household. I cannot wait to see what you do with your kitchen…looking for tips!!
Enjoy that new bathroom!!
Fabulous!
Your bathroom turned out beautiful, with or without the shiplap! You have superb taste and your selections, from top to bottom, work together seamlessly! Enjoy your lovely bathroom!
Beautiful transformation ❣️
So beautiful! I love blue and white and you’re bathroom has given me inspiration for my master bathroom refresh. Thanks for your beautiful blog! I love all of your ideas. 😊
Oh, Ann, it’s gorgeous!! The floor is not too busy at all. Everything is just perfect!
Your bathroom remodel is beautiful! I love the navy blue cabinetry! So happy for you and so inspiring as we have a mid century home with green and yellow tile in the bathrooms… maybe a change will happen someday, or maybe the next owner can make the changes!
Beautiful job Ann! Everything looks gorgeous
Simply stunning!
Lovely bathroom remodel!
Would you share the sink and toilet models you chose? I am overwhelmed by the decisions!
Thank you!
Hi Kris! I added the toilet to the source list. I’m sorry I forgot all about it! The sinks are actually part of the countertop. It’s all one piece. It is man-made, not a natural stone. Because of my narrow depth, my only option was oval sinks…which I am very happy with. Thank you!
Your bathroom turned out beautiful.
Beautiful bathroom remodel! Just wondering about what you did instead of a medicine cabinet.
Hi Danae! I use the drawers in the vanity for things like toothpaste, combs, brushes, etc. I also have baskets in the linen closet where other items are stored. Thank you!
It turned out so beautiful! Great job, Ann 👏
Loving your bathroom especially the floor.
You did great. You probably did the wisest and most classic decision on the shiplap and wallpaper for sure. You will be happy with it for years to come.
Absolutely love it all!
My daughter put a peel n stick wallpaper over her mantel and it looks just like shipboard. She found it at Walmart.
The bathroom looks perfect! Love all your choices. Thank you so much for providing links to the products – just ordered the shelf brackets from Pottery Barn and the plant holder with legs from Hobby Lobby for my home. Have been wanting to do something for the wall space above the toilet, forever. I’m going to copy quite a few of your ideas. Thanks for the inspiration.
Absolutely gorgeous!
Your bathroom came out beautifully! I’m glad you didn’t do shiplap, so nice to see a remodel without it. I also think it dates a look, your bathroom will look great for years and years. In a few years everyone is going to be trying to figure out how to cover up their shiplap.
Stunning! I agree with Bobbi that you made the right choice to skip the shiplap. You’ve achieved a timeless look that you and your guests will love for years to come.
Hi Bobbi…this made me laugh! Thank you…covering up shiplap is one problem I will not have!
Oh Ann, your new bathroom is just beautiful!! I love the colors, textures and floor!!
Looks Great!
Gorgeous! I love the navy vanity with gold hardware. The floor tile looks beautiful. I was looking coward to this reveal and you did not disappoint. Wonderful job!
Love it!! Absolutely beautiful!
Beautiful remodel! I love the colors you chose!
It looks beautiful and serene! I love all the finishes you chose and I prefer the “plain “ wall to shiplap. I think shiplap does add texture but it’s overused.
I absolutely love the bathroom. The colors are beautiful and it has a serene feel, which a touch of pizazz in the cabinets. Great job! On to the kitchen!
Your bathroom is beautiful!! The items you picked are perfect. Everything goes together perfectly. Well done!!
Ann,
Your bathroom is beautiful!! I’m sure you are going to really enjoy it.
Stunning. Maybe you should be the designer for the construction company!
Love the bath-excellent choices. Is your cultured granite finish the gloss or matte?
Hi Mary…it’s the gloss finish. It’s shiny, but not too shiny, if that makes sense!
Just beautiful. You have the best taste in choosing things.
I have been waiting patiently for your bathroom reveal. It looks lovely. So spa like and probably a pleasure to be in and use.😍Enjoy !!
Congratulations on your finished bathroom. I was going to email you about its status. Looks great. A job well done.
Ann, I think your bathroom remodel turned out perfect! After having remodeled our “downsizing” home, I know about second guessing. There are so many decisions and a limit to funds. Enjoy each beautiful and carefully thought out element. If your “plain” wall continues to bug you in the future, can I suggest stenciling? There are some beautiful ones available and you can make it very subtle. I did my powder room and I love it. I figured,”It’s only paint. If I don’t like it, I can paint over it. You did an amazing job!
It’s soooo beautiful! Every little detail! I used paintable textured bead board wallpaper with chair railing in a half bath once. Bet you can come up with something if you want but everything is perfect as is!
This is gorgeous! Love all the details.
Your new bathroom is quite beautiful. Really lovely.
Absolutely beautiful. We are having a condo home built for us in about 18 months and now I am rethinking having a door on the bathroom linen closet. I love the way yours looks.
So beautiful. I believe I have the same small bathroom in my home built in 1970. You’ve given me great ideas. Thank you.
Well it’s beautiful Ann you did a great job love it all very inspiring as always.
This renovation is just beautiful! My fav is the navy cabinets. I think they just set the tone for the whole project! Enjoy using every aspect of this beautiful room!
Very nice! You waited a long tie for this and I know you will love it going forward. The crown molding around the shower just got noted for our next year project.
Beautiful bathroom!!! All the finishes are perfect!! Good job!!
The bathroom is lovely. I like all the finishes you chose. I especially love the linen closet.
Wow! What an incredible transformation and inspiration! Like you I turn to Pinterest for all sorts of ideas, and I think that’s how I found you in the first place 😀. I live in Kent in the UK and we’re about to have a bungalow that was built in the 40’s and was extended in the 50’s the 60’s and the 80’s!! Great footprint but not so good inside, so it’s being remodelled from the inside out!! I’m dreading what they might find, but can’t wait till I get to add all the design features and details that will make this house our forever home. Thank you for all you share I love your posts, your inspiration and your joy in a job well done. Can’t wait to see what you share next.
Ann, love the bath remodel. Question……what is the brand of your biotin shampoo and conditioner…..can’t quite make out the label…..also do you recommend it?
The brand is Aquableu :)
Oh my gosh, I love it. You have done a wonderful job Ann.
You did a great job Ann. Having done a bath remodel ourselves, it is overwhelming with all of the decisions that must be made. I like all of the choices you made to update your bath remodel…it is just lovely.
Love your finished room. It’s very peaceful and not too busy
Projects are fun and I. Glad for you that you didn’t get surprises that would have been costly. Seems like when we do projects. Something unexpected and costly pops up
Great job thanks for sharing
You did a beautiful job with your bathroom. It looks lovely along with all the towels
and accessories.
What a huge transformation! I love it!
Just beautiful!
Your bathroom is absolutely gorgeous! Where did you purchase the blue towel hanging on the wall? Is the picture on the shelf one of your printables?
Hi Ann…the towel on the wall is part of a set from Williams-Sonoma. They are actually kitchen towels! I made the print on the shelf and framed it myself. I haven’t shared it on the blog yet, but will at some point. Thank you! Here is my affiliate link for the towels: https://rstyle.me/+YFHcuBhjnxDzA_ix99vzyA