This post may contain affiliate links. See my disclosure statement.

Use these budget-friendly hanger frames to display your DIY wall art. They are quick to assemble, they come in many sizes, and they look great!

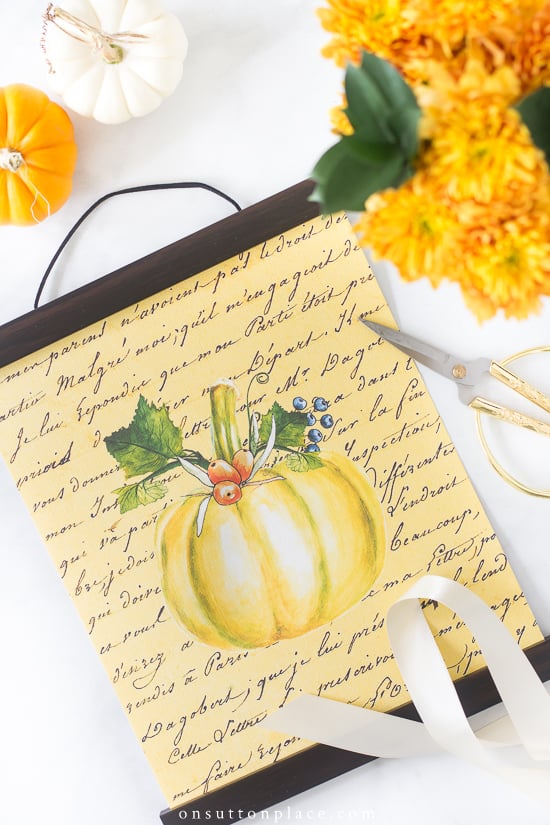
There has been quite a bit of interest in the hanger frame images I have used recently to present my free printables. Many of you have written wanting to know where to buy them, and how to use them. So…I decided to show you exactly what these hanger frames look like, and how easy they are to assemble.

Unpackaging the Hanger Frames
In the image above, you can see that the packaging for these hanger frames is very small. You would never know there’s a frame inside! I printed my wall art on 8.5 x 11 cardstock, so I used a 9 inch hanger frame. Each frame comes with the string attached, but it’s very easy to change it if you prefer something different, or want it to be a different length. (The string for these frames actually looks like leather.)

Assembling the Hanger Frames
- When you remove the frame from the box, there will be four pieces…two for the top, and two for the bottom.
- There is a magnet strip attached to one side of each piece.
- To assemble the frame, simply place the piece with the string, magnet side up, on a flat surface.
- Place your printable or wall art on the magnet, and cover it with another piece of the frame.
- Repeat the process for the bottom of the frame.
- It’s very easy to straighten your wall art and make adjustments, so don’t worry about getting it exactly right on the first try. That’s it!
Where To Buy Hanger Frames
- The frames I used for this post were purchased HERE, and the color is walnut. As you can see, they are a rich, dark brown. They are available in many different sizes and colors.
- Hanger frames are also available on Etsy.

How To Hang These Frames
These frames can be hung from tiny nails or hooks. (These hooks would be perfect.) They can also be hung from cabinet knobs and drawer handles. If you are lucky enough to have shaker pegs, these would be perfect! Hang them individually, or group them together to make more of a statement.

For best results, I recommend printing your wall art on good quality cardstock. I used textured cardstock, which gave my wall art a bit more depth. Textured cardstock can also be purchased at craft stores, and can be found in the scrapbook section.
Free Printable Collections
- 50 Free Christmas Printables
- 30+ Free Fall Printables
- Give Thanks Printable Banner
- Thanksgiving Planner
- Home For The Holidays Christmas Planner
These hanger frames make me very happy, and they are everything that you love…budget-friendly, easy to use, and great looking. I still totally enjoy the look of a framed and matted print, but these are such a welcome change. It’s nice to add something seasonal to our decor that is simple, and that doesn’t take much time.

JOIN THE OSP COMMUNITY
Sign up to get uncomplicated recipes, unlimited seasonal decor, and
understated ways to refresh your home sent straight to your email inbox!


Ann,
Don’t you just adore autumn in Ohio? Me too! Thanks for your inspiring ideas and thoughts. A fellow
Ohioan,
Nan
I bought this hanger from Amazon and my next step is to get a really good printer. Ours is on its last legs.
We just bought a new pair home so I will do this for Thanksgiving!
Thanks Ann!
Cranberry Township, PA
Thank you so much for sharing your tips and tricks!
I have done a few diamond paintings and discovered these frames for displaying them at a reasonable cost. It’s so easy to change them out or add a different cord/ribbon. If you want an added side border – washi tape works well, comes in loads of colors or patterns and can be removed. Colored duct tape is another option.
Thank you so much for sharing the magnetic frame link! Love your printables but I didn’t know how to display them before so I ordered 2 different colors! I’m hoping to find some for 4×6 or 3×3 hand stamped pieces for a narrow wall I want to group a trio together.